Skipjack User Guide
All Users
Welcome to Skipjack!
Schmidt Sciences Users
Schmidt Sciences users should reach out to Schmidt Sciences rather than refer to the guides below.
Requirements
Item |
Notes |
|---|---|
JHED Login ID |
or Email (External collaborators only) |
OTP Authenticator App |
Required for Multi-Factor Authentication (MFA) |
SSH client |
macOS/Linux: built-in • Windows: OpenSSH or PuTTY |
Create or Activate an Account
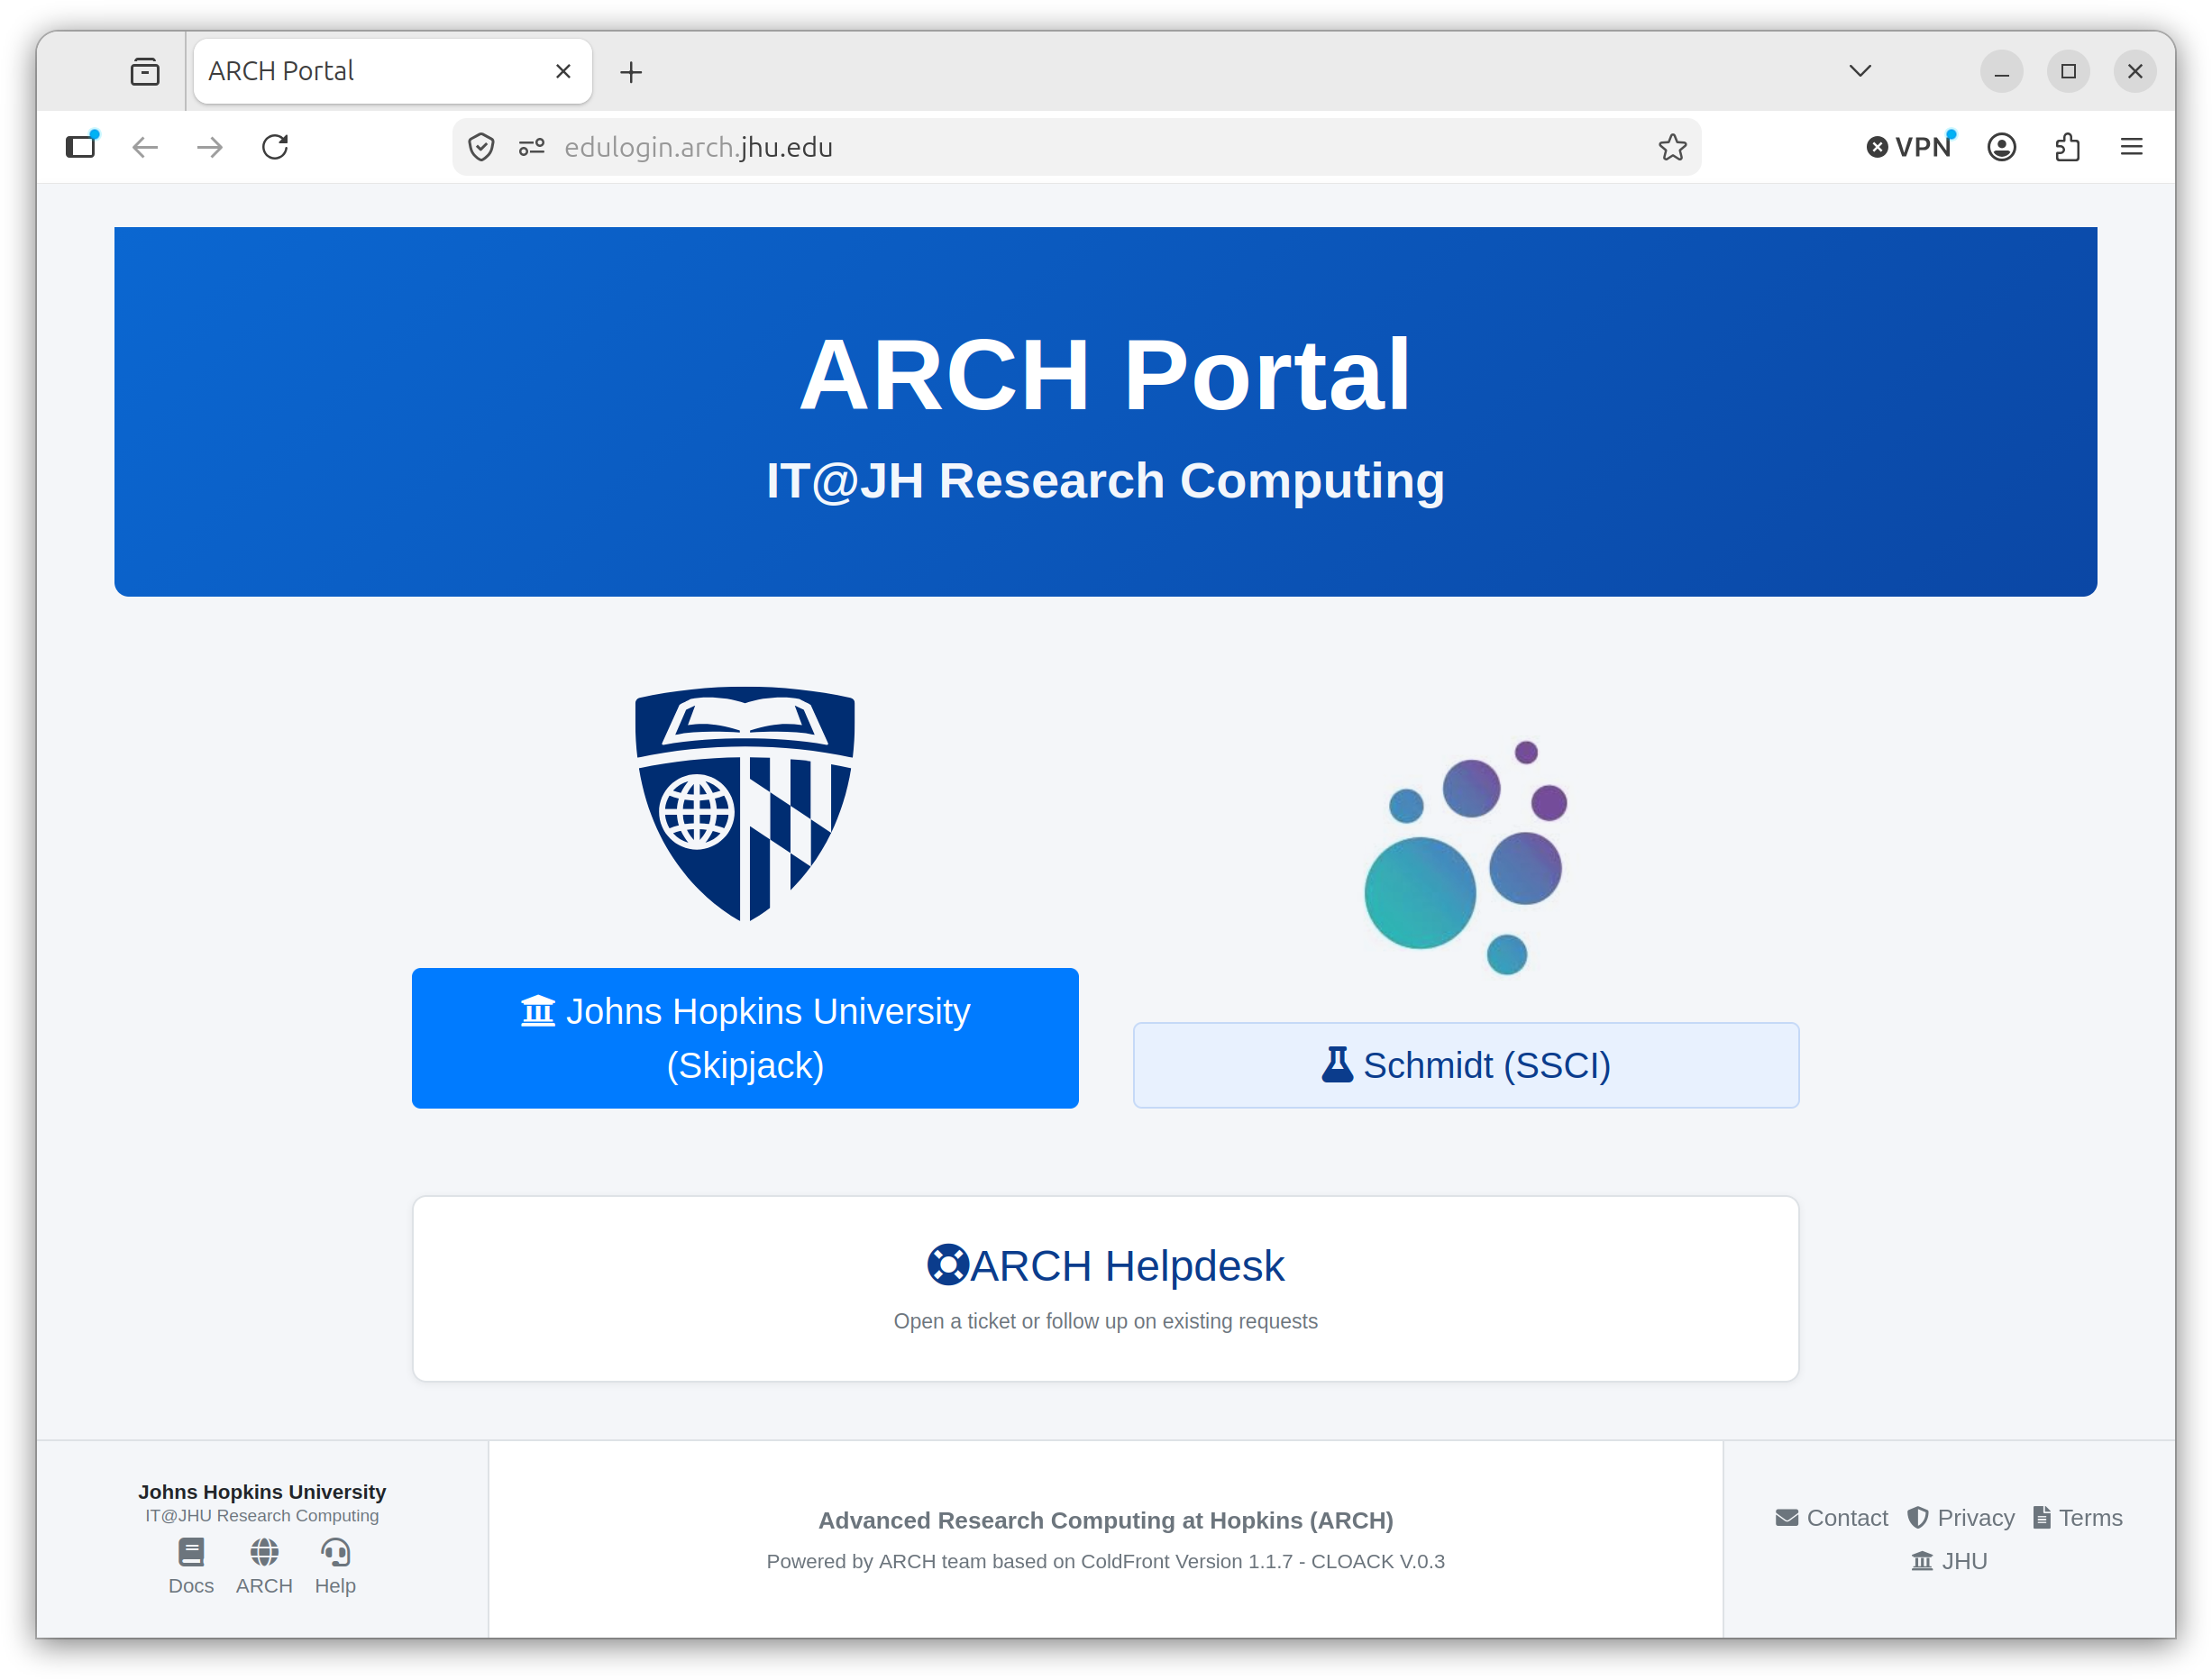
Navigate to the Arch Portal at https://portal.arch.jhu.edu
Select Affiliation and Use Case
As a multi-architecture system with a diverse user base, Skipjack requires users to determine their access method based on both their affiliation and their specific purpose. To find the correct procedure, please refer to the table below.
Affiliation |
Class Use |
Authentication Method |
MFA |
Username Prefix |
Email Domain |
|---|---|---|---|---|---|
JHED ID |
No |
Use JHU SSO |
N/A |
jh.edu, jhu.edu, etc. |
|
Schmidt Sciences |
No |
OTP Code |
|
A non-JHU email* |
|
External User |
No |
OTP Code |
|
A non-JHU email* |
|
JHED ID |
Yes |
OTP Code |
|
A non-JHU email* |
|
External User |
Yes |
OTP Code |
|
A non-JHU email* |
*A non-JHU email refers to an email address outside the JHU domain, such as univ.edu, gmail.com, hotmail.com etc.
Log in via JHED Login ID
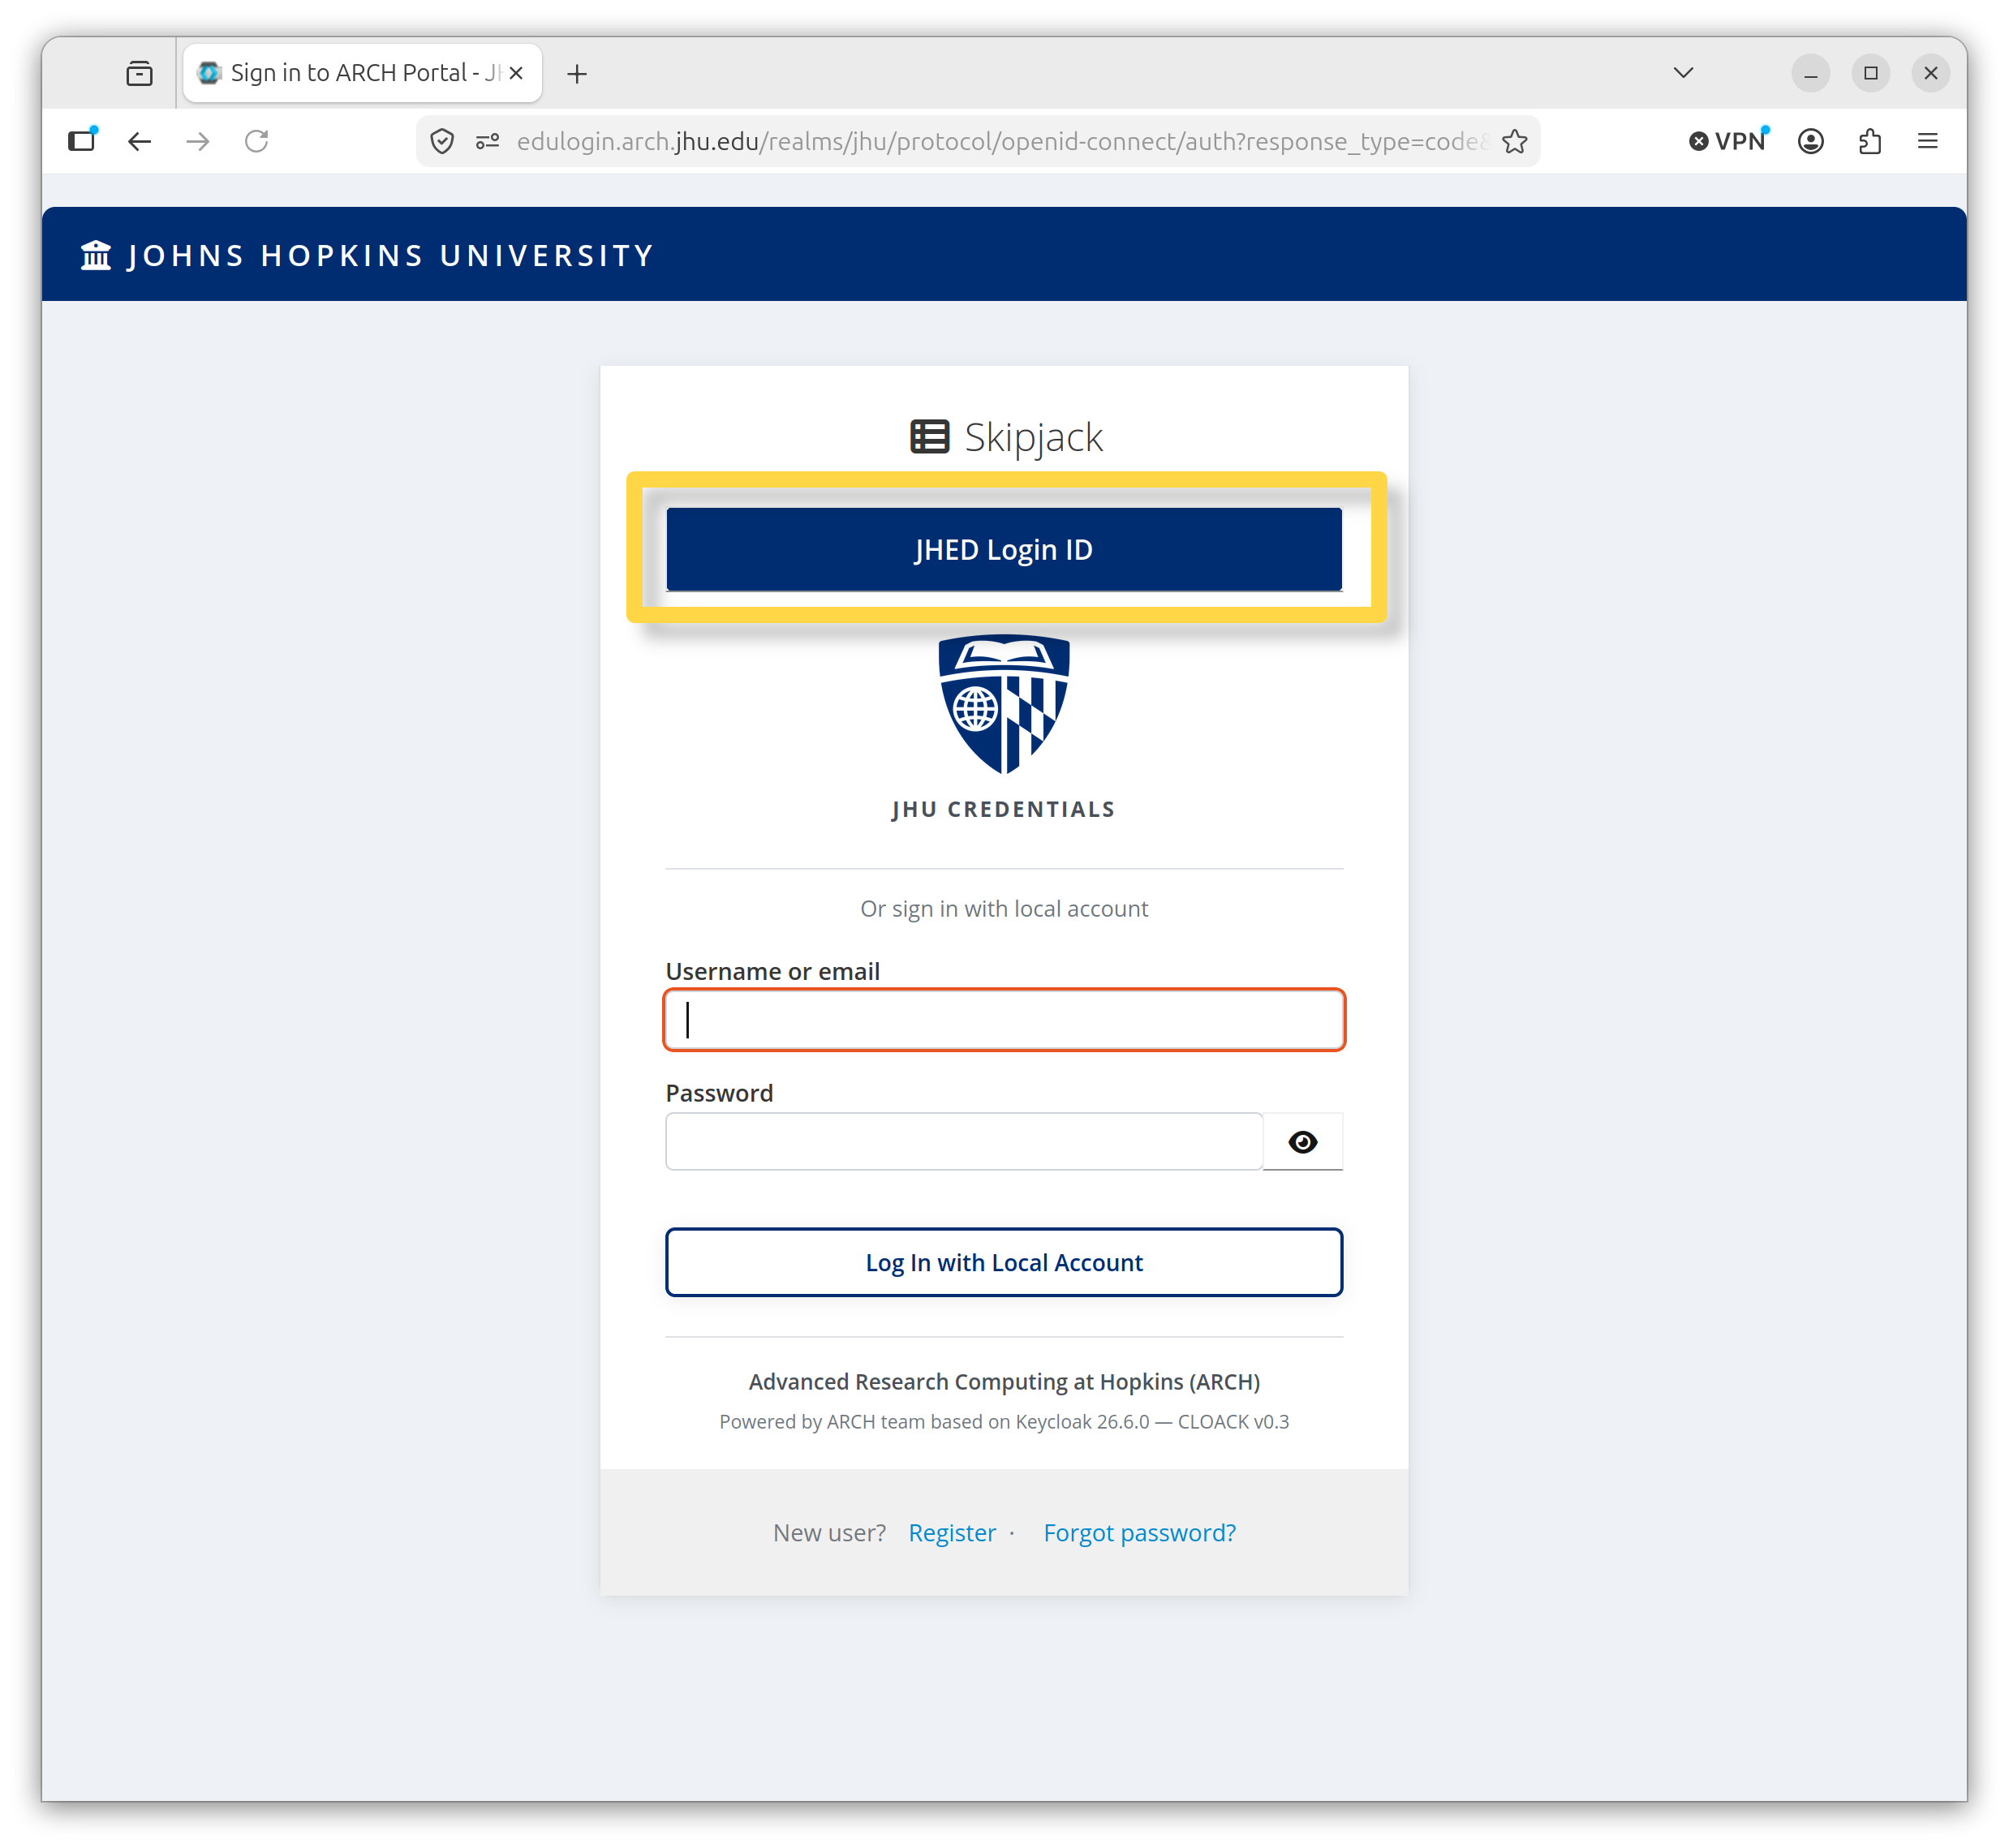
Click the JHED Login ID button and follow the prompts.
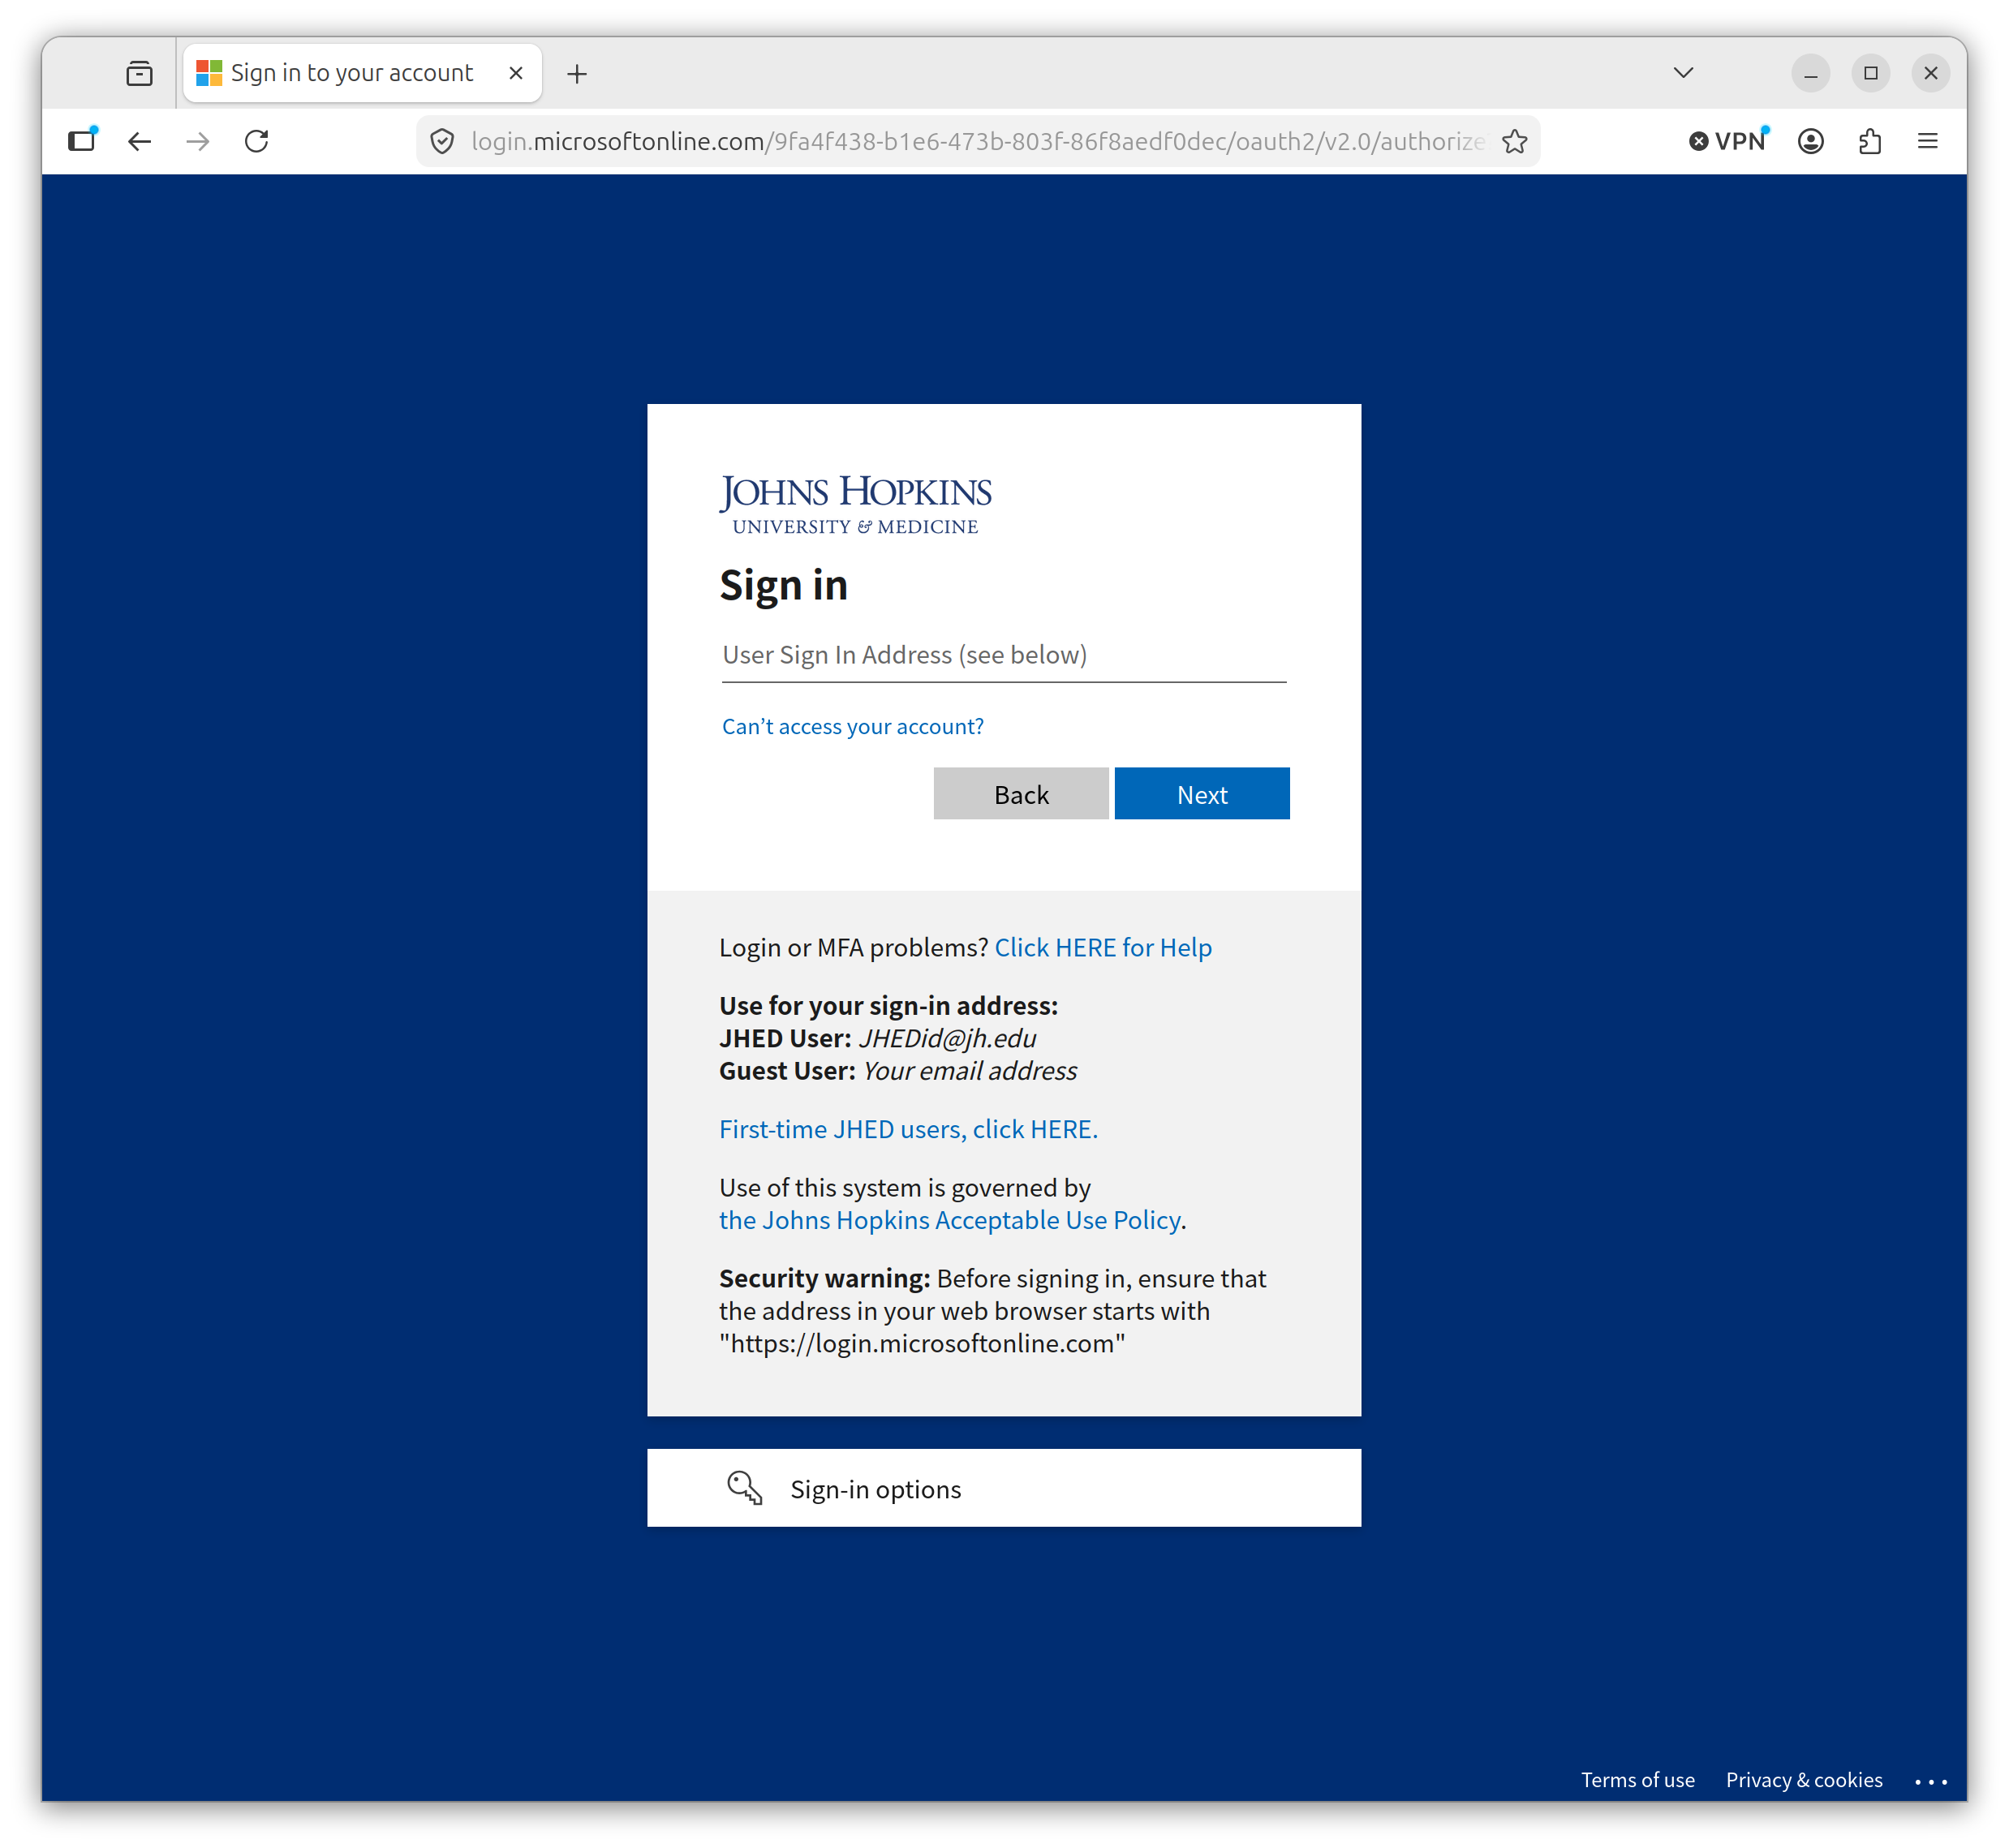
Users will be prompted with the JHED login sequence.
Upon first login, users will be asked to accept the Terms of Service.
Log in via Local Account
Warning
This method is for Schmidt Sciences, External and Class-Use users only. JHU faculty, staff, and students should sign in with the JHED Login ID described above.
Schmidt Sciences users and external collaborators can create an account and log in with their email. This option is not permitted for users with a JHED Login ID.
First Time Account Activation
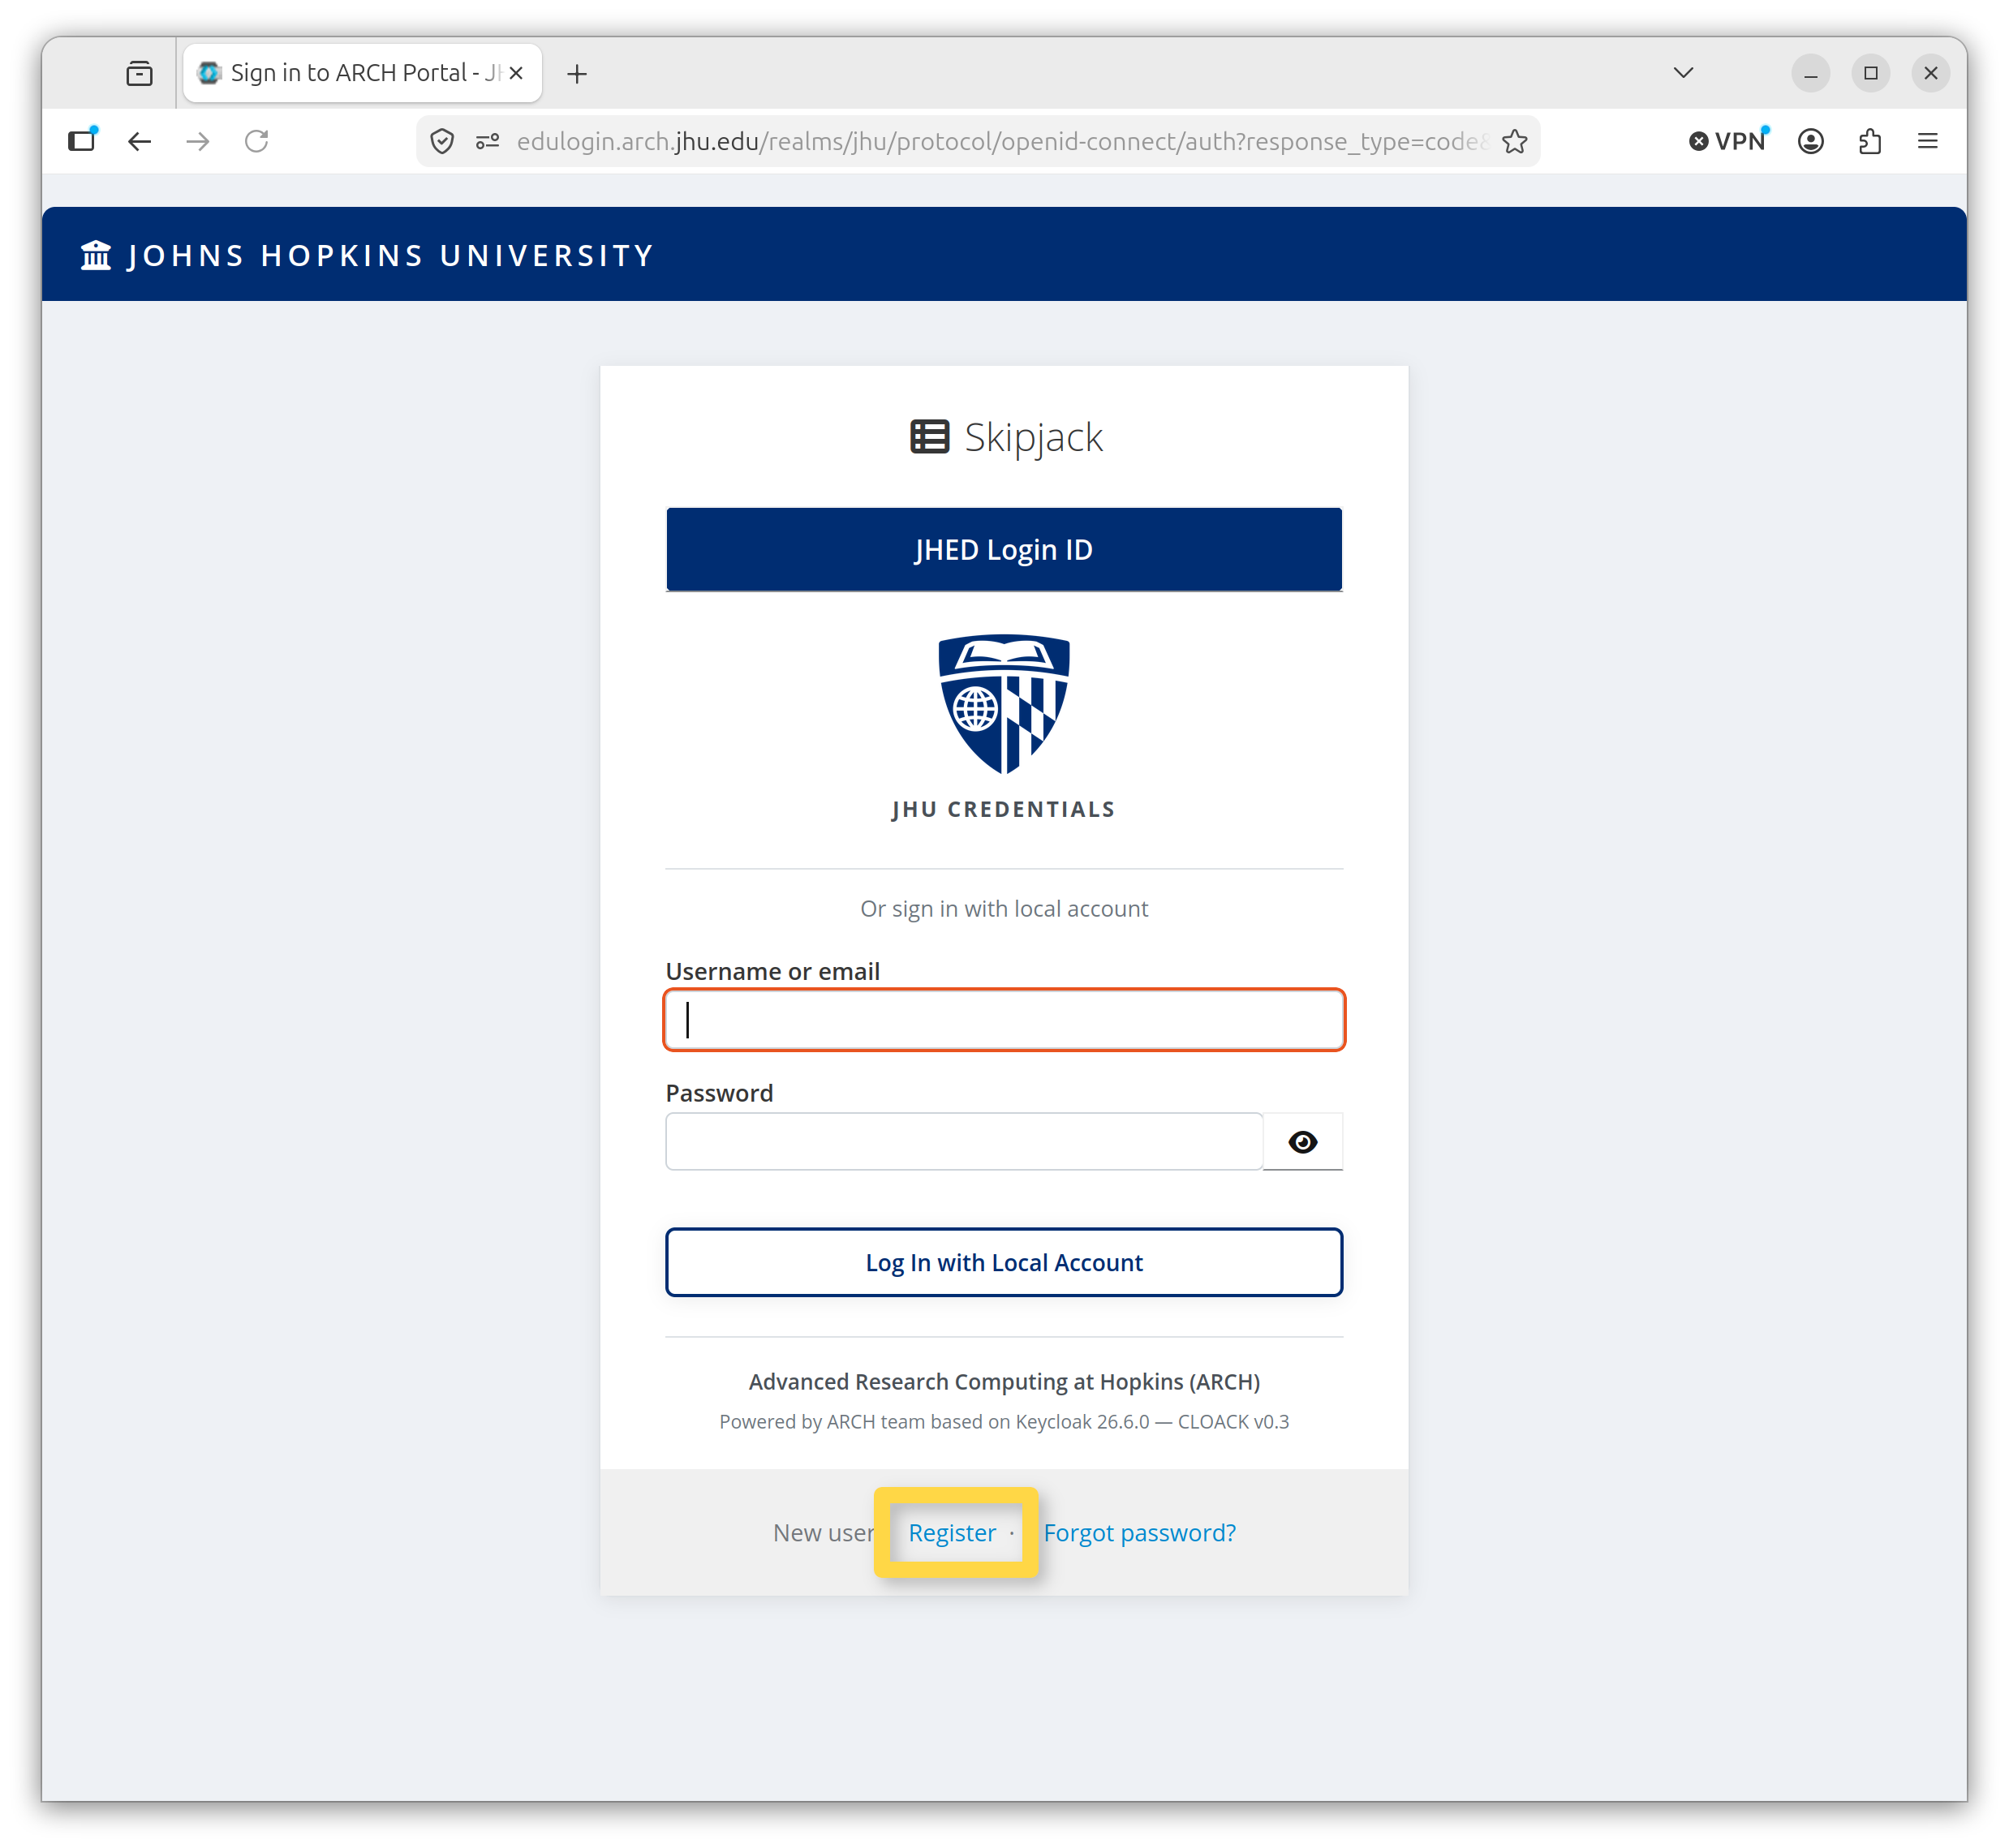
Click the Register link, and fill out the information to create a new account.
Username Prefixes
scci- to their username.ext-class-code>- for example class123-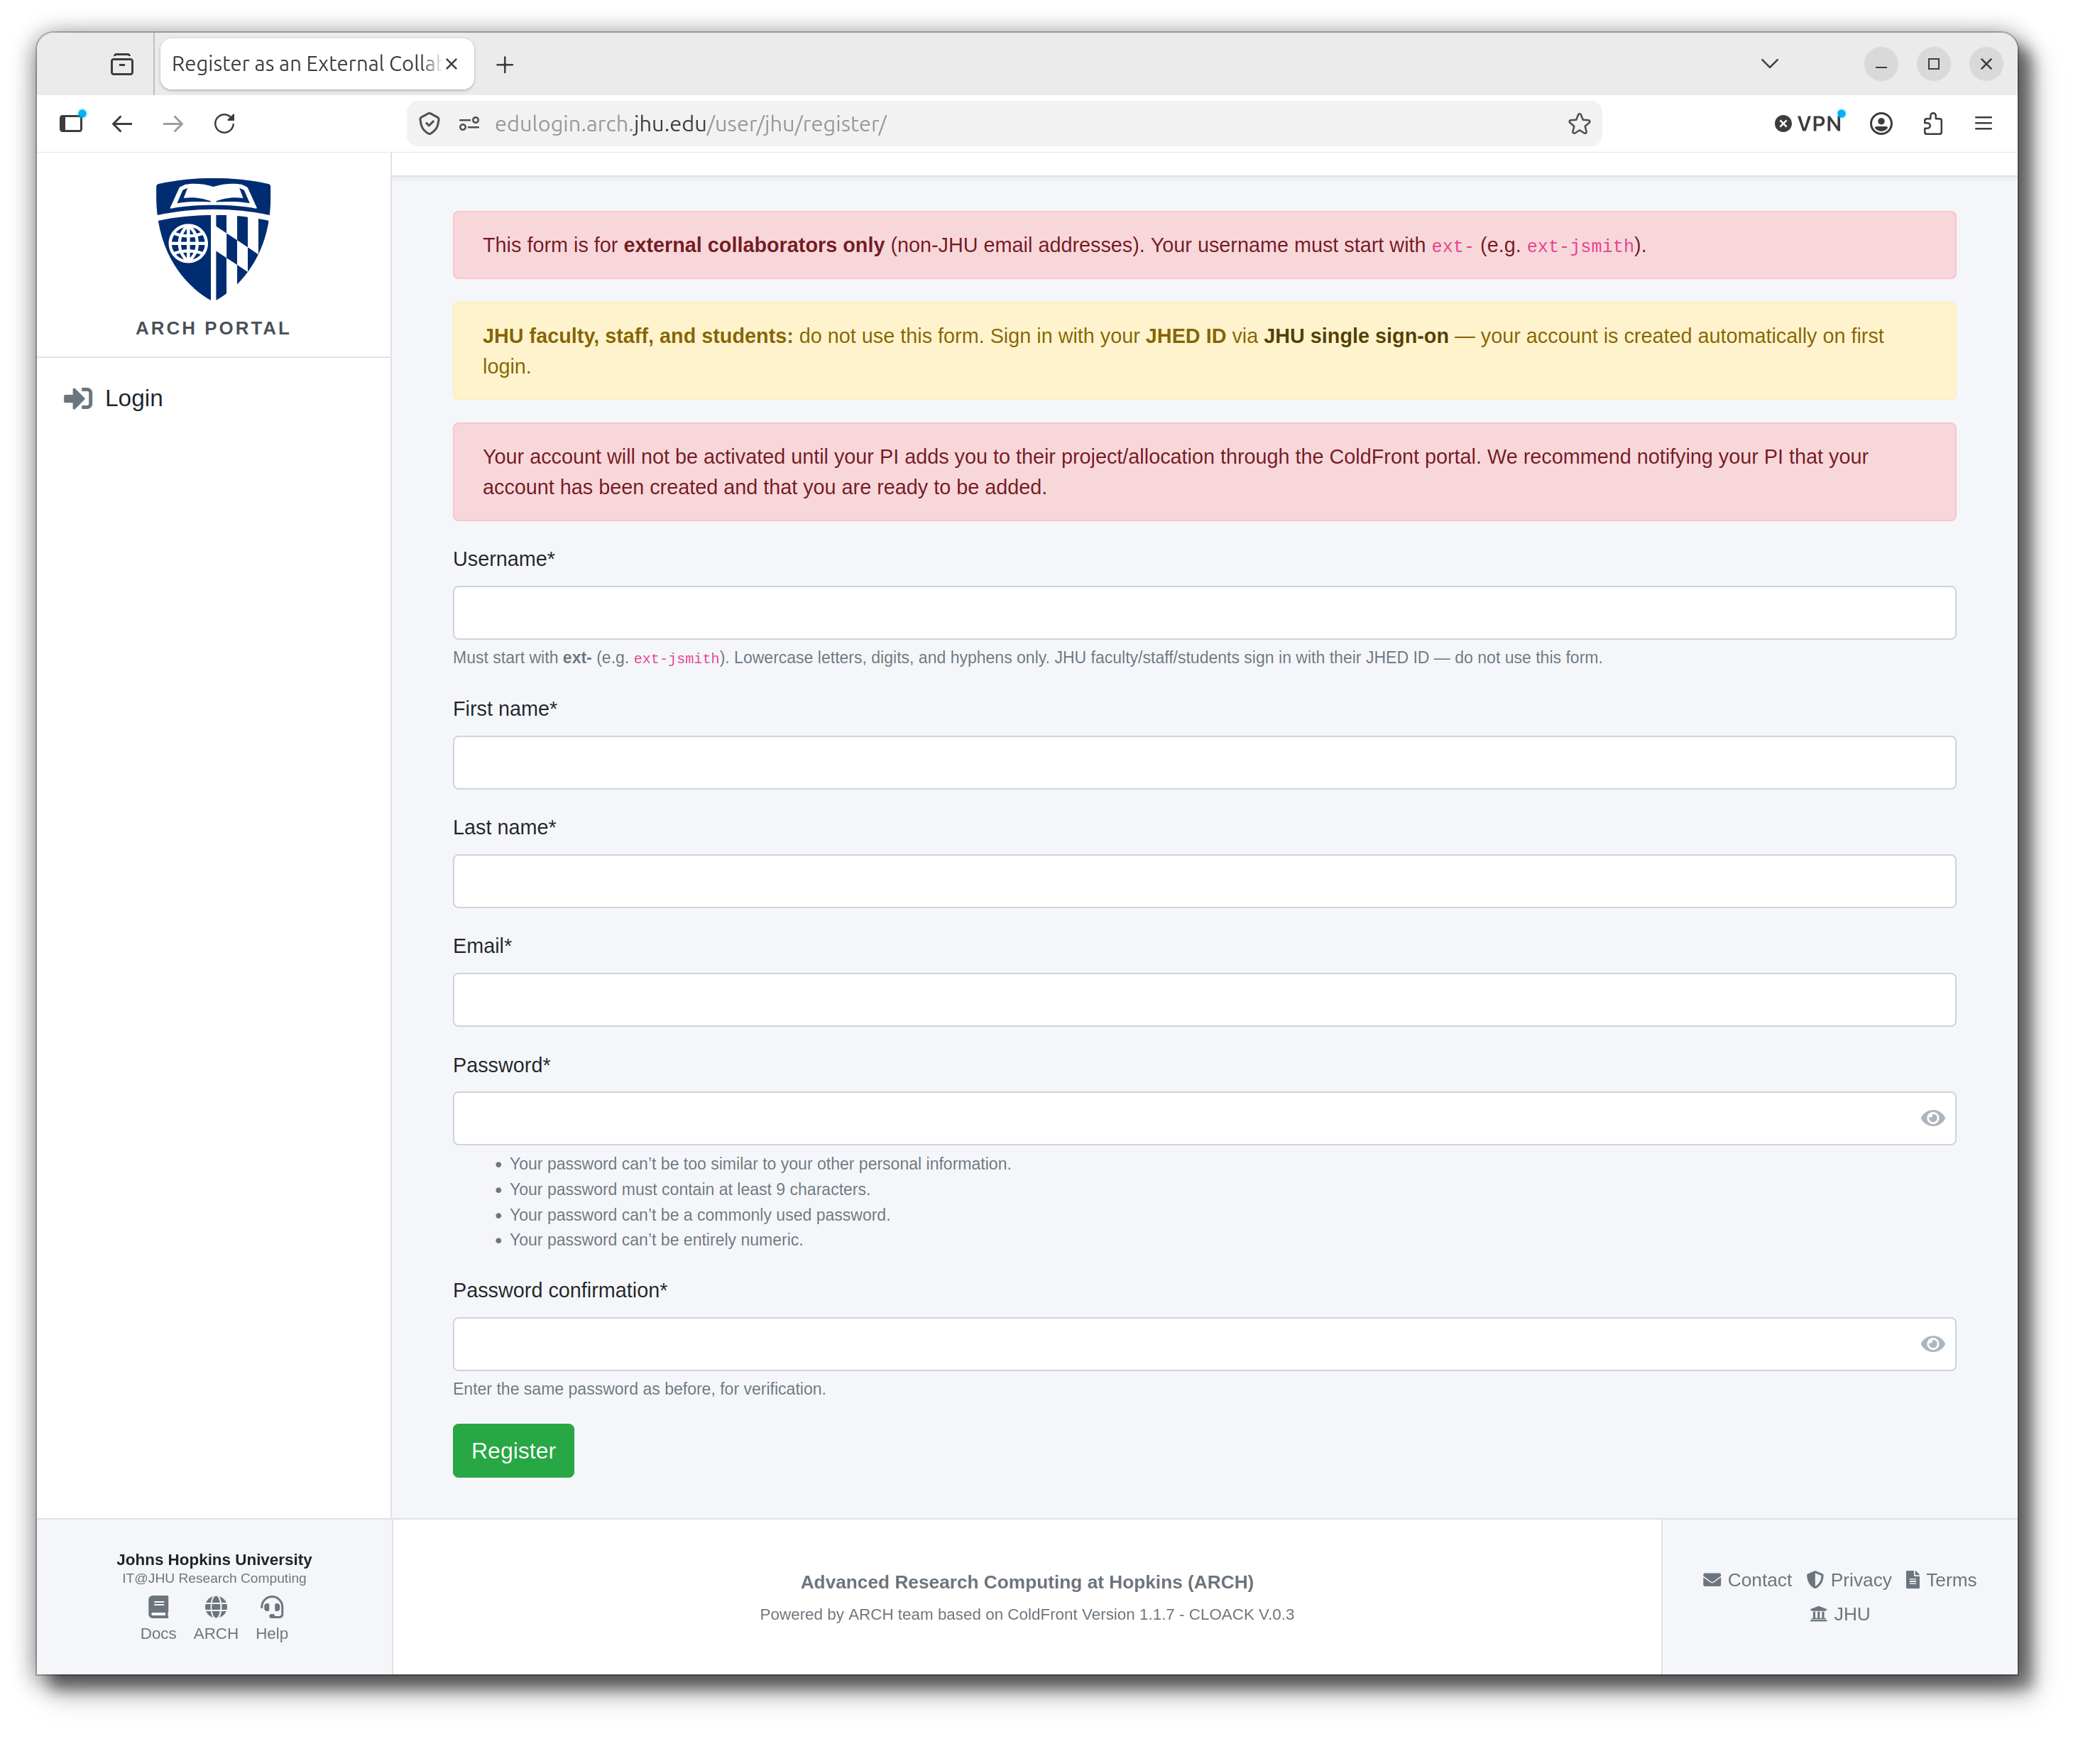
When complete, you will be returned to the login screen. Log in with the credentials you just created.
Upon first login, users will be asked to accept the Terms of Service.
Setup Multi-Factor Identification
Users with a JHED ID do not need to set up a separate One-Time Password (OTP) authenticator app. Instead, they should use their JHED ID to log in after setting up their account in the portal (see Create or Activate an Account). Conversely, users without a JHED ID must set up an OTP authenticator app to connect to Skipjack. To set up an OTP authenticator app for your account, follow these steps:
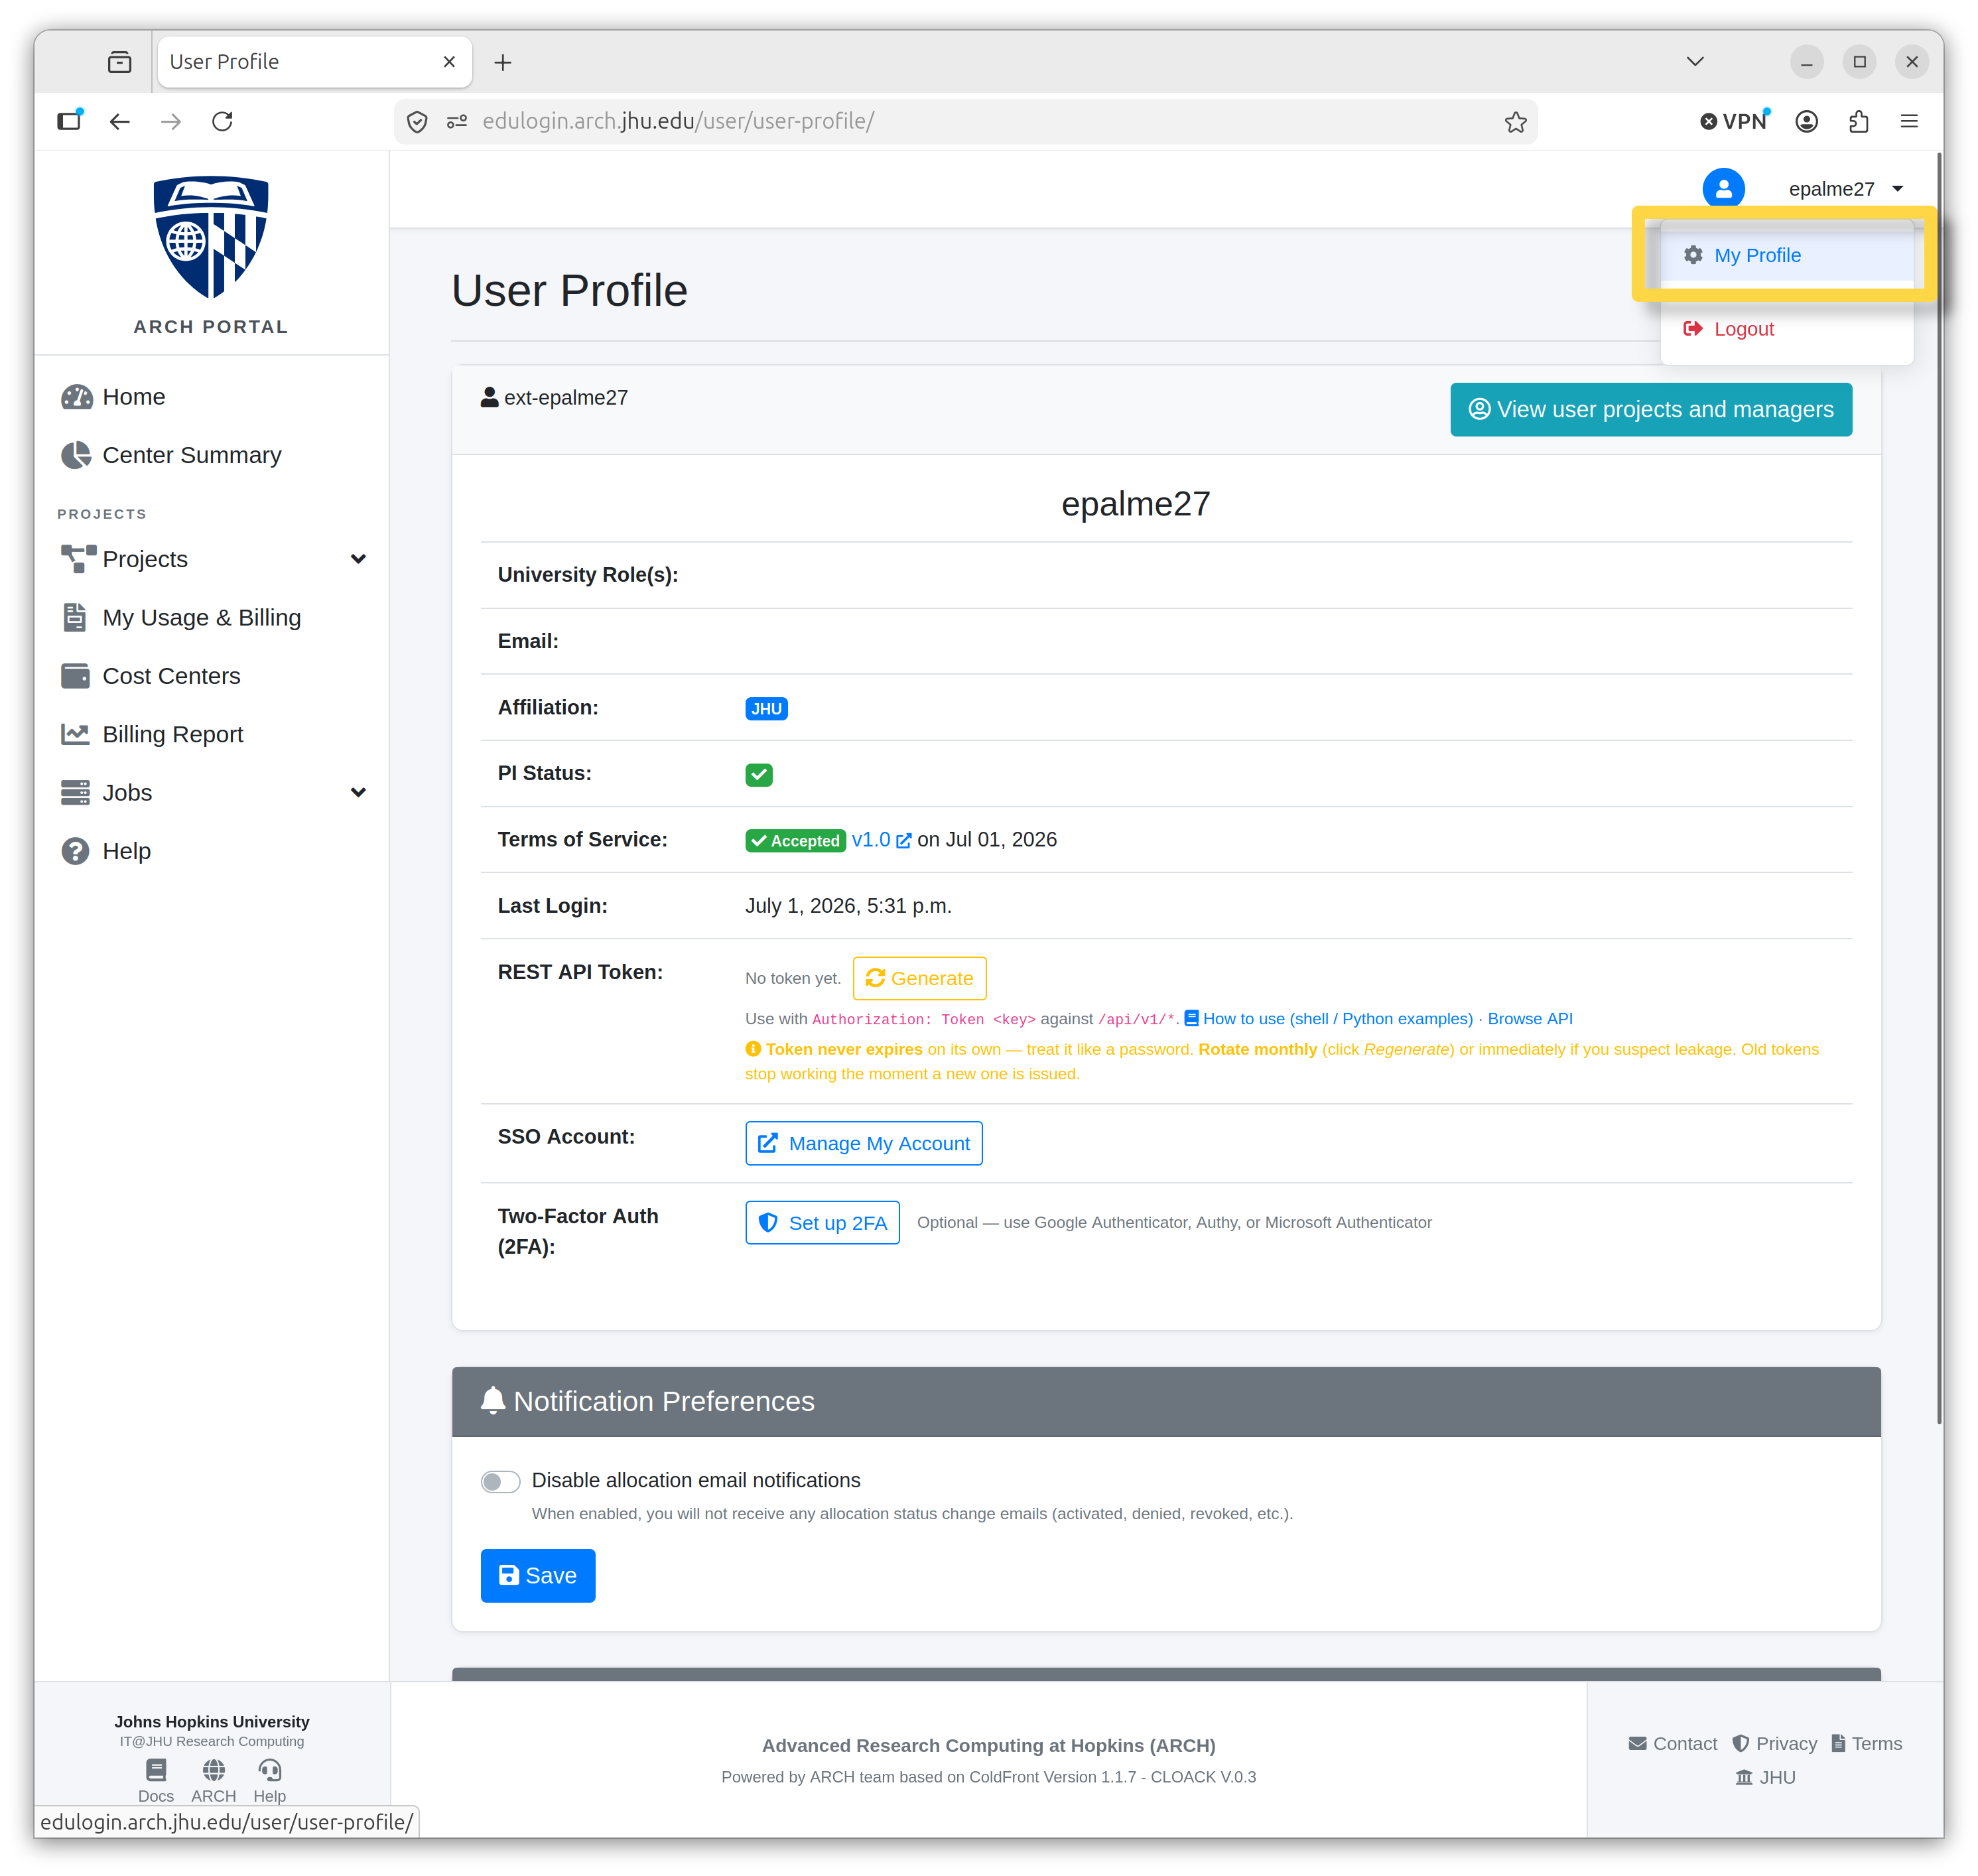
Navigate to My Profile.
Click the dropdown menu next to the user icon and select “My Profile.”
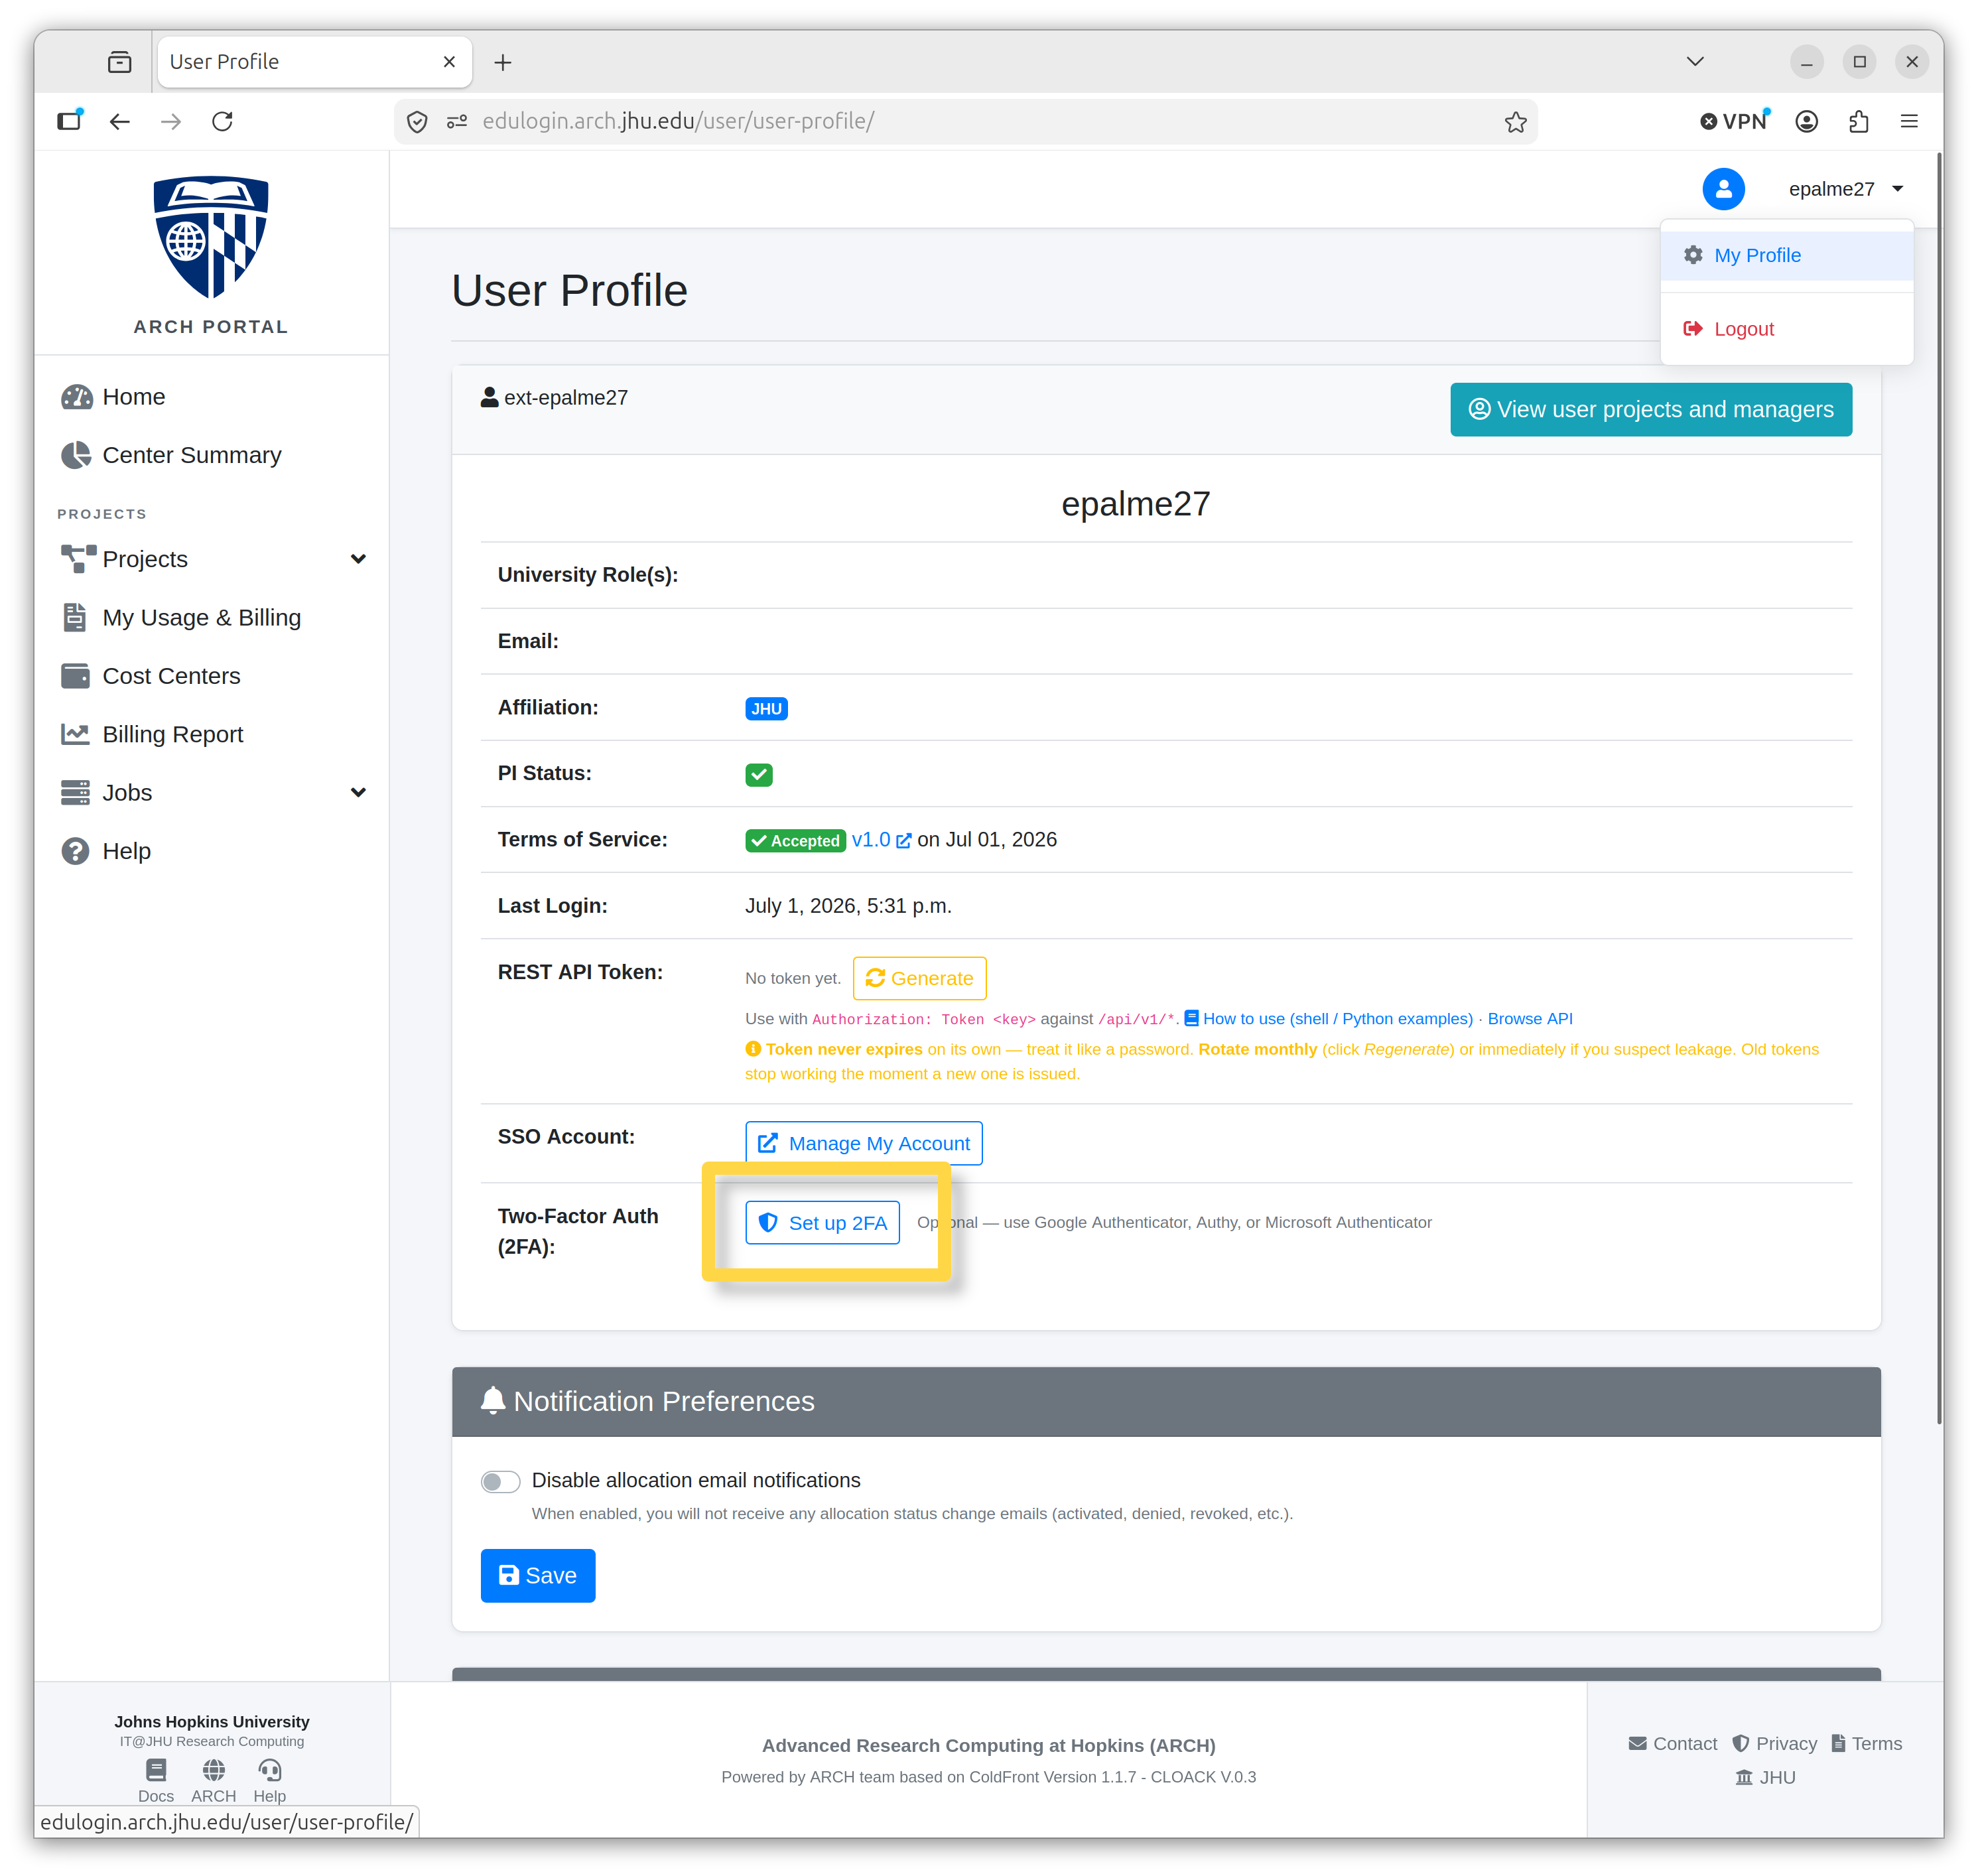
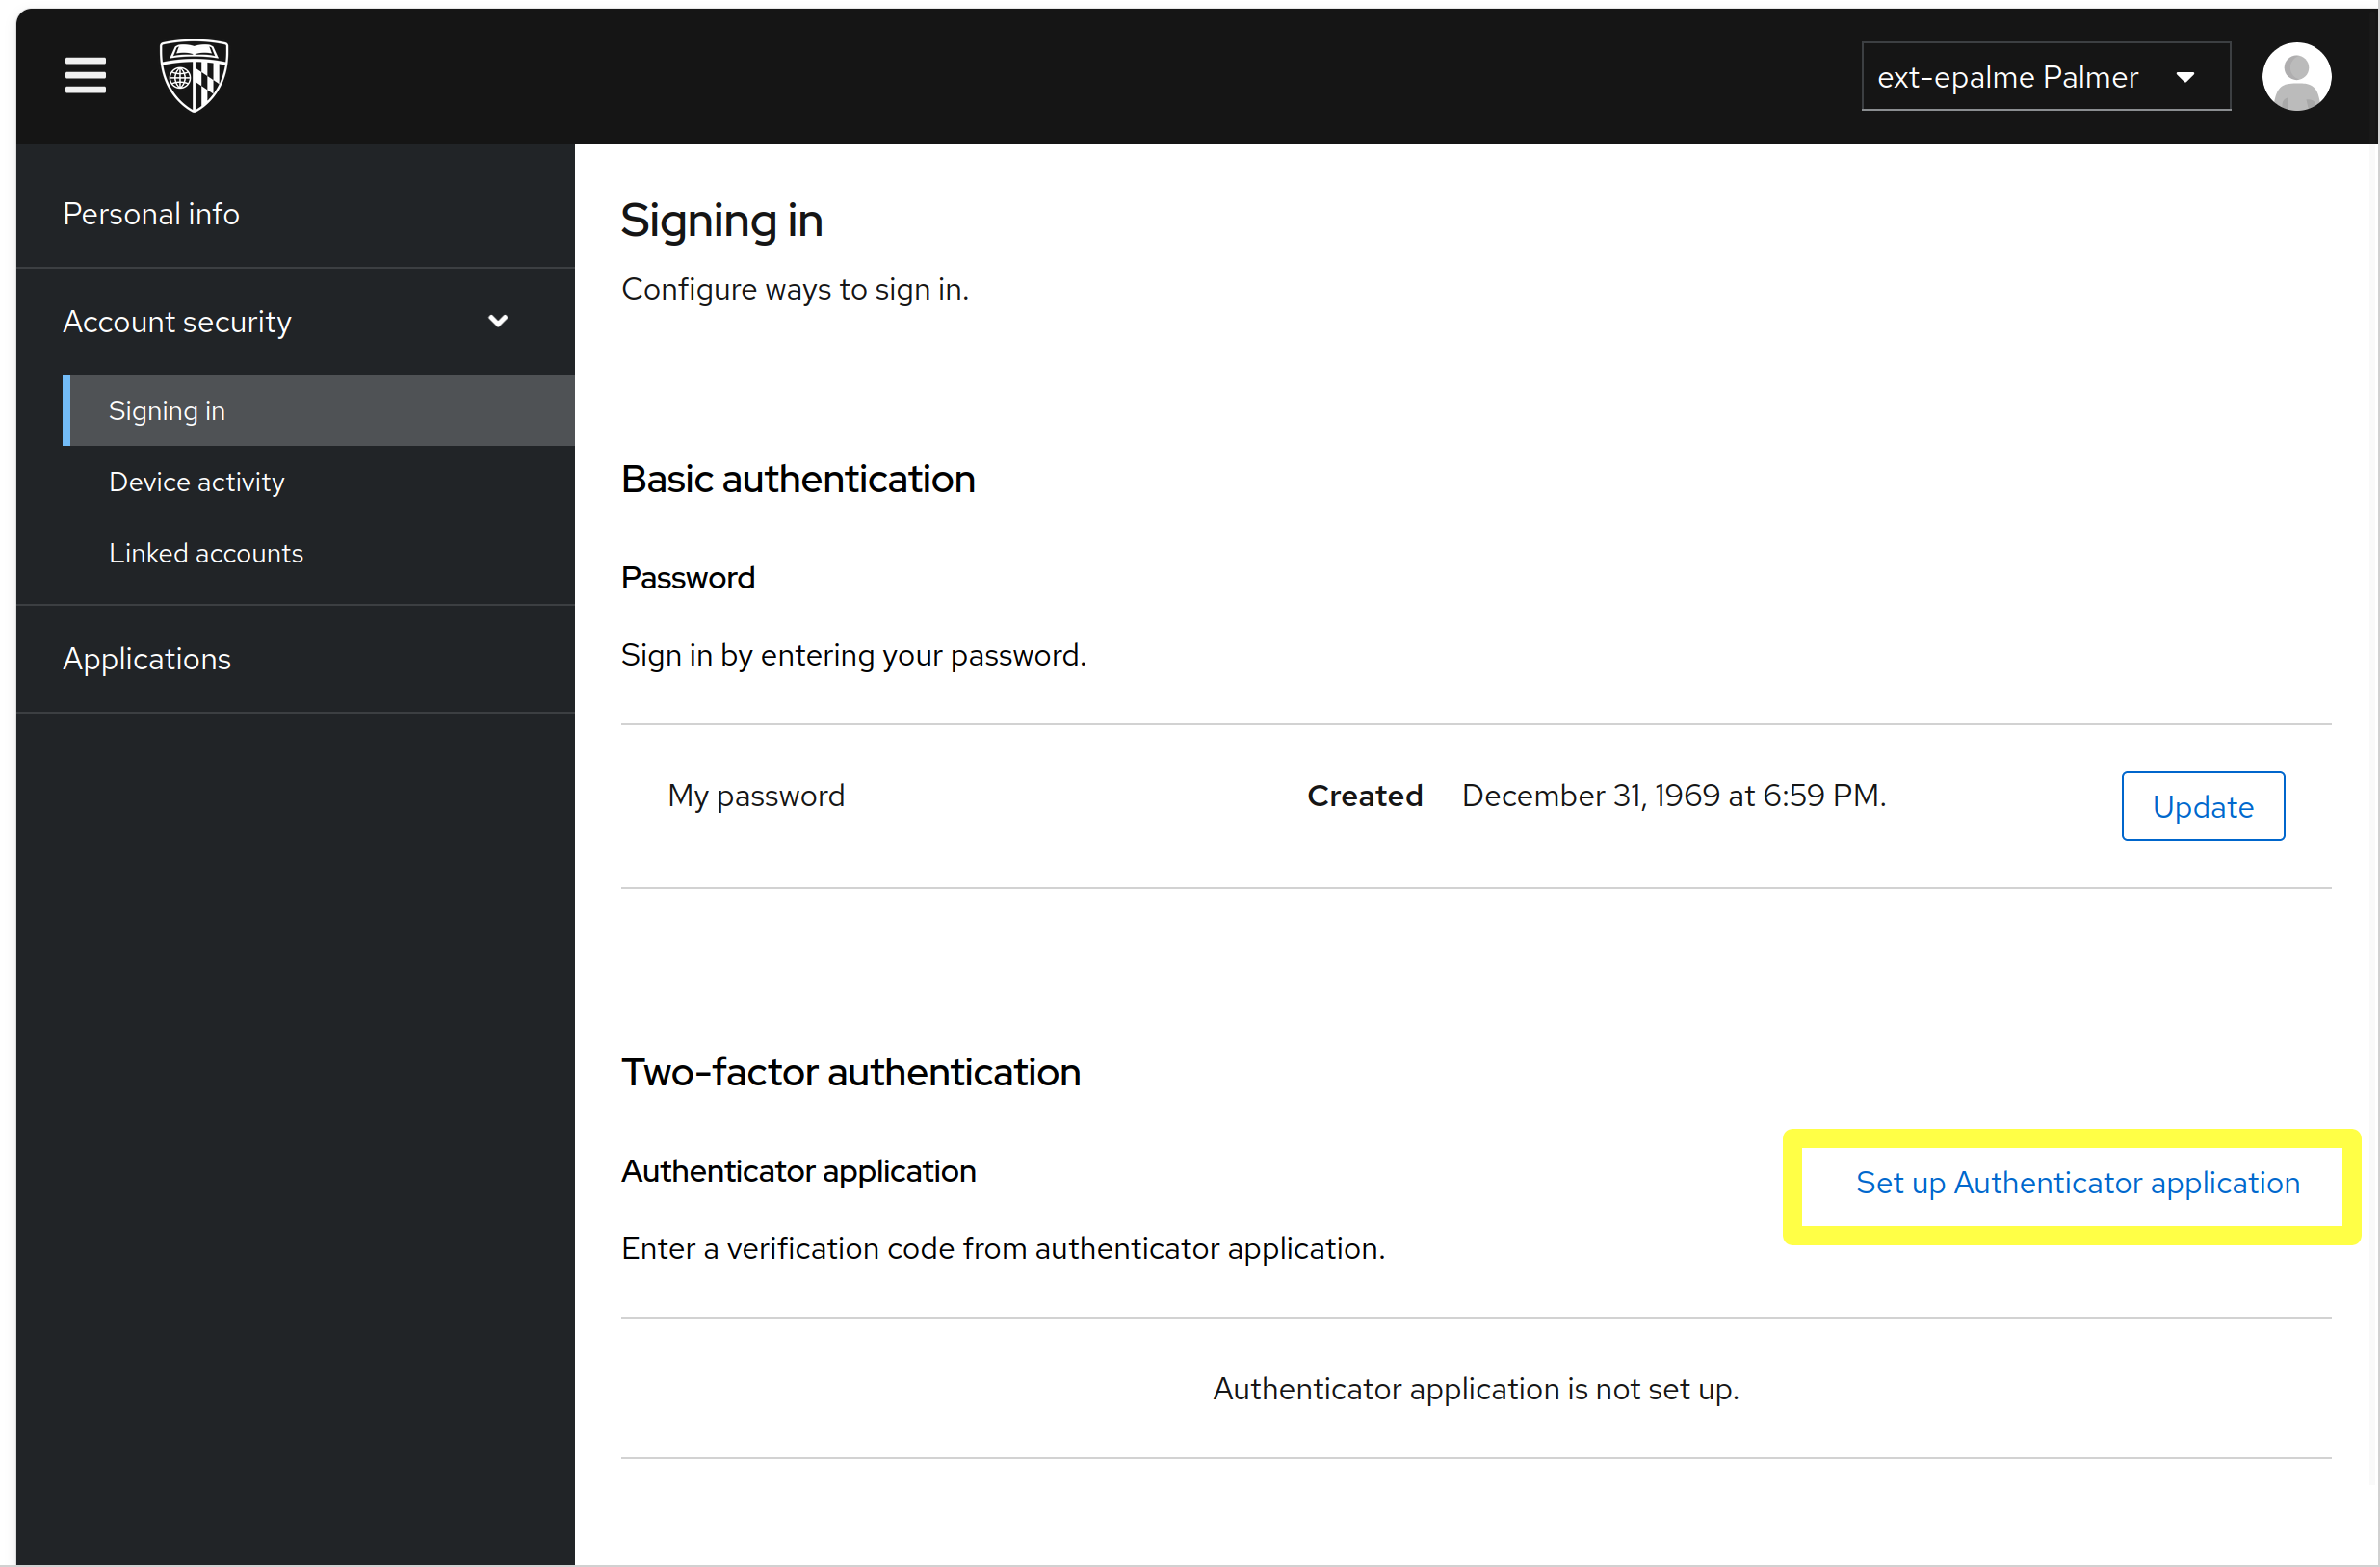
Under Two-Factor Auth (2FA), click the “Set up 2FA” button.
On the next screen, find the “Set up Authenticator application” link in the bottom right.
Click the Set up Authenticator application link.
On the Mobile Authenticator Setup page, follow the steps to set up a One-Time Password (OTP) device.
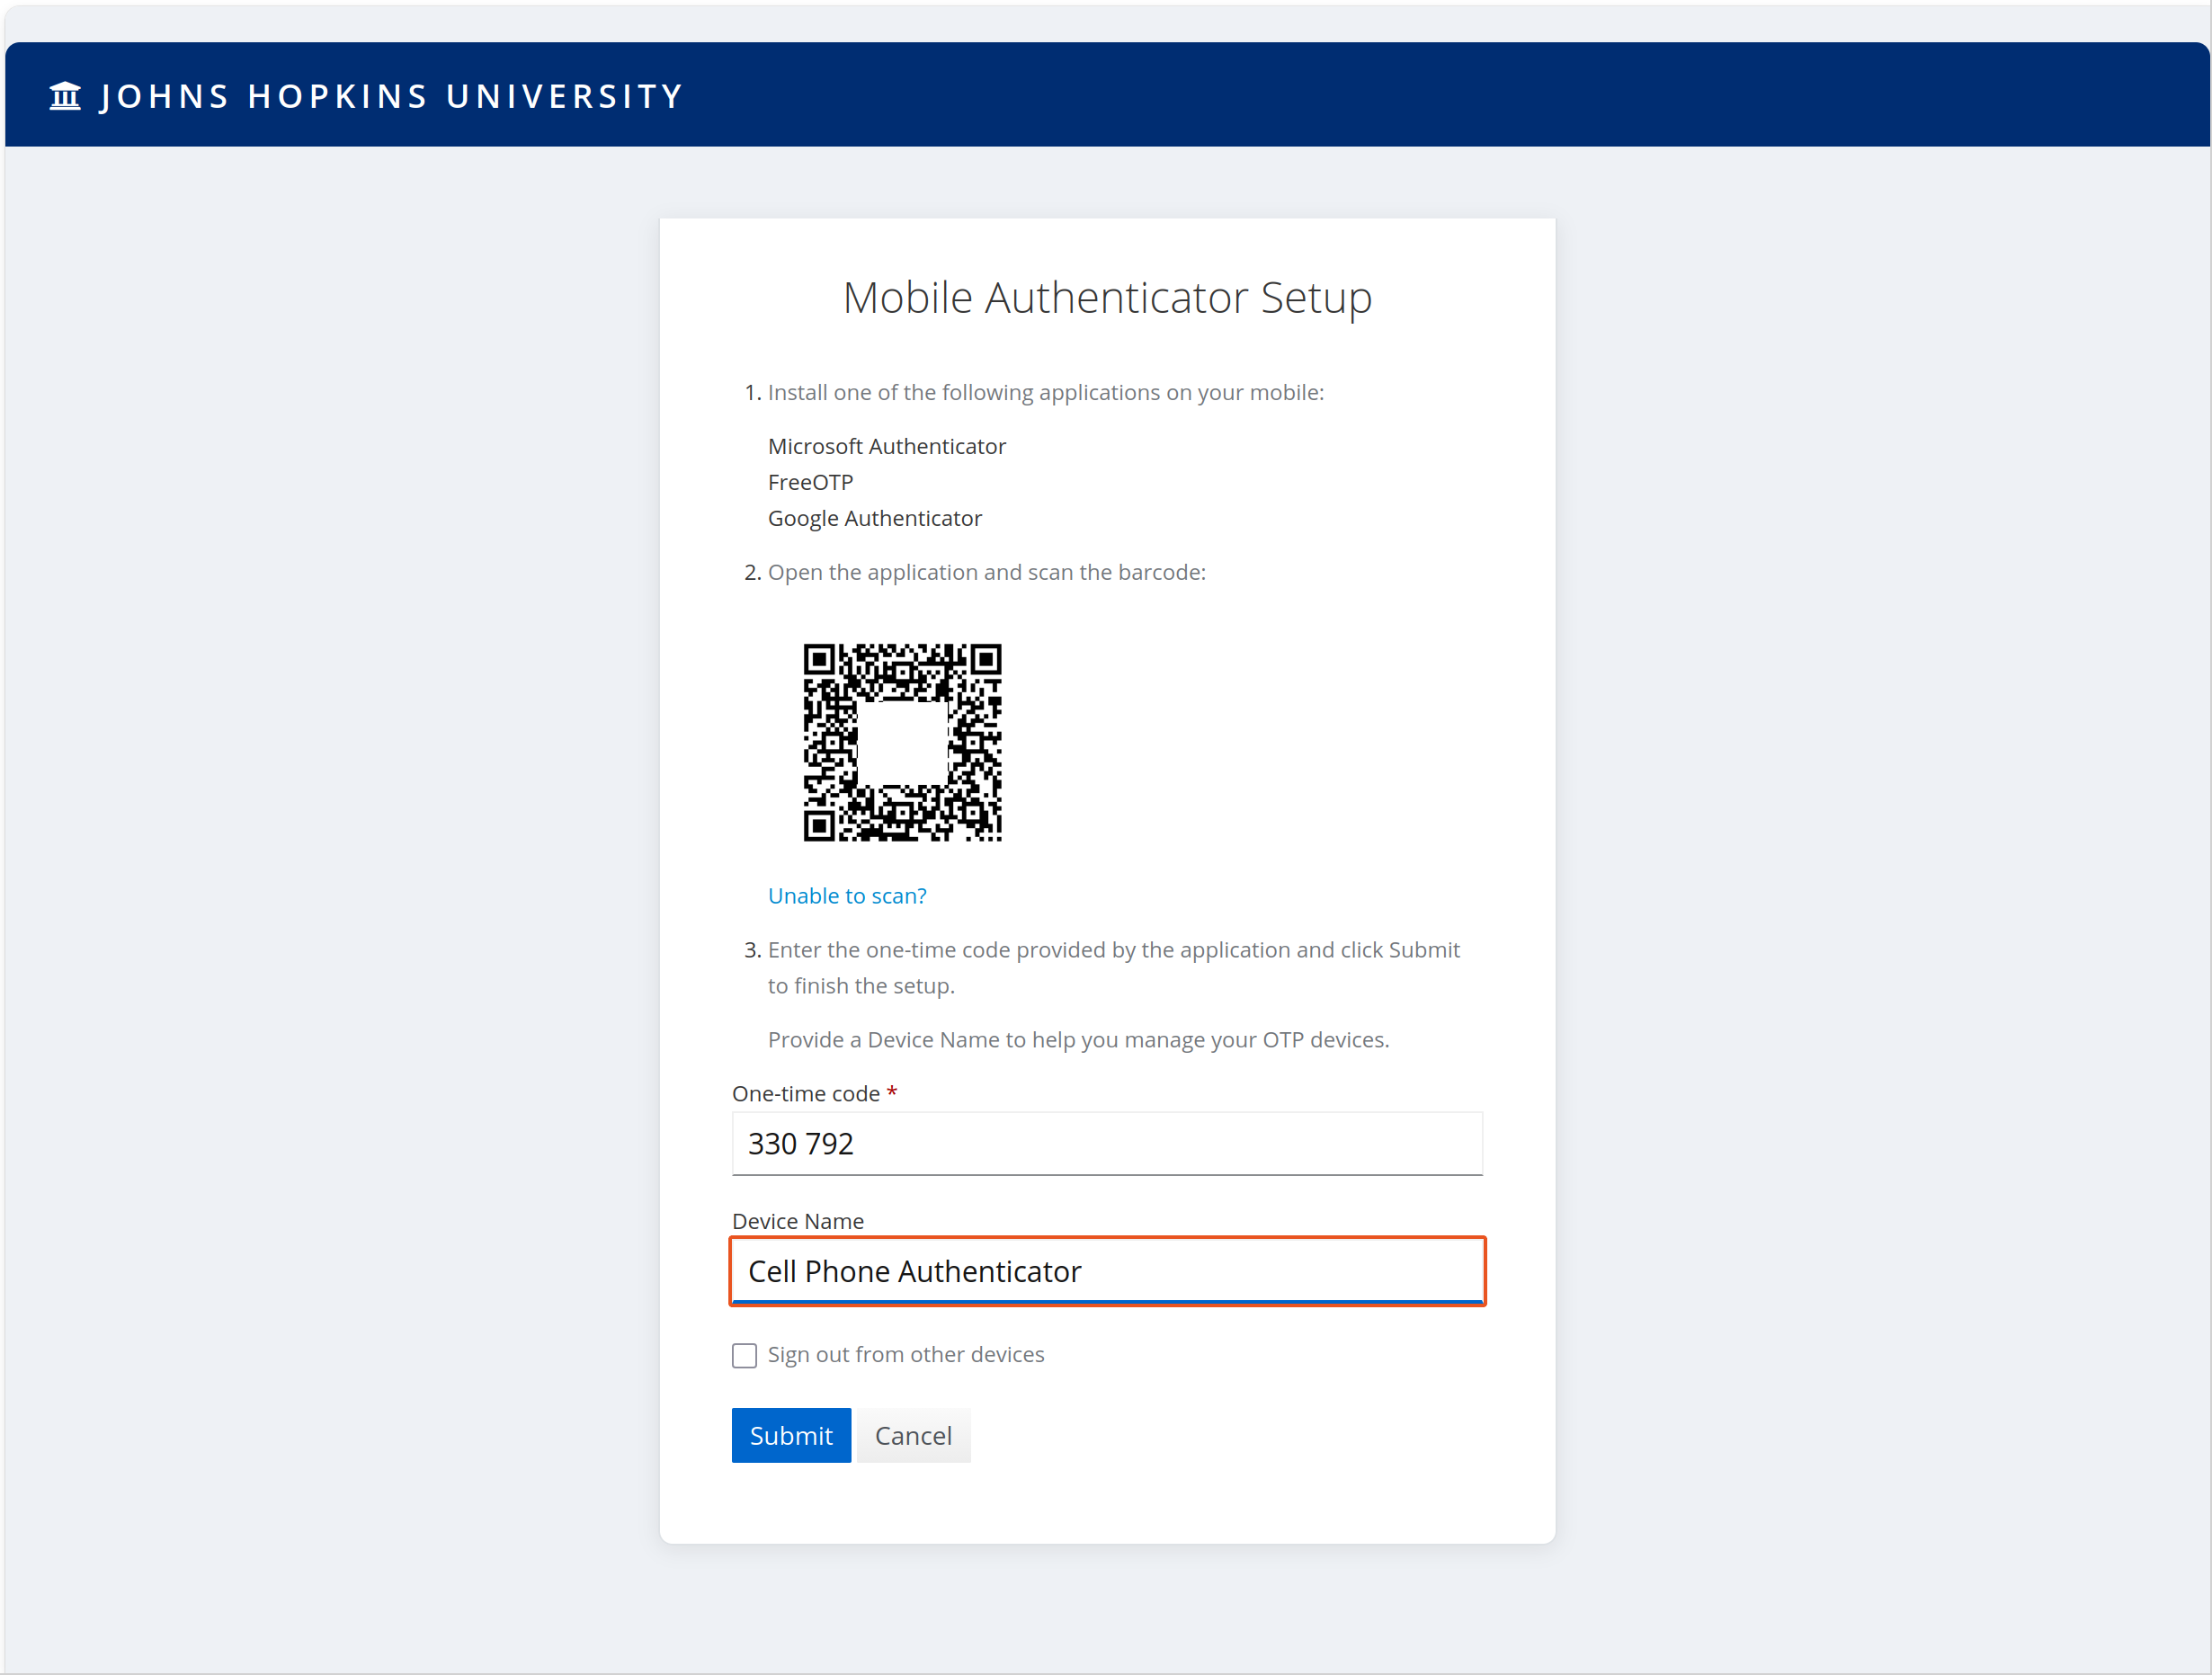
Install one of the following:
Microsoft Authenticator


FreeOTP
Google Authenticator
Using your chosen authenticator app, scan the barcode. Enter the 6-digit code in the box to confirm synchronization.
Optionally, you can give the device a name for easier record-keeping.
Click Submit before the 6-digit code expires to validate the setup.
Reset Password
JHED ID Users
JHED ID users should manage passwords through my.jh.edu. You can reset your password by clicking the link in top right of the MyJHU webpage.
Schmidt Sciences and External Users
If you forgot your password and cannot log in to the ARCH Portal, you can send yourself a password reset email.
Warning
Users added as part of a class cannot reset their password using this method. Instead, please reach out to help@arch.jhu.edu.
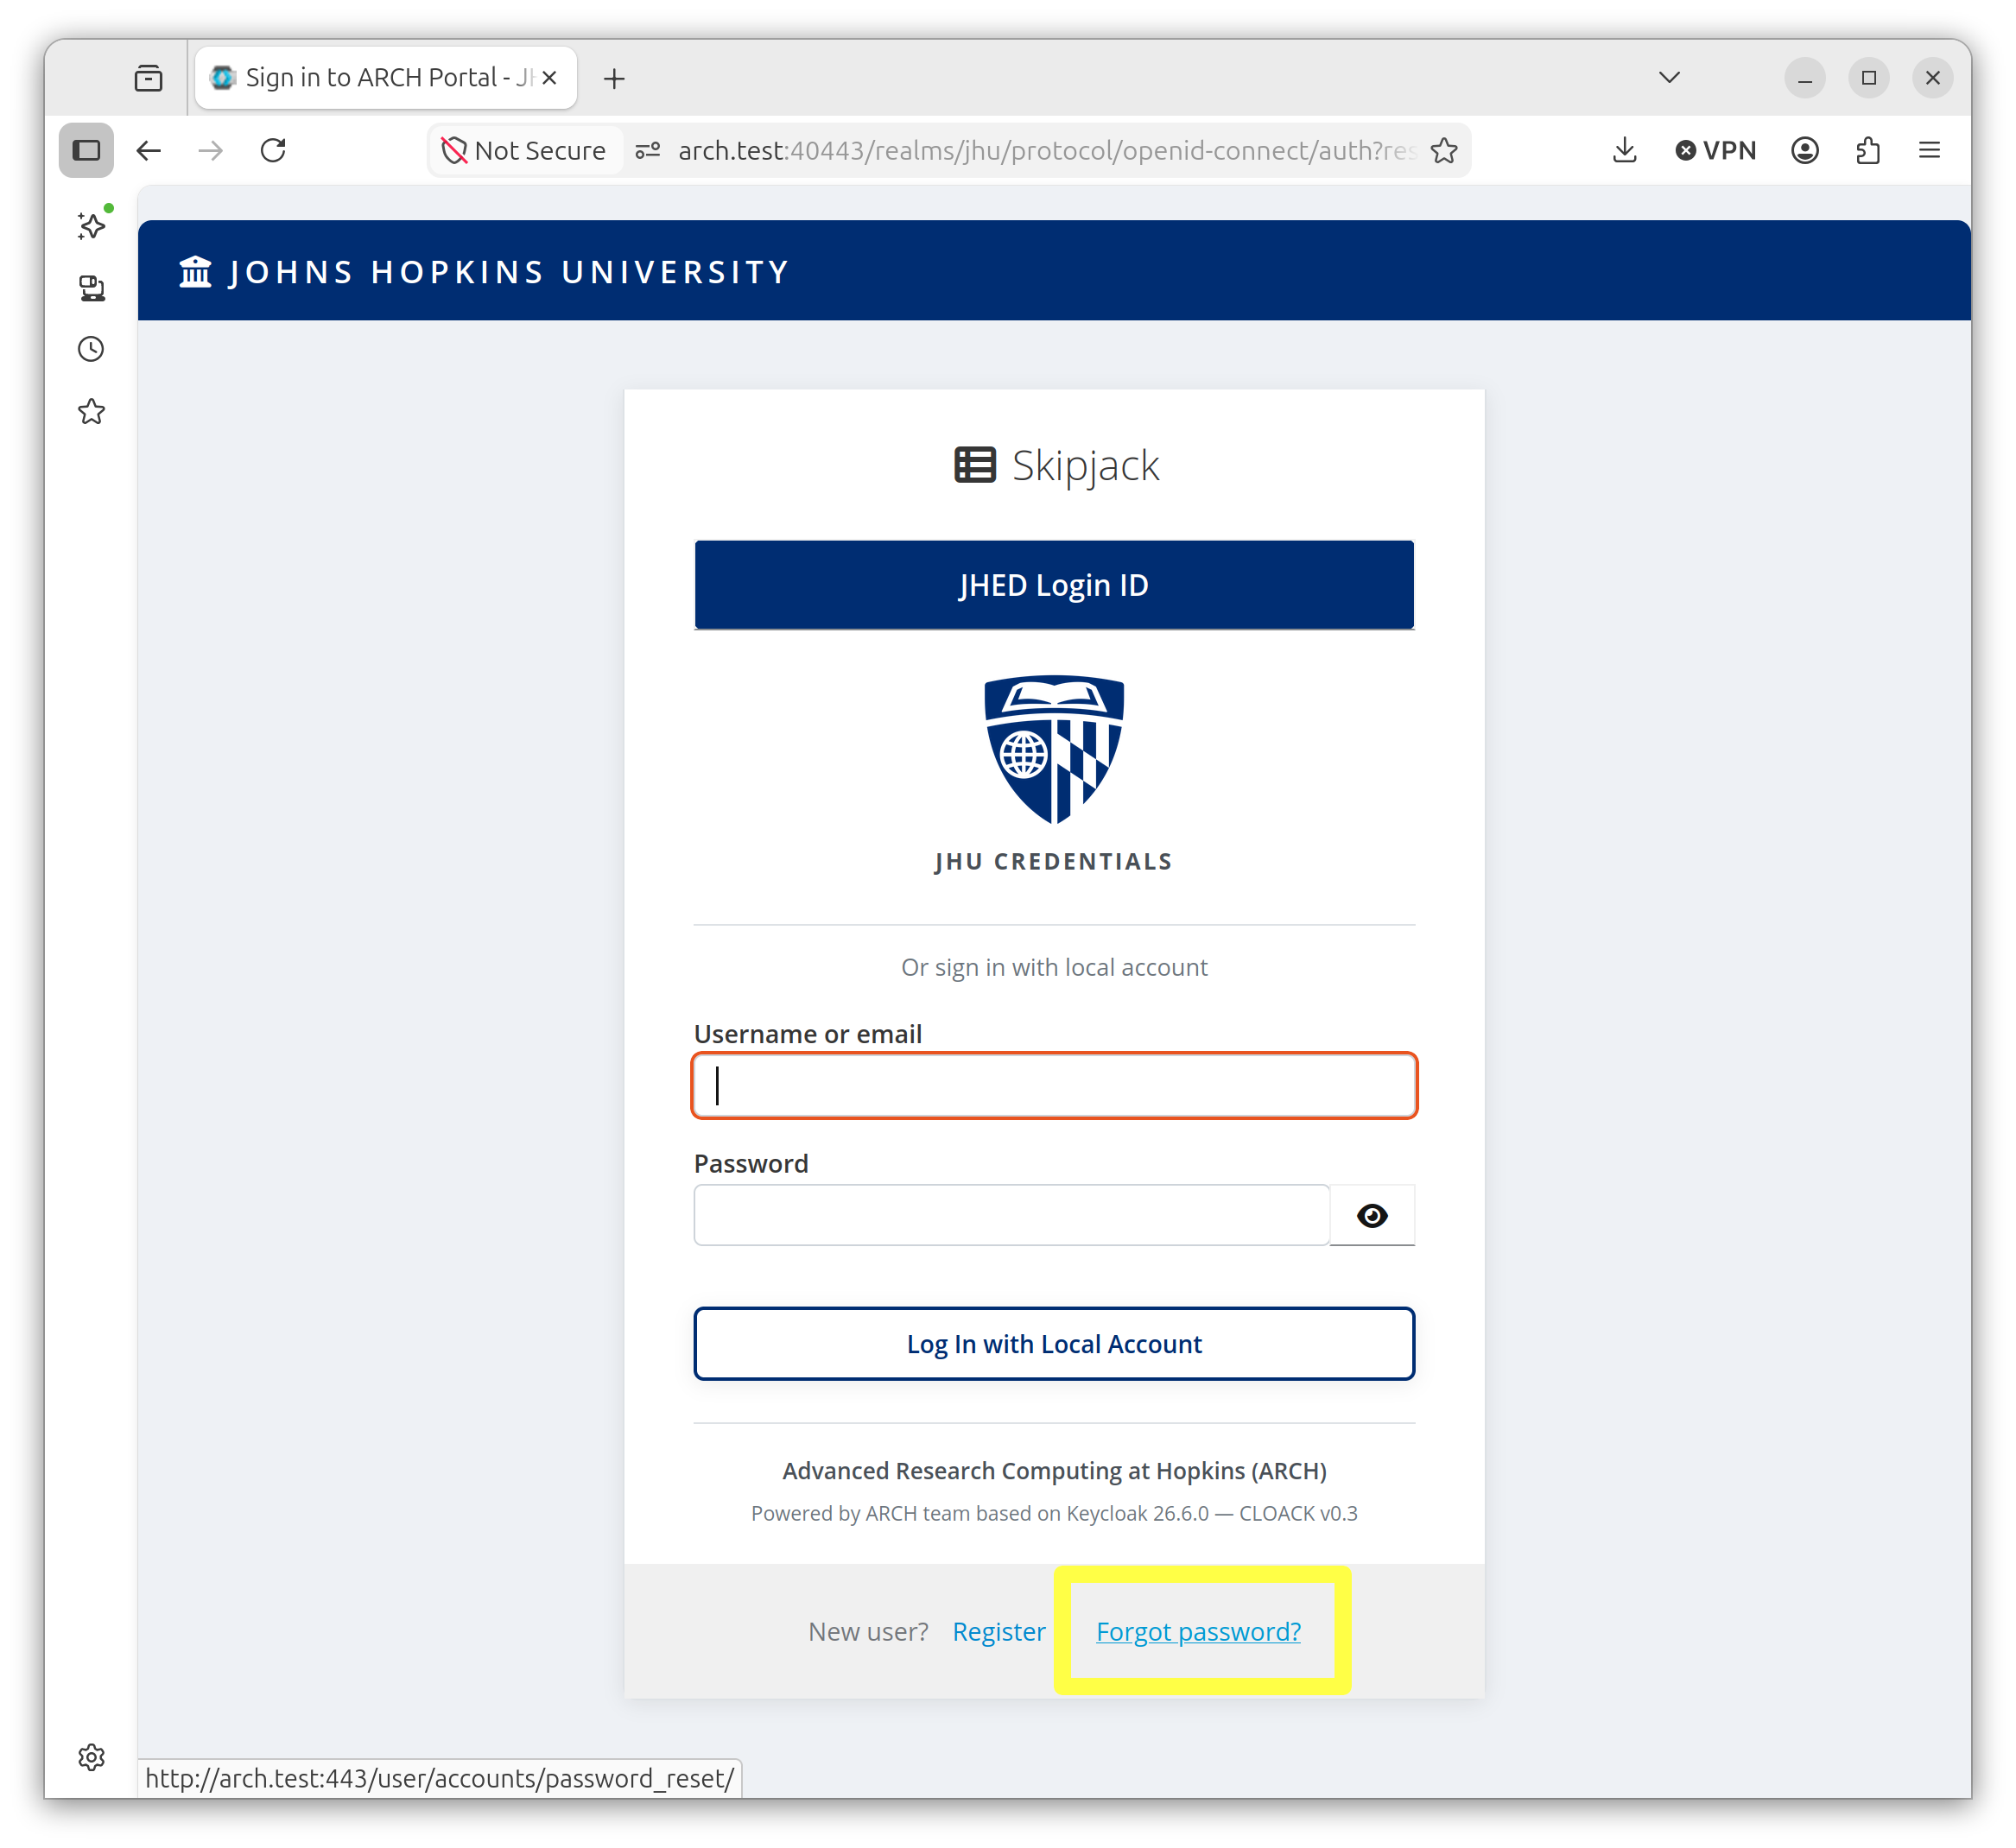
From the login screen, click the “Forgot Password” link.
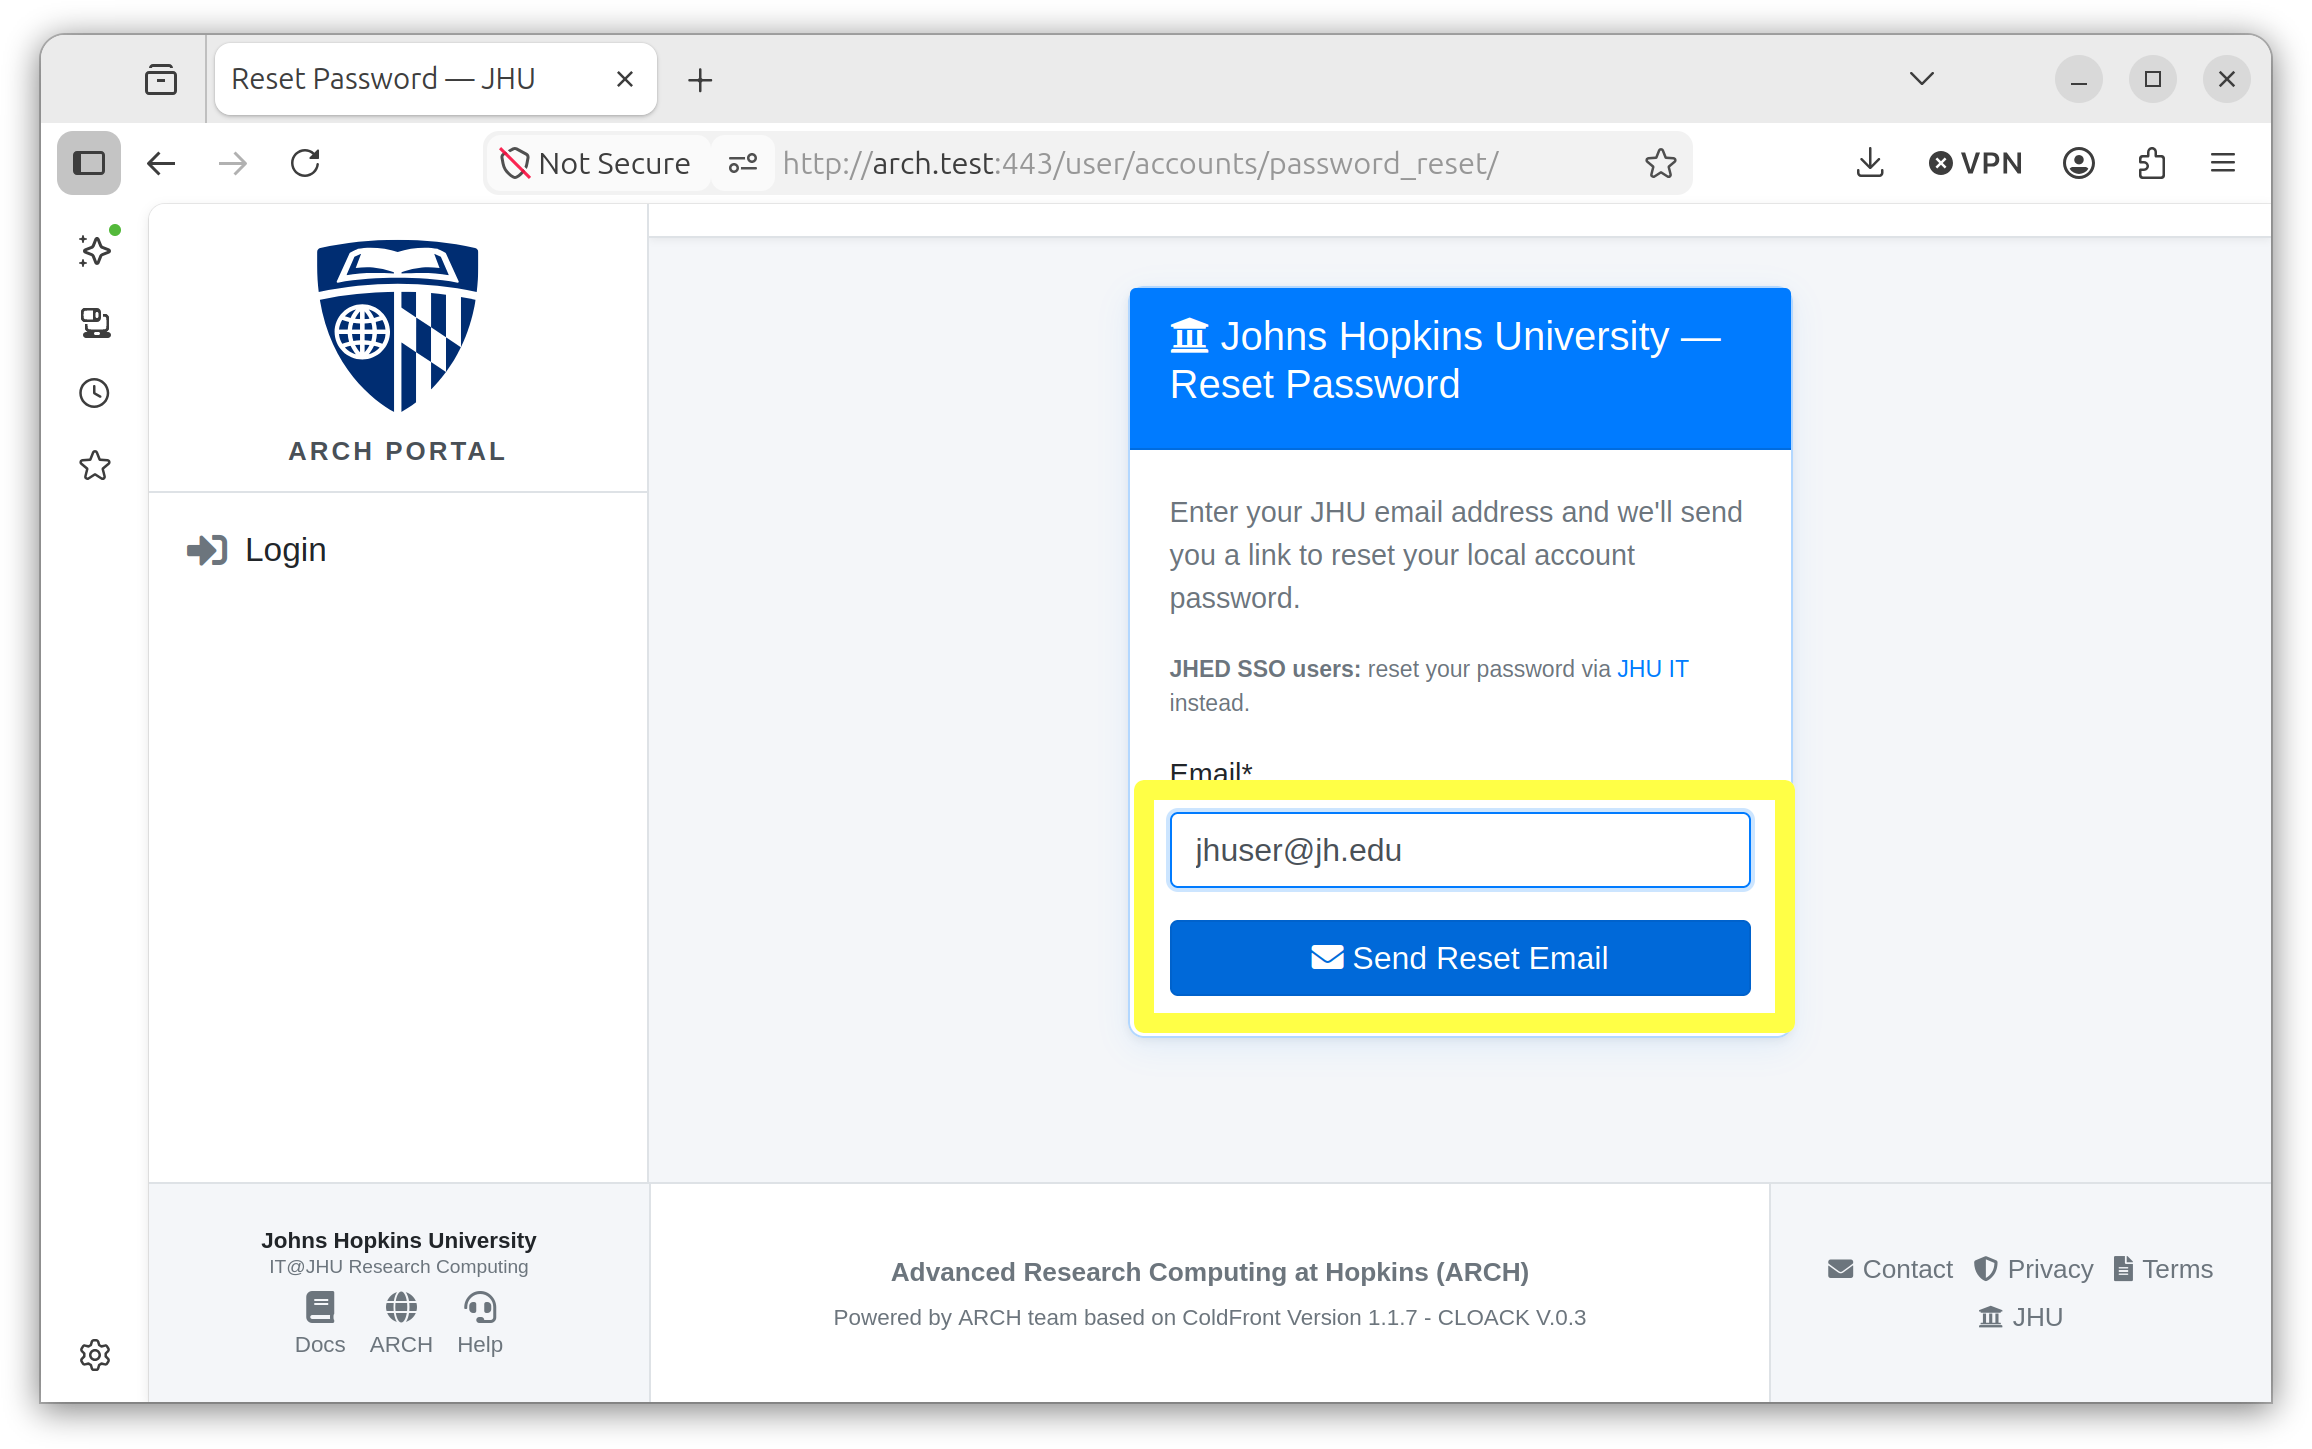
Enter your email address.
JHU users should enter their JHU email address. External users can enter the email address used to set up their external account.
Click Send Reset Email.
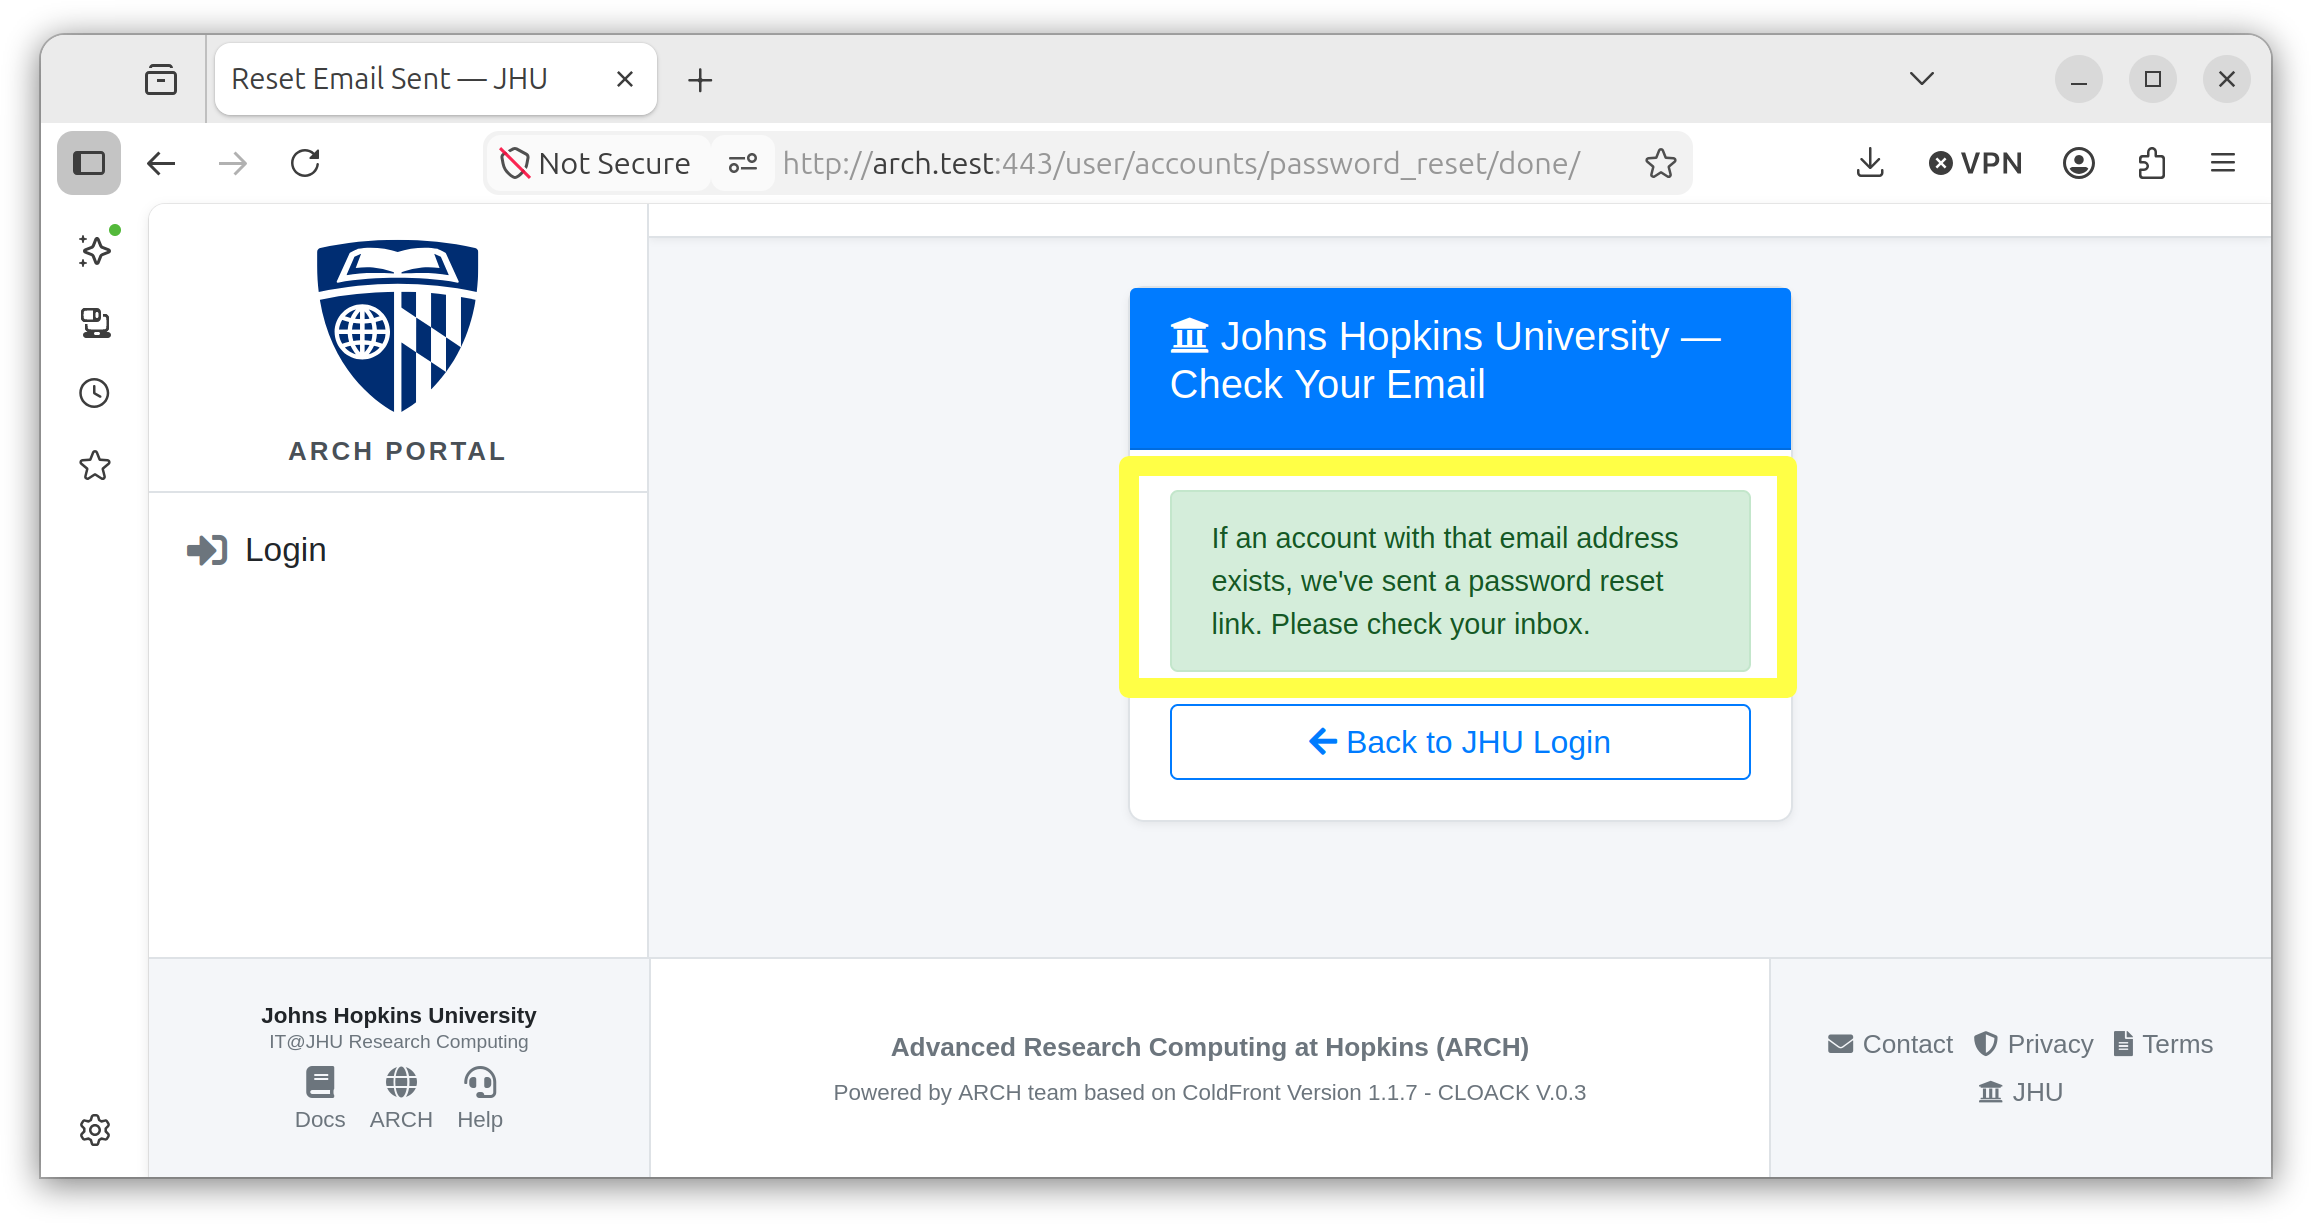
A confirmation screen will appear, indicating that a password reset email has been sent.
Connect to the Skipjack Cluster
Schmidt Sciences Users can access Skipjack using any one of the three login nodes.
ssh <YourUserID>@login03.schmidtsciences.jhu.edu
ssh <YourUserID>@login04.schmidtsciences.jhu.edu
ssh <YourUserID>@login05.schmidtsciences.jhu.edu
JHED ID and External Users can connect to any one of the three login nodes.
ssh <YourUserID>@login03.arch.jhu.edu
ssh <YourUserID>@login04.arch.jhu.edu
ssh <YourUserID>@login05.arch.jhu.edu
Note
Multi-Factor Authentication is required to log in to Skipjack.
Select the process for connecting to the system based on your affiliation and purpose.
Affiliation |
Class Use |
Authentication Method |
MFA |
Username Prefix |
Email Domain |
|---|---|---|---|---|---|
JHED ID |
No |
JHU SSO |
N/A |
jh.edu, jhu.edu, etc. |
|
Schmidt Sciences |
No |
Schmidt (SSCI) |
|
A non-JHU email* |
|
External User |
No |
Local Account |
|
A non-JHU email* |
|
JHED ID |
Yes |
Local Account |
|
A non-JHU email* |
|
External User |
Yes |
Local Account |
|
A non-JHU email* |
*A non-JHU email refers to an email address outside the JHU domain, such as univ.edu, gmail.com, hotmail.com etc.
JHED ID Users
Users with JHED ID will be prompted to approve the login via web browser with JHU SSO. Follow the
provided hyperlink to review the request. After authenticating in the browser
return to the terminal command line and press Enter to proceed.
Schmidt Sciences, External and Class-Use Users
After entering your password, you will be prompted for your OTP code (see Setup Multi-Factor Identification for more information). Enter the code from your OTP app that corresponds to your Skipjack account.
Note
If it is your first time connecting, you’ll be asked to verify the host key. Once verified, type yes at the prompt, then enter your Skipjack password.
Data Transfer with Globus
We recommend using Globus to transfer large amounts of data to and from the Skipjack cluster. Globus reliably manages transfers in the background, handling restarts if interruptions occur.
The directions below explain how to transfer files from an external endpoint to the Skipjack cluster scratch storage. Transferring files from Skipjack to an external endpoint can be done by reversing the endpoints or changing the transfer direction.
Note
Endpoints can be other HPC systems registered on Globus, or personal computers and laptops set up with a Globus Connect Personal Instance.
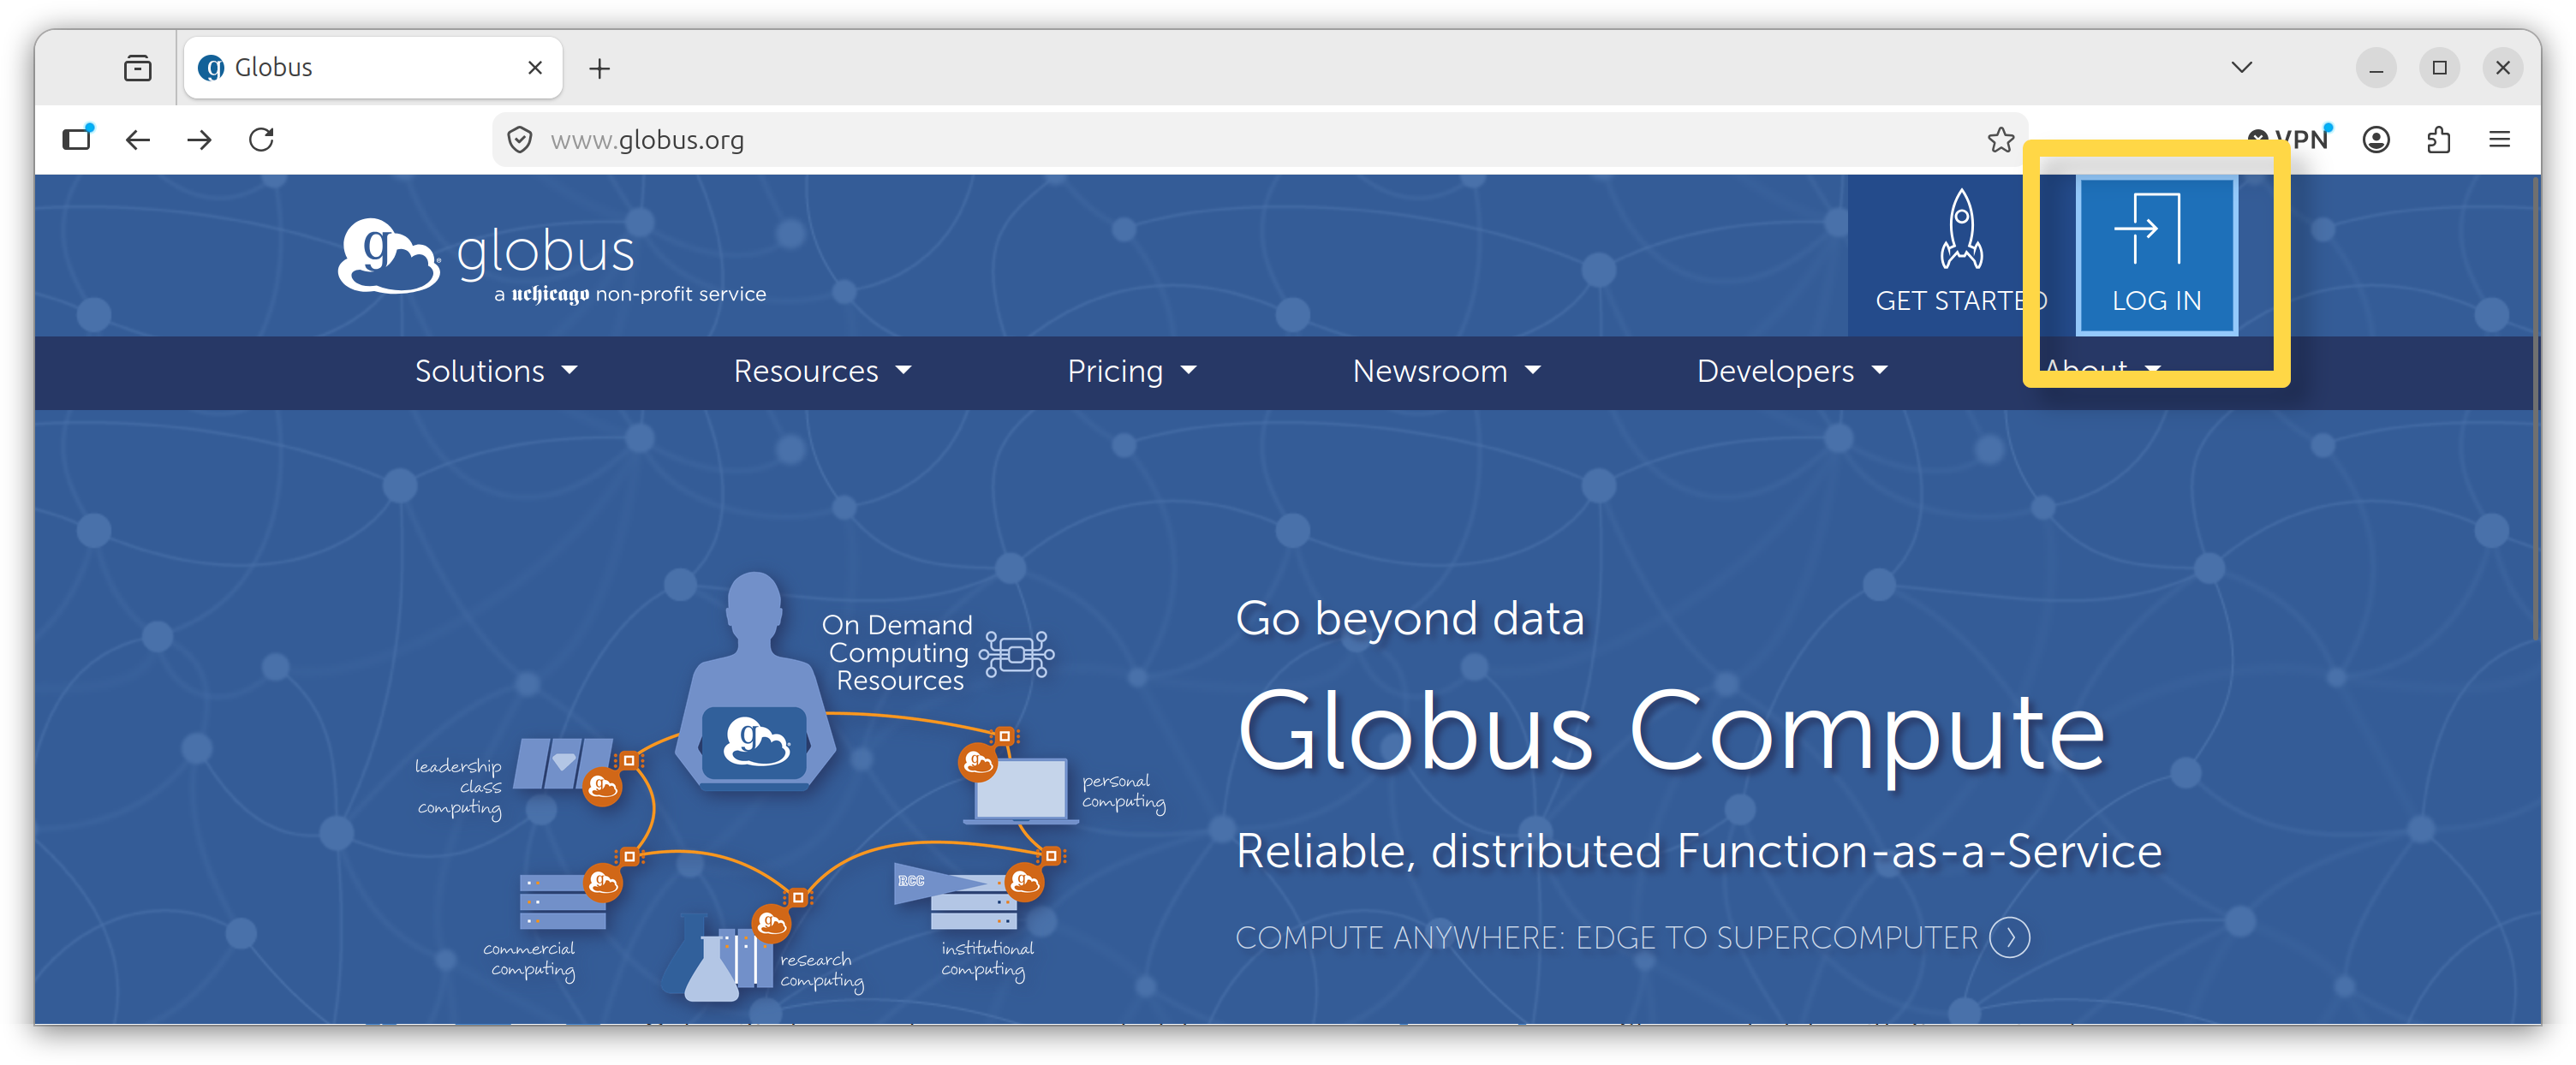
1. Connect to Globus
Using your web browser, navigate to https://www.globus.org.
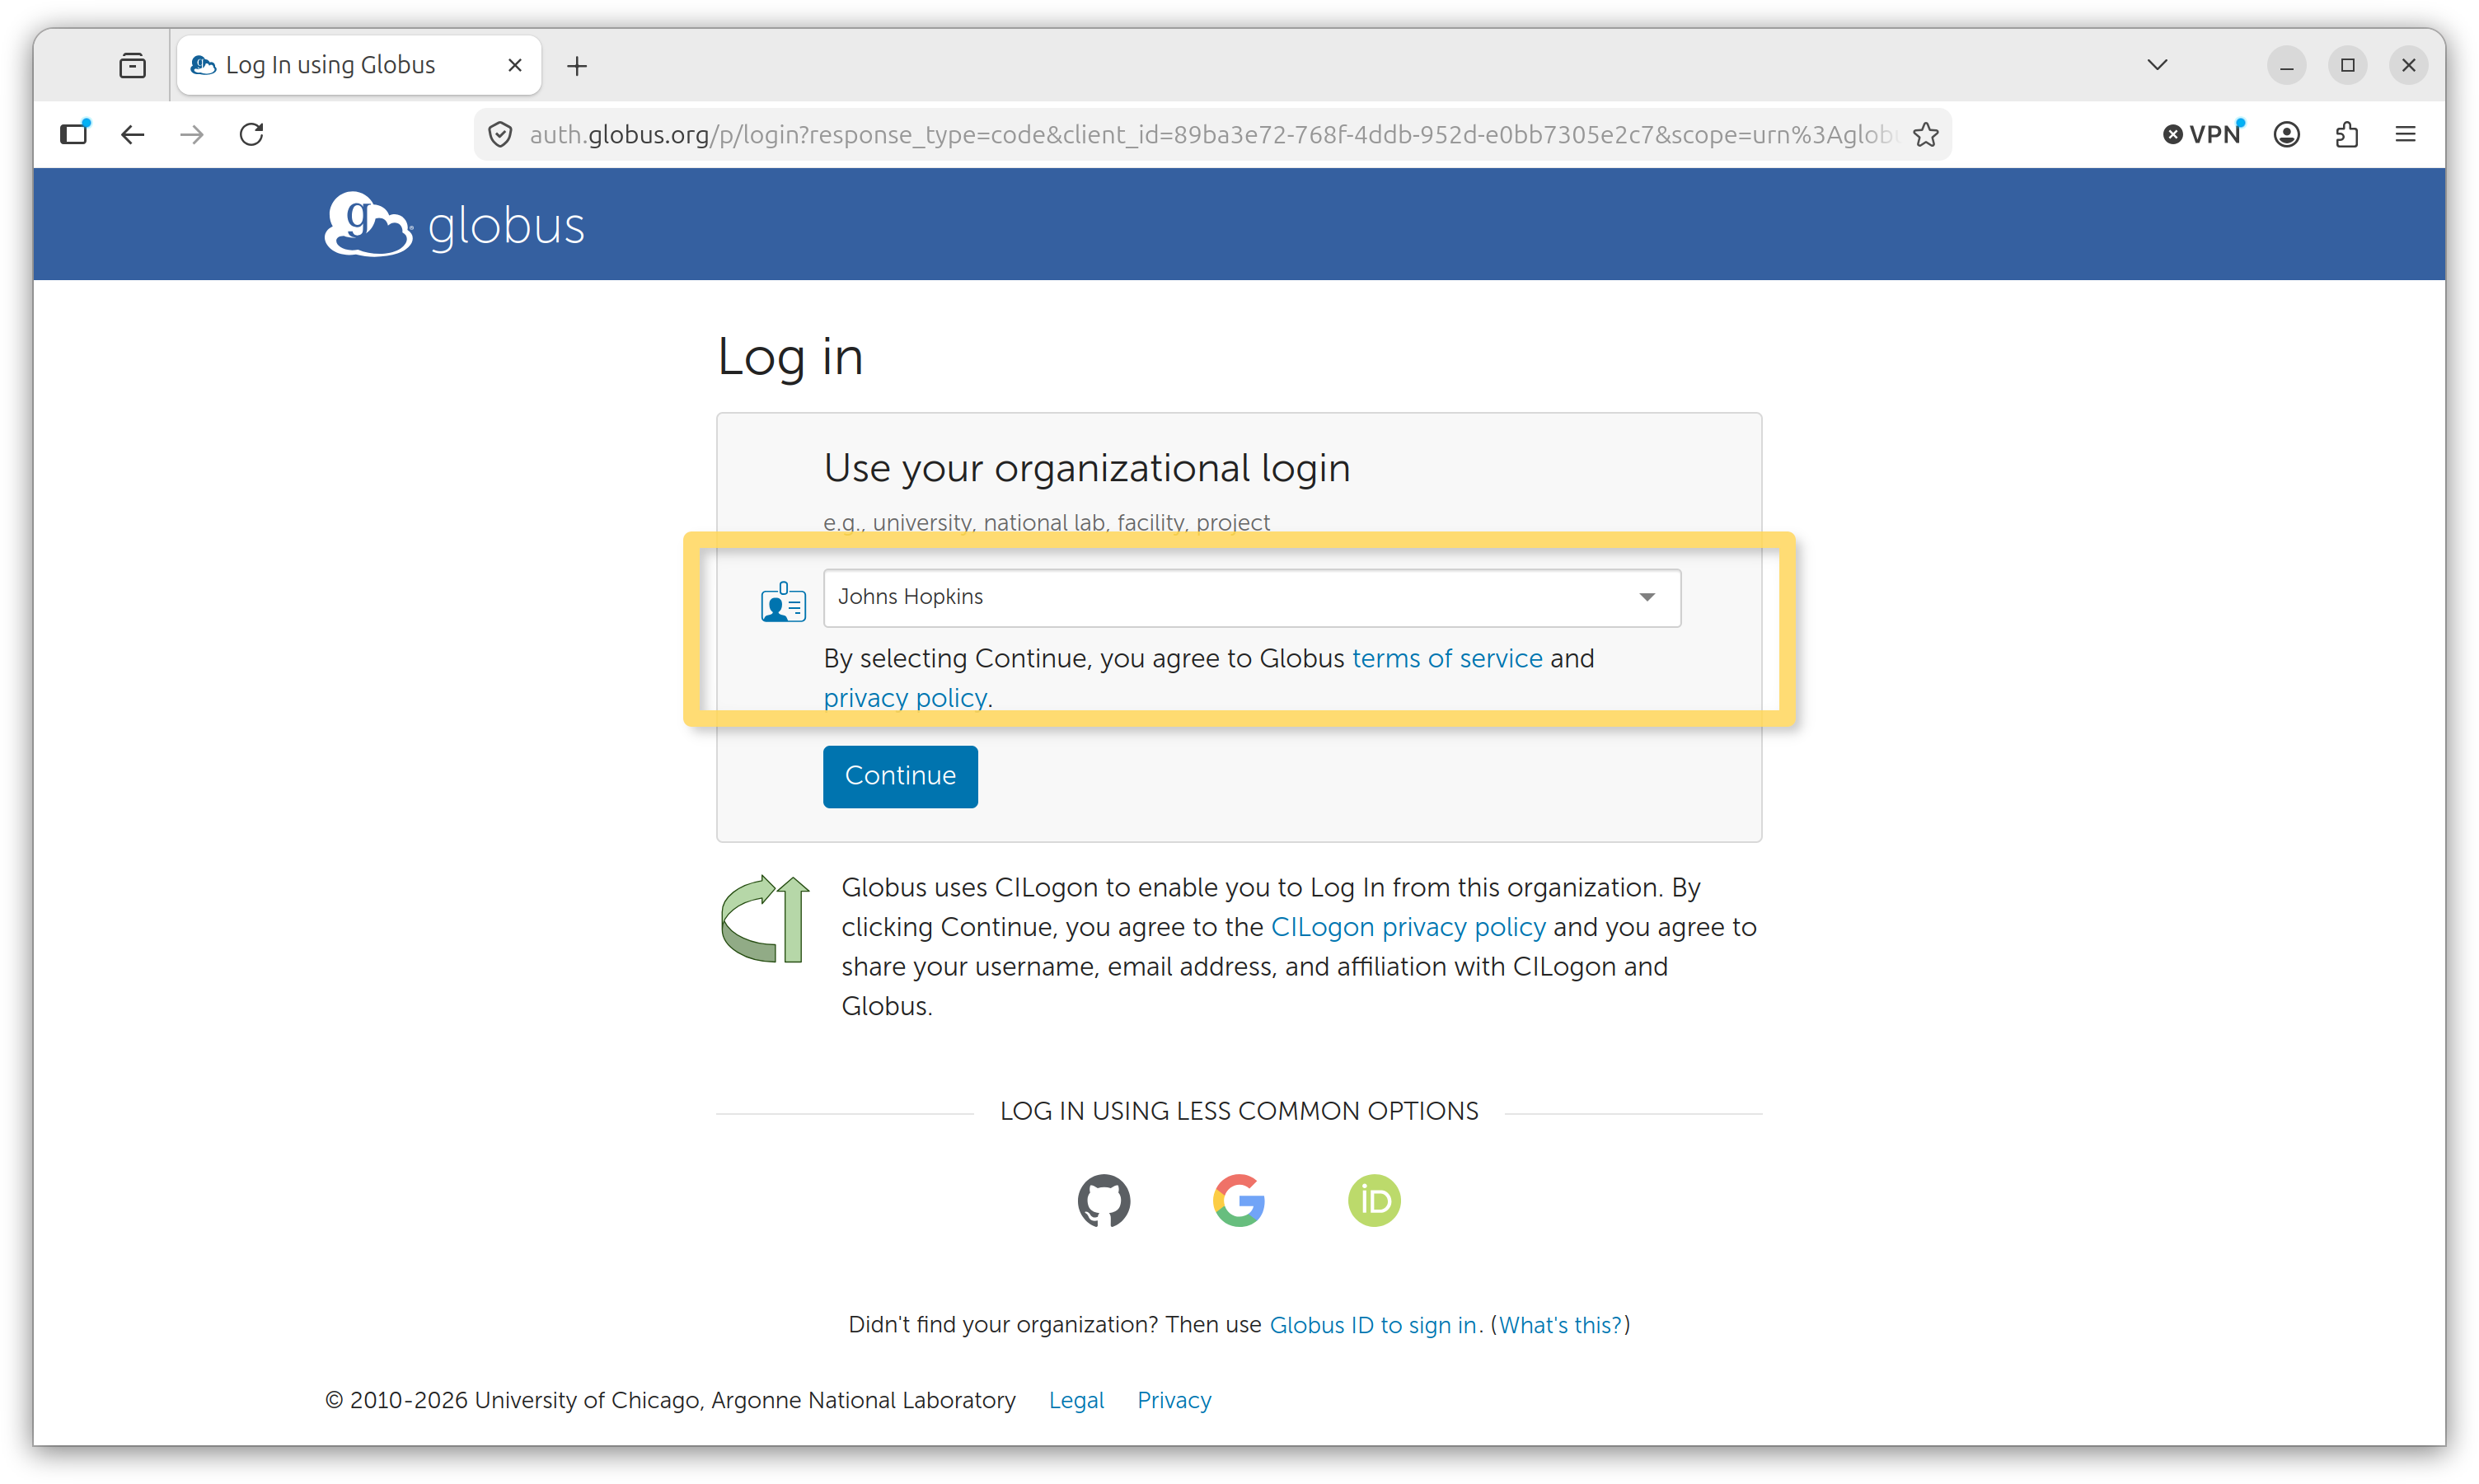
2. Select Johns Hopkins
Select Johns Hopkins from the dropdown menu.
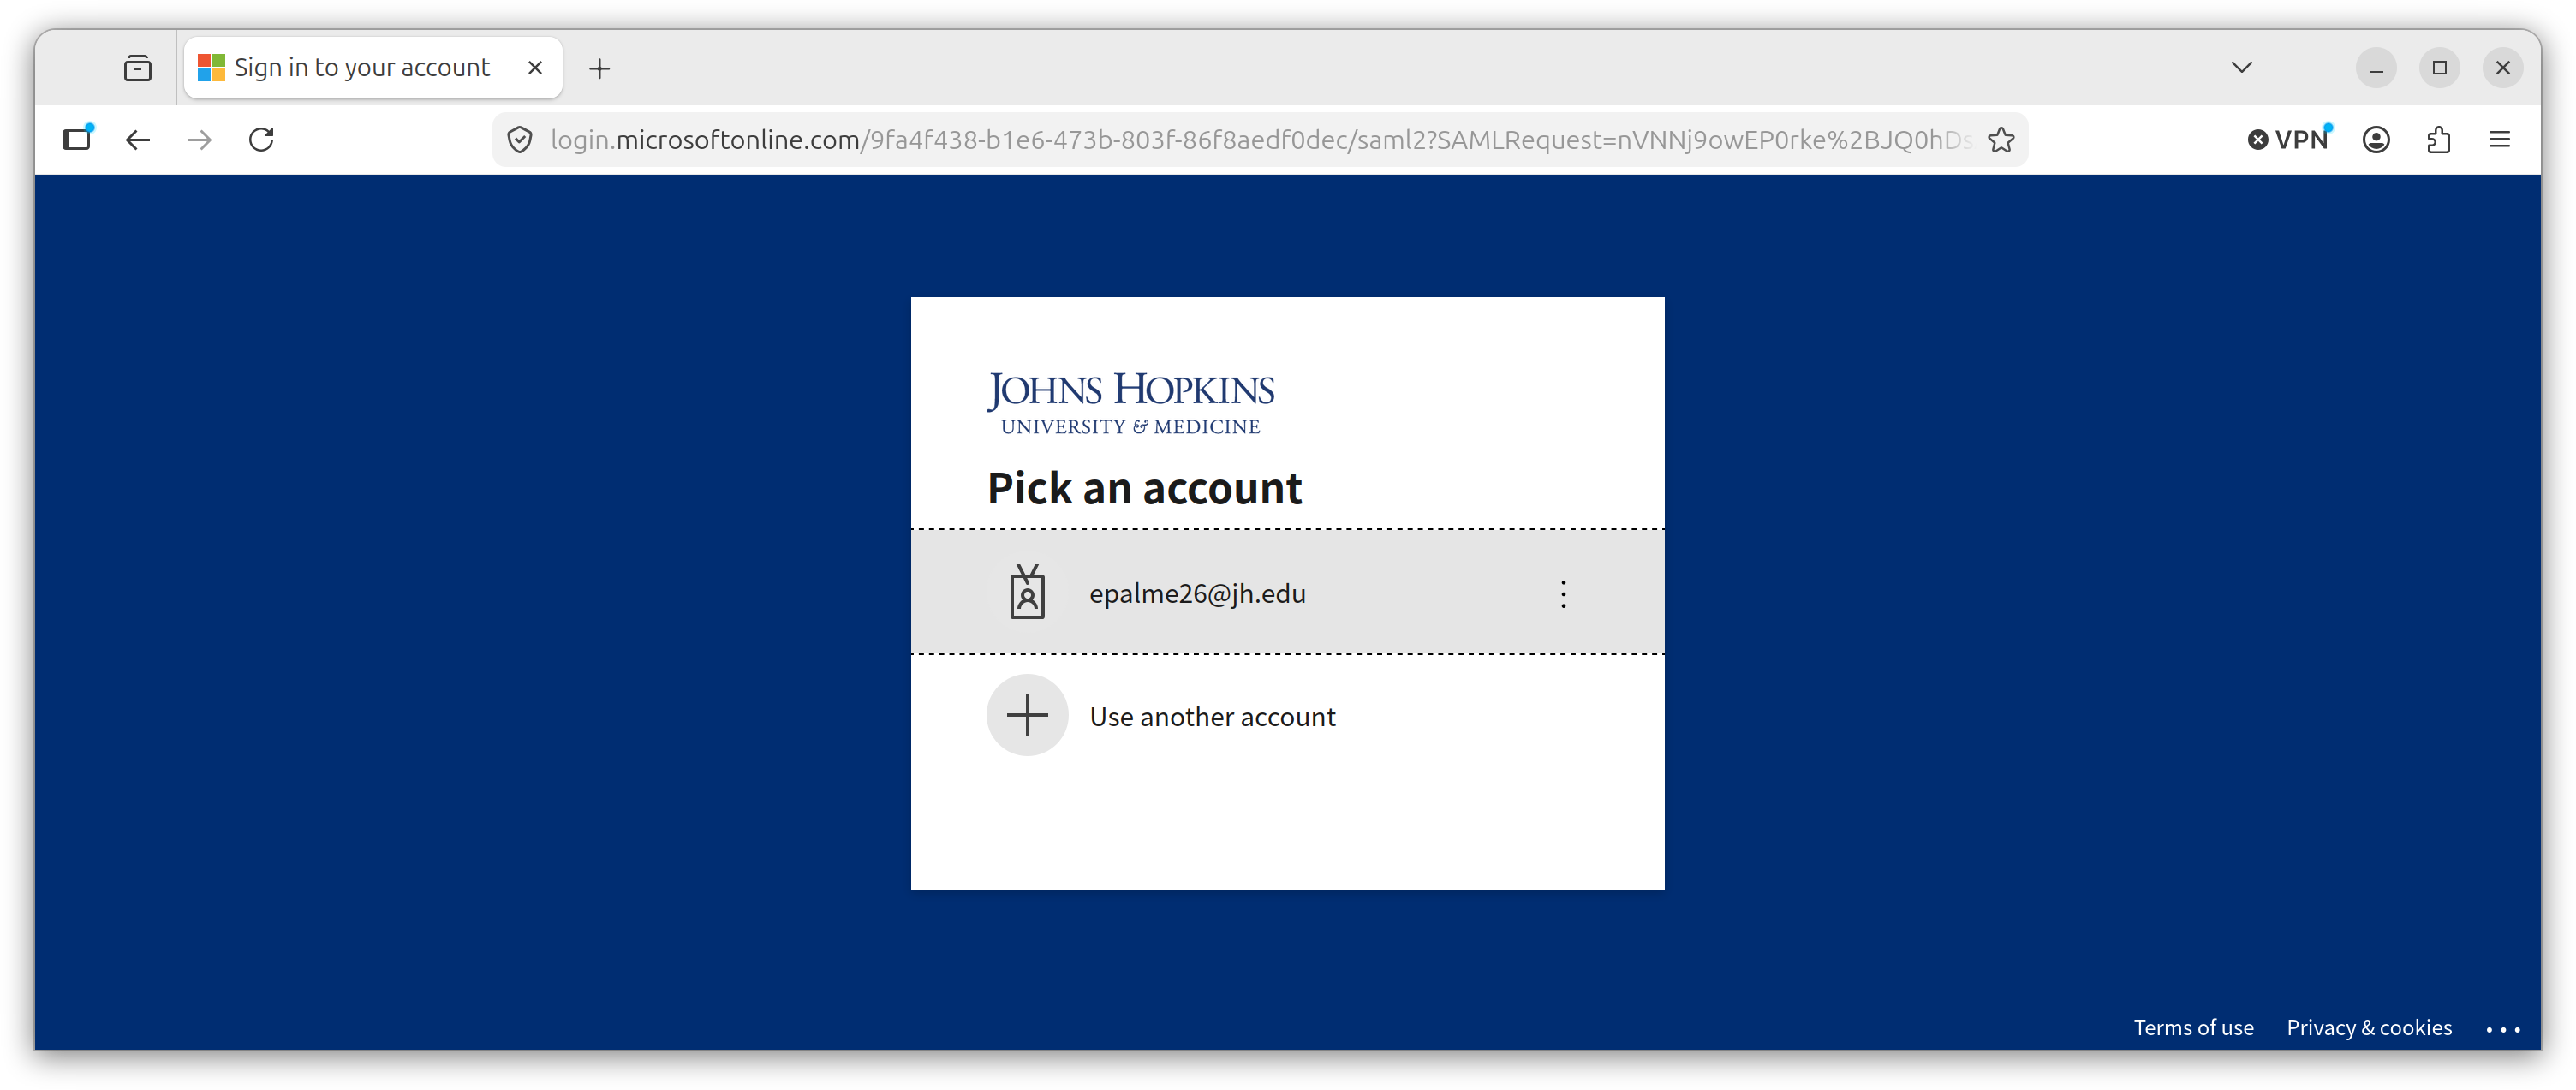
3. Log in with JHED ID
Authenticate via the Johns Hopkins SSO portal using your JHED ID.
4. Set the Source Endpoint Files
After logging in, select File Manager on the left. Use the search bar to find your desired endpoint, then select the folders or files you wish to transfer.
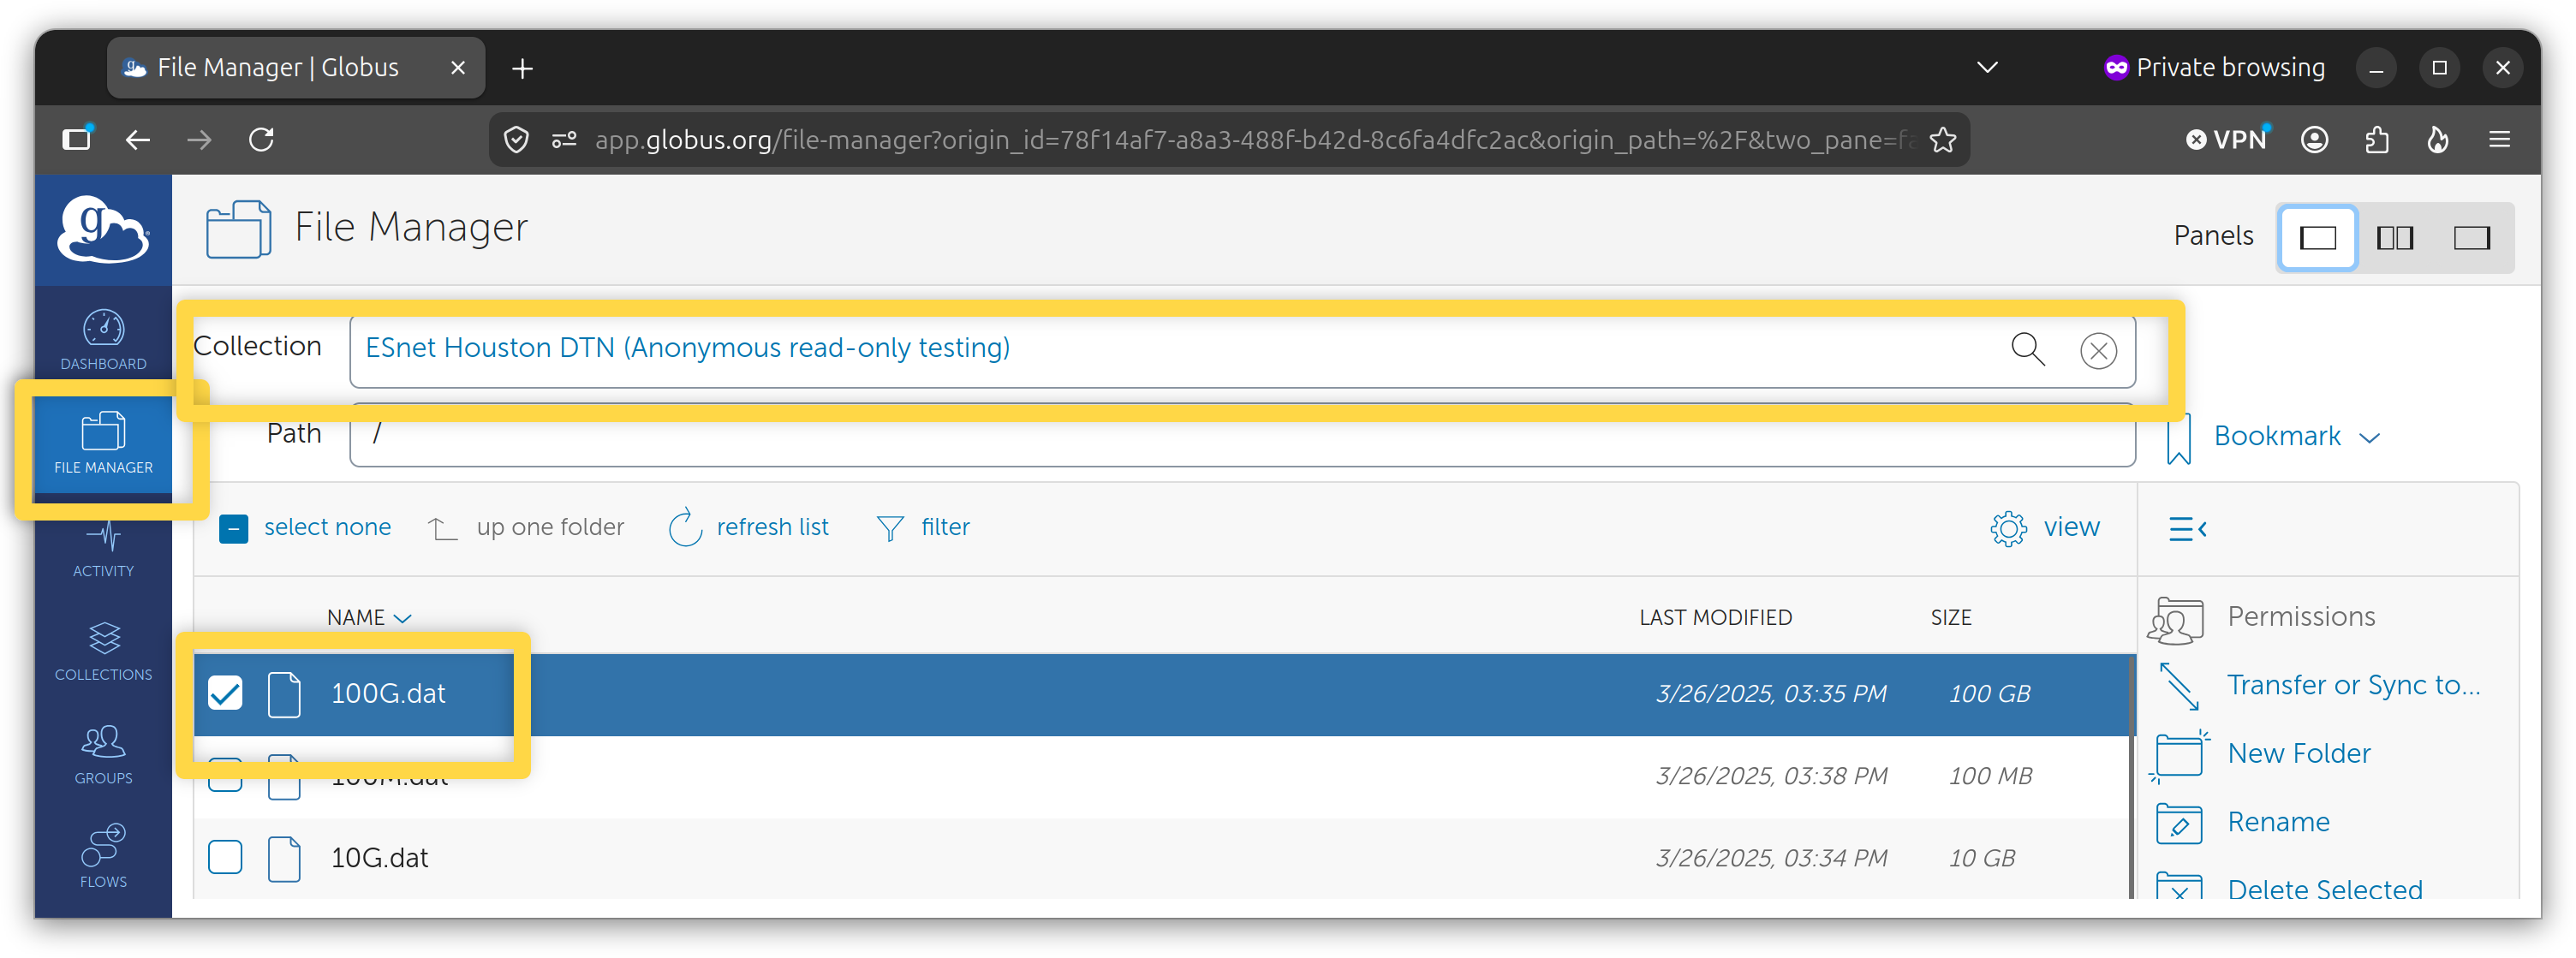
This example uses a publicly available test data set from ESNet.
Note
You may need to authenticate the endpoint to grant Globus permission to access your files.
5. Set the Skipjack Destination Endpoint
Click the two-panel icon in the top right of the File Manager to split the view. In the new search bar on the second panel, search for Skipjack.
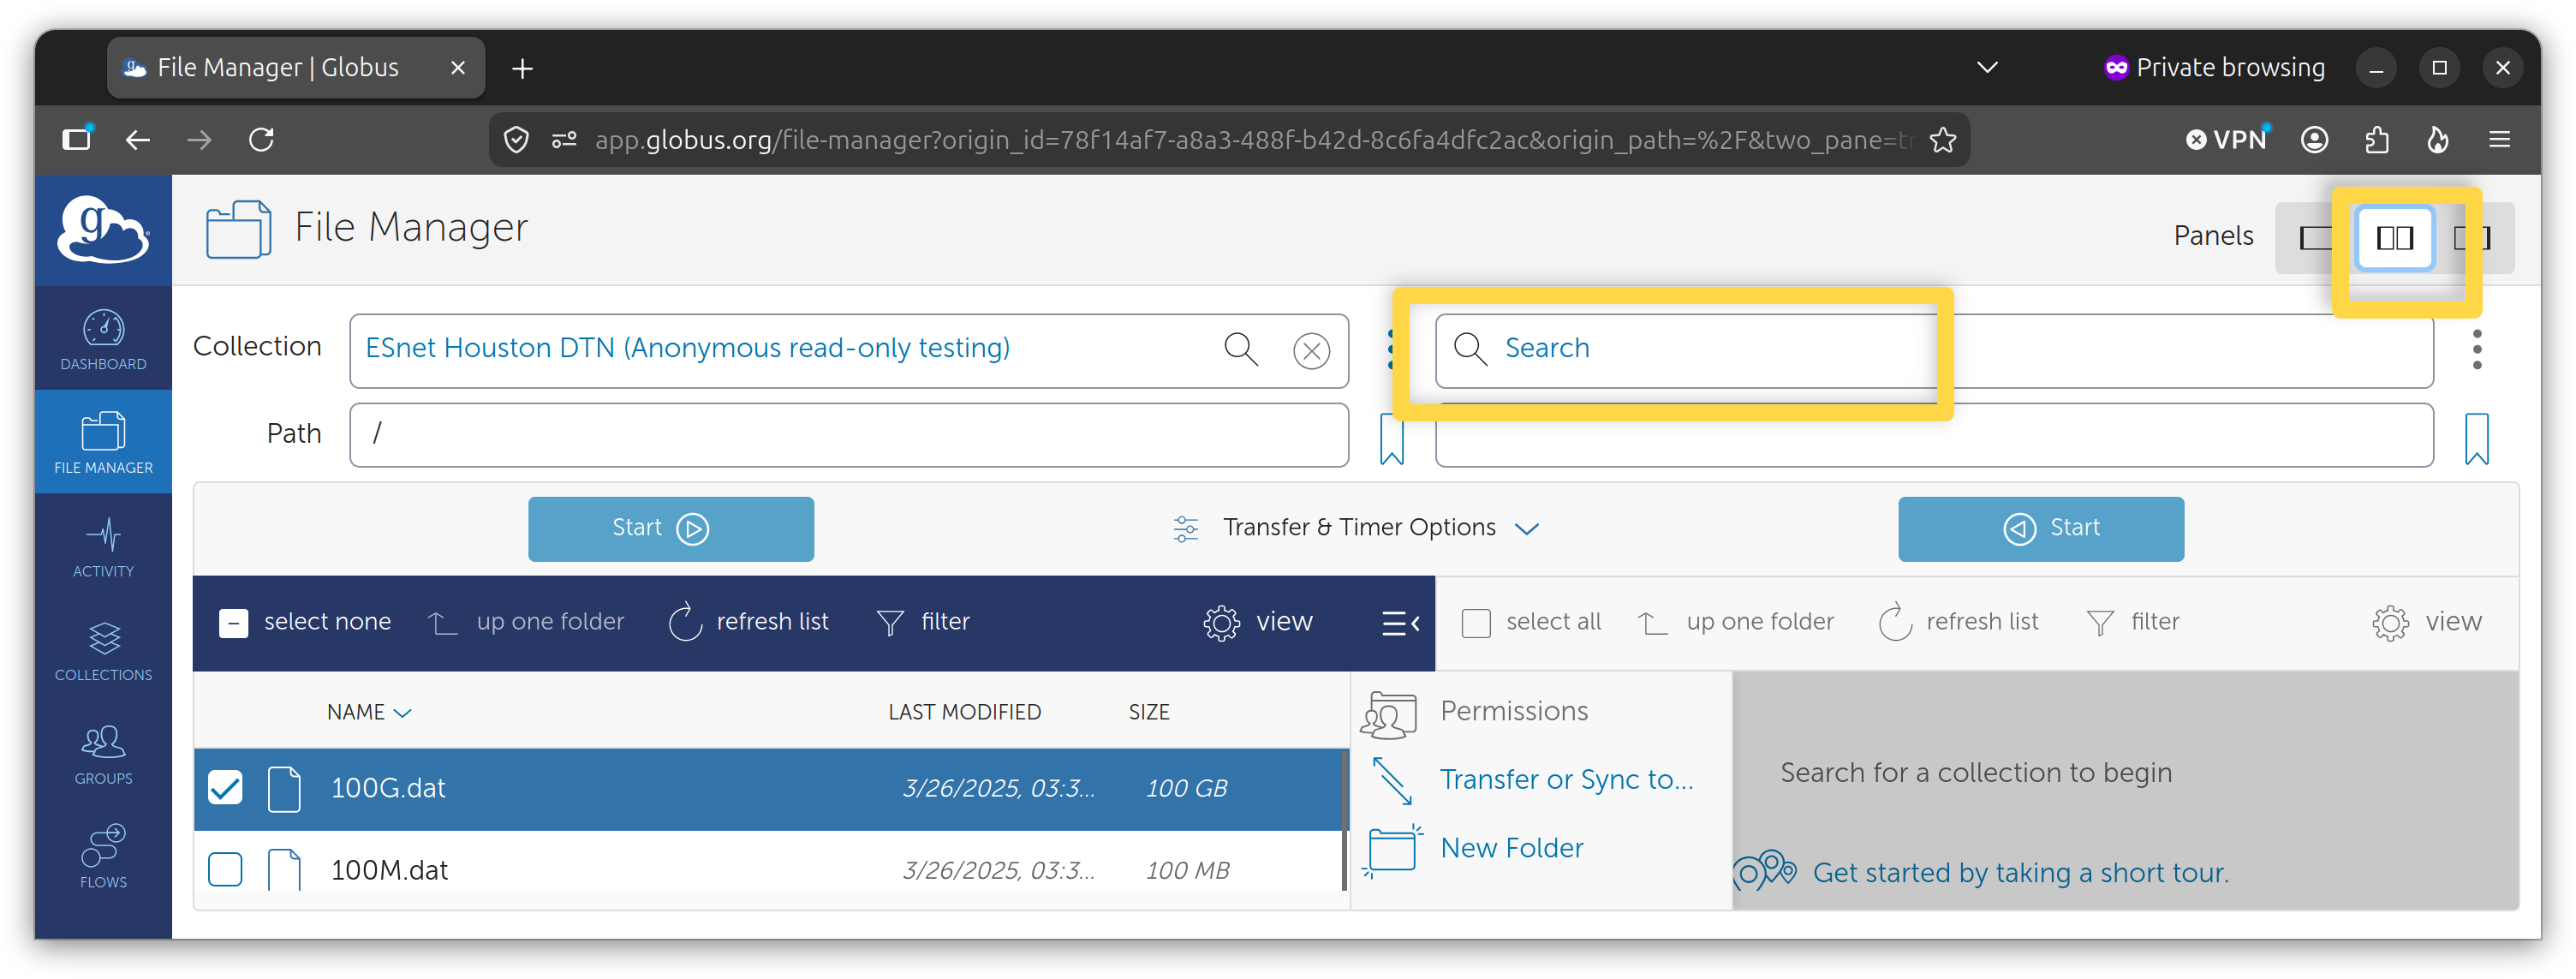
There are several Skipjack endpoints available:
Skipjack JHU Homes
Skipjack JHU Scratch
Skipjack SSCI Scratch
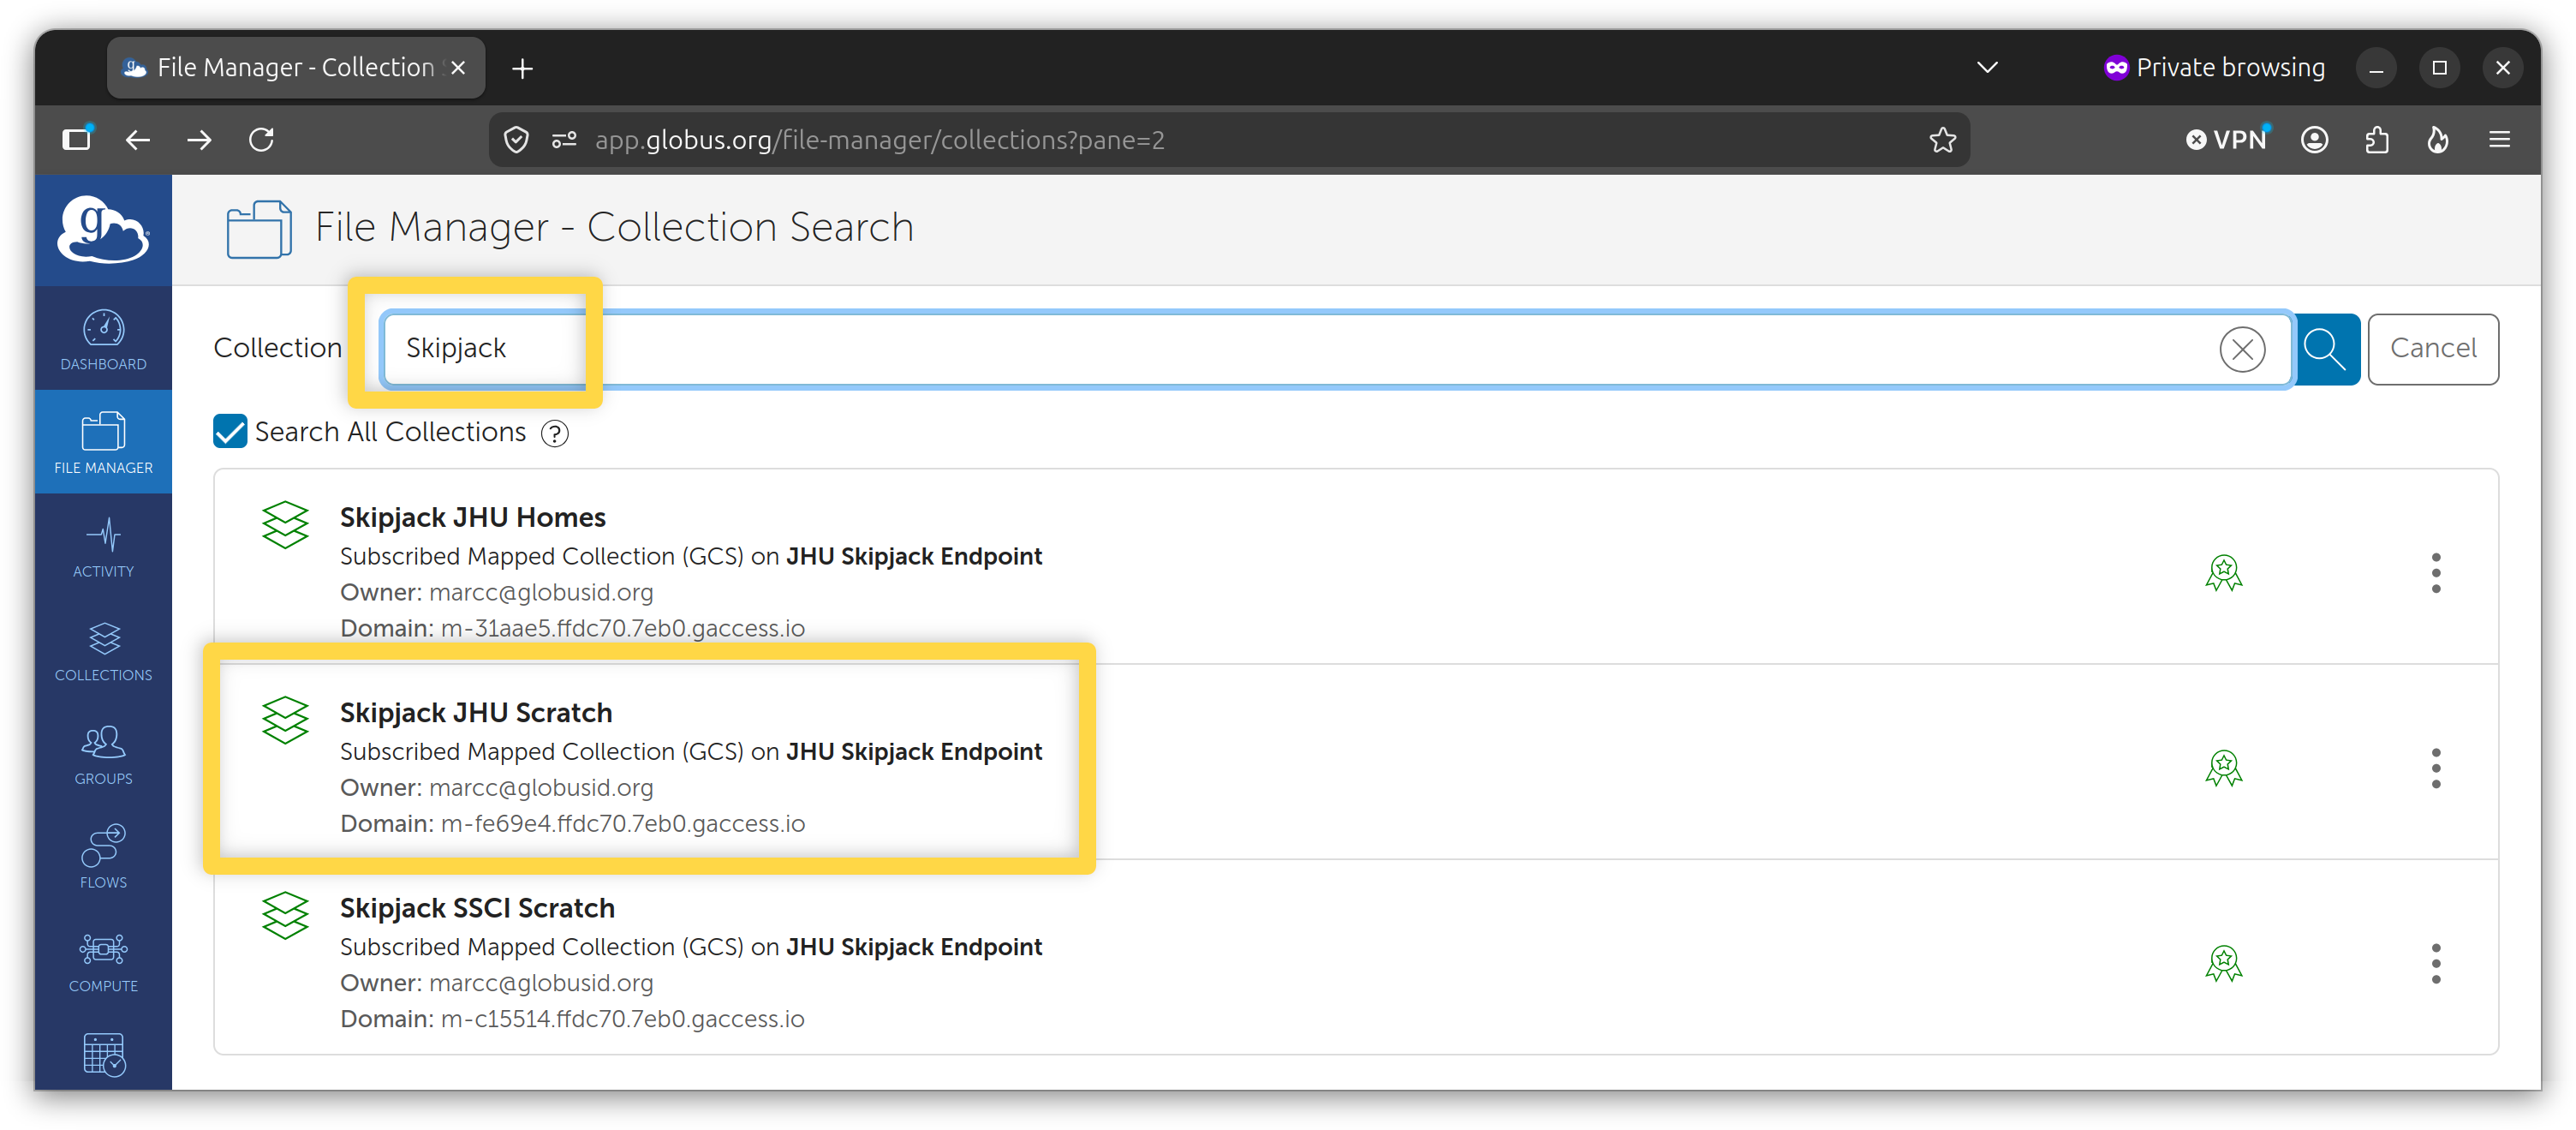
Click the name hyperlink of the desired Skipjack endpoint to set it as your transfer destination.
Authenticate to Allow Access
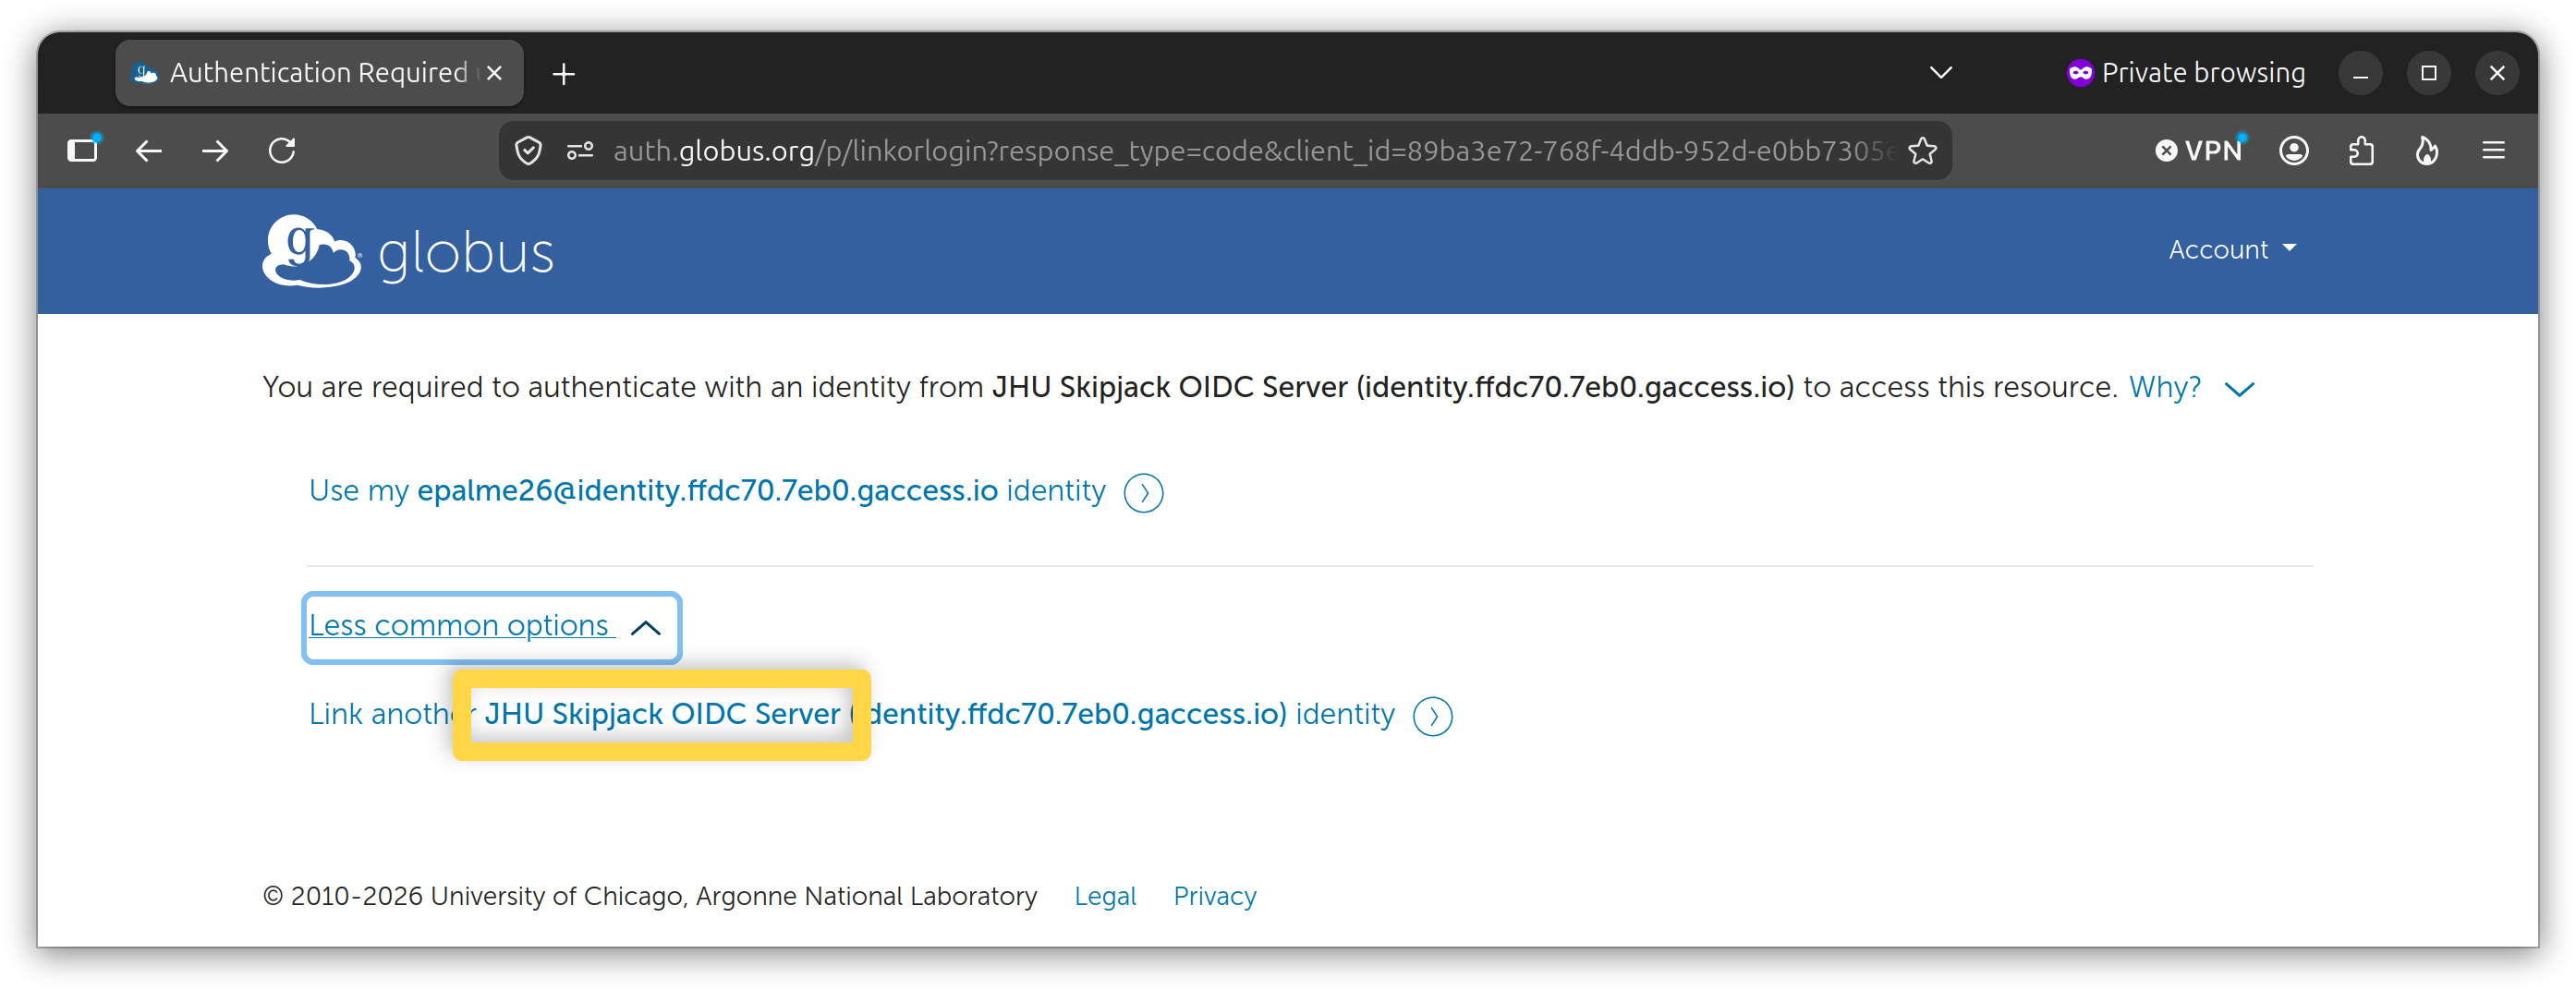
On first access, Globus will ask for consent to access your data. At the prompt, click Continue.
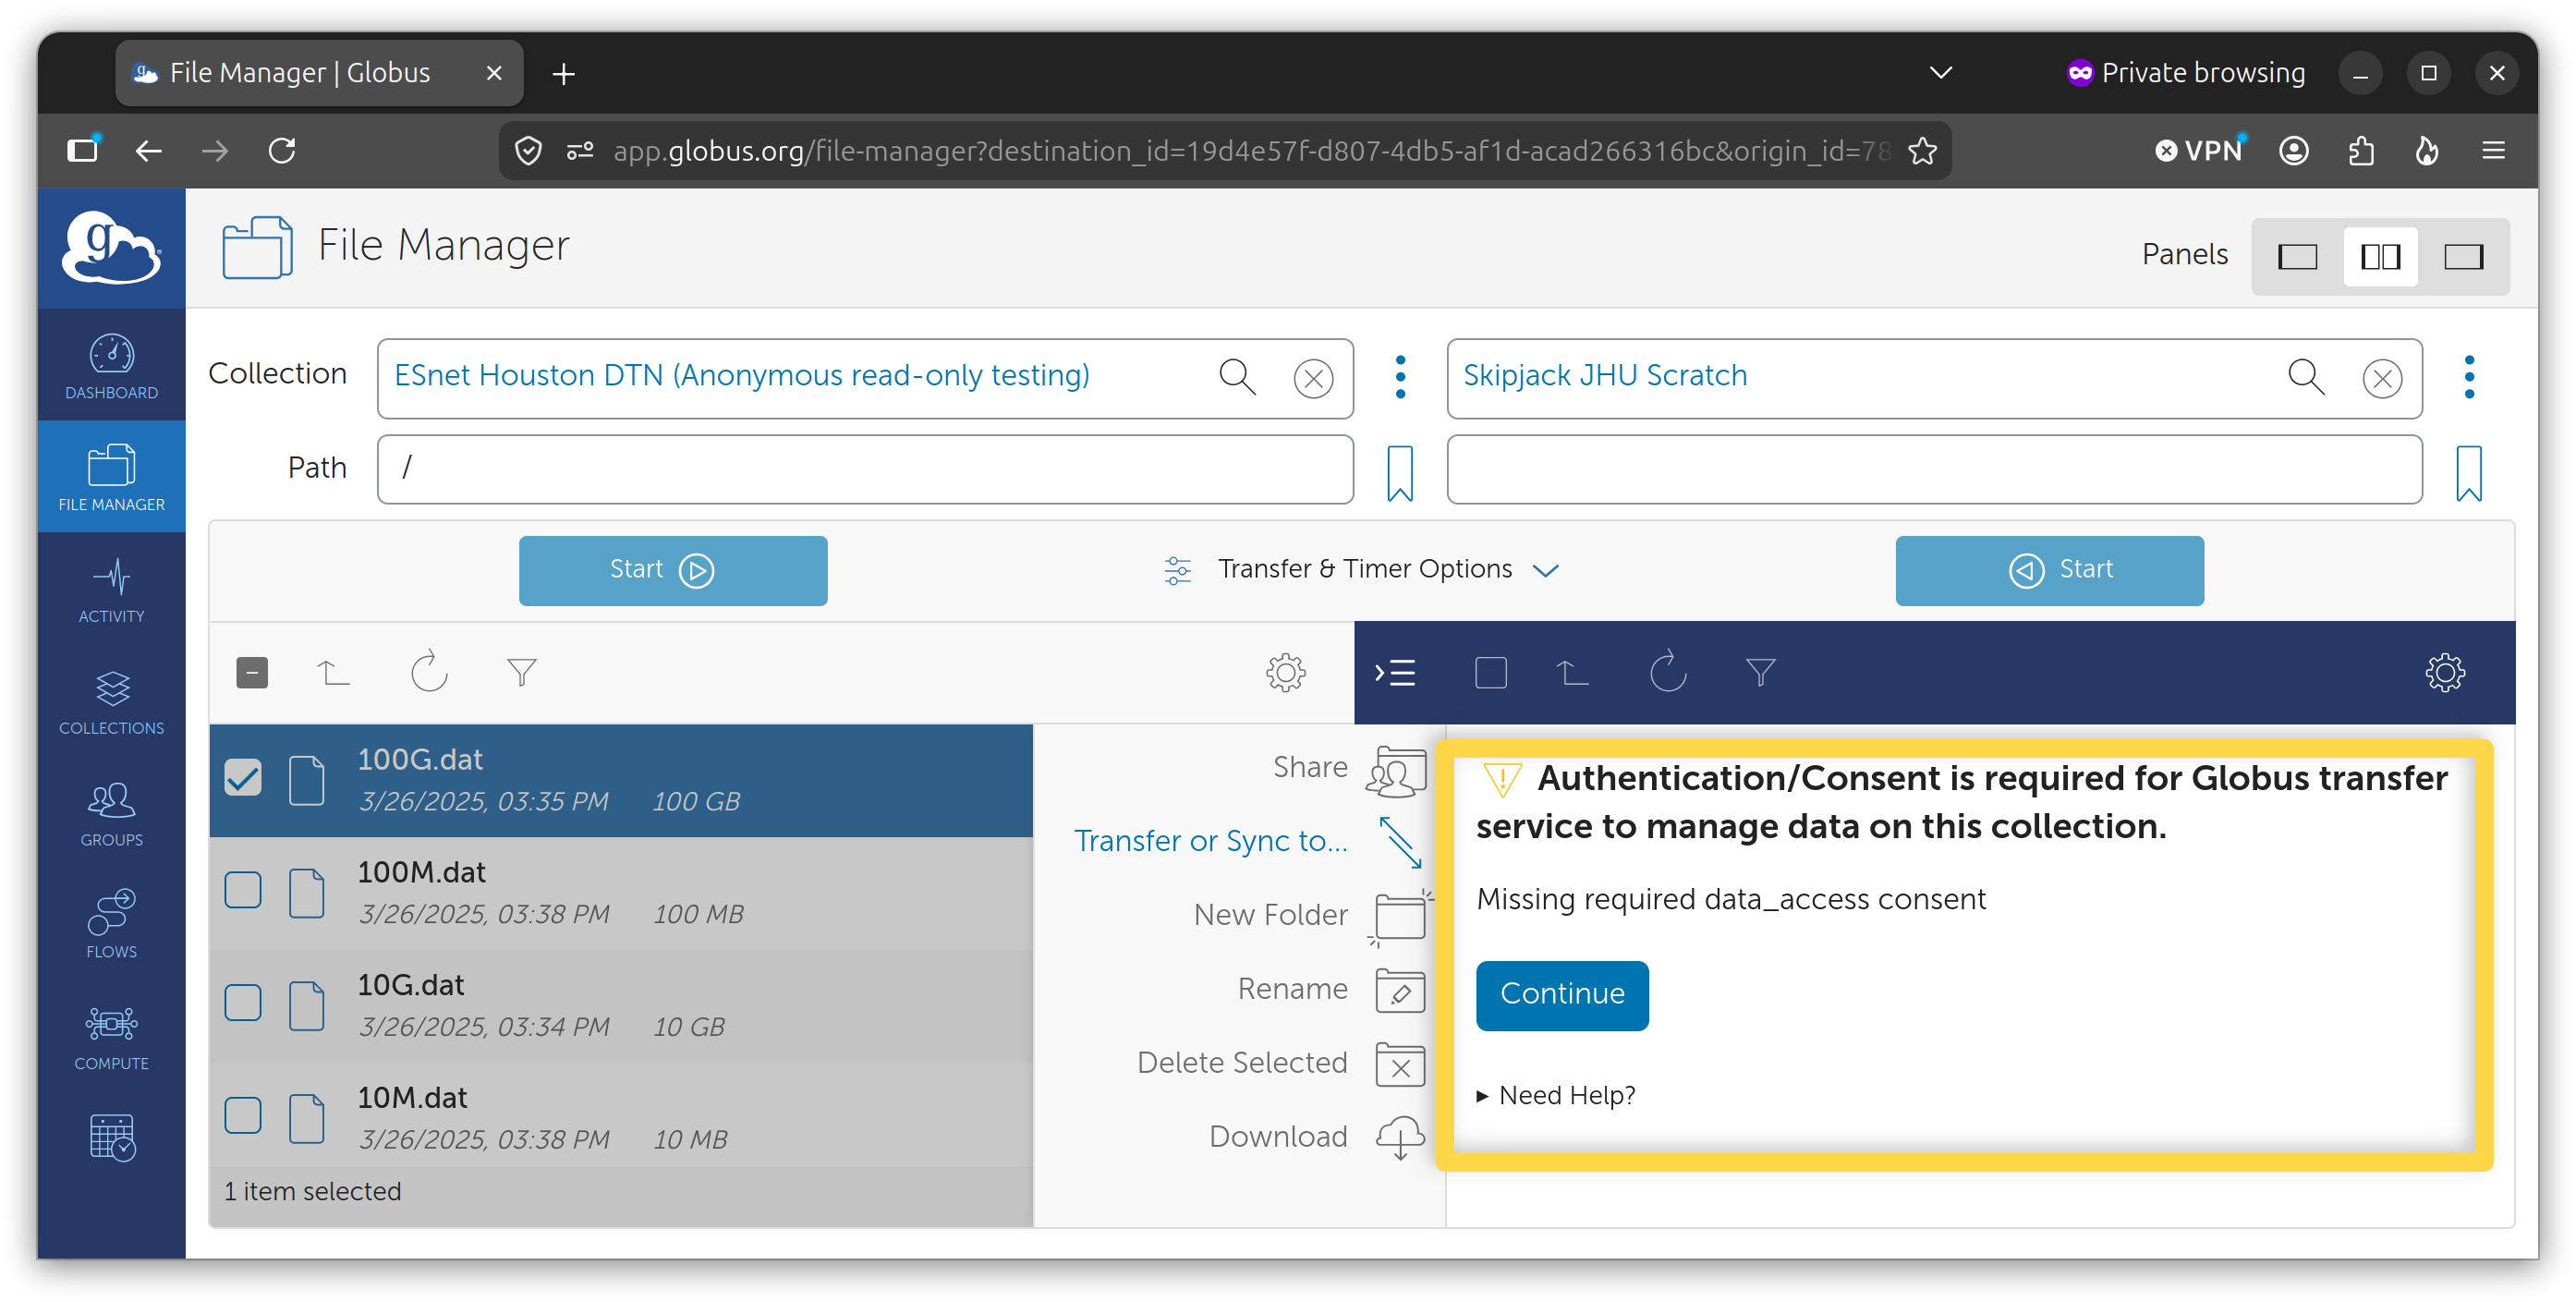
Follow the link JHU Skipjack OIDC Server.
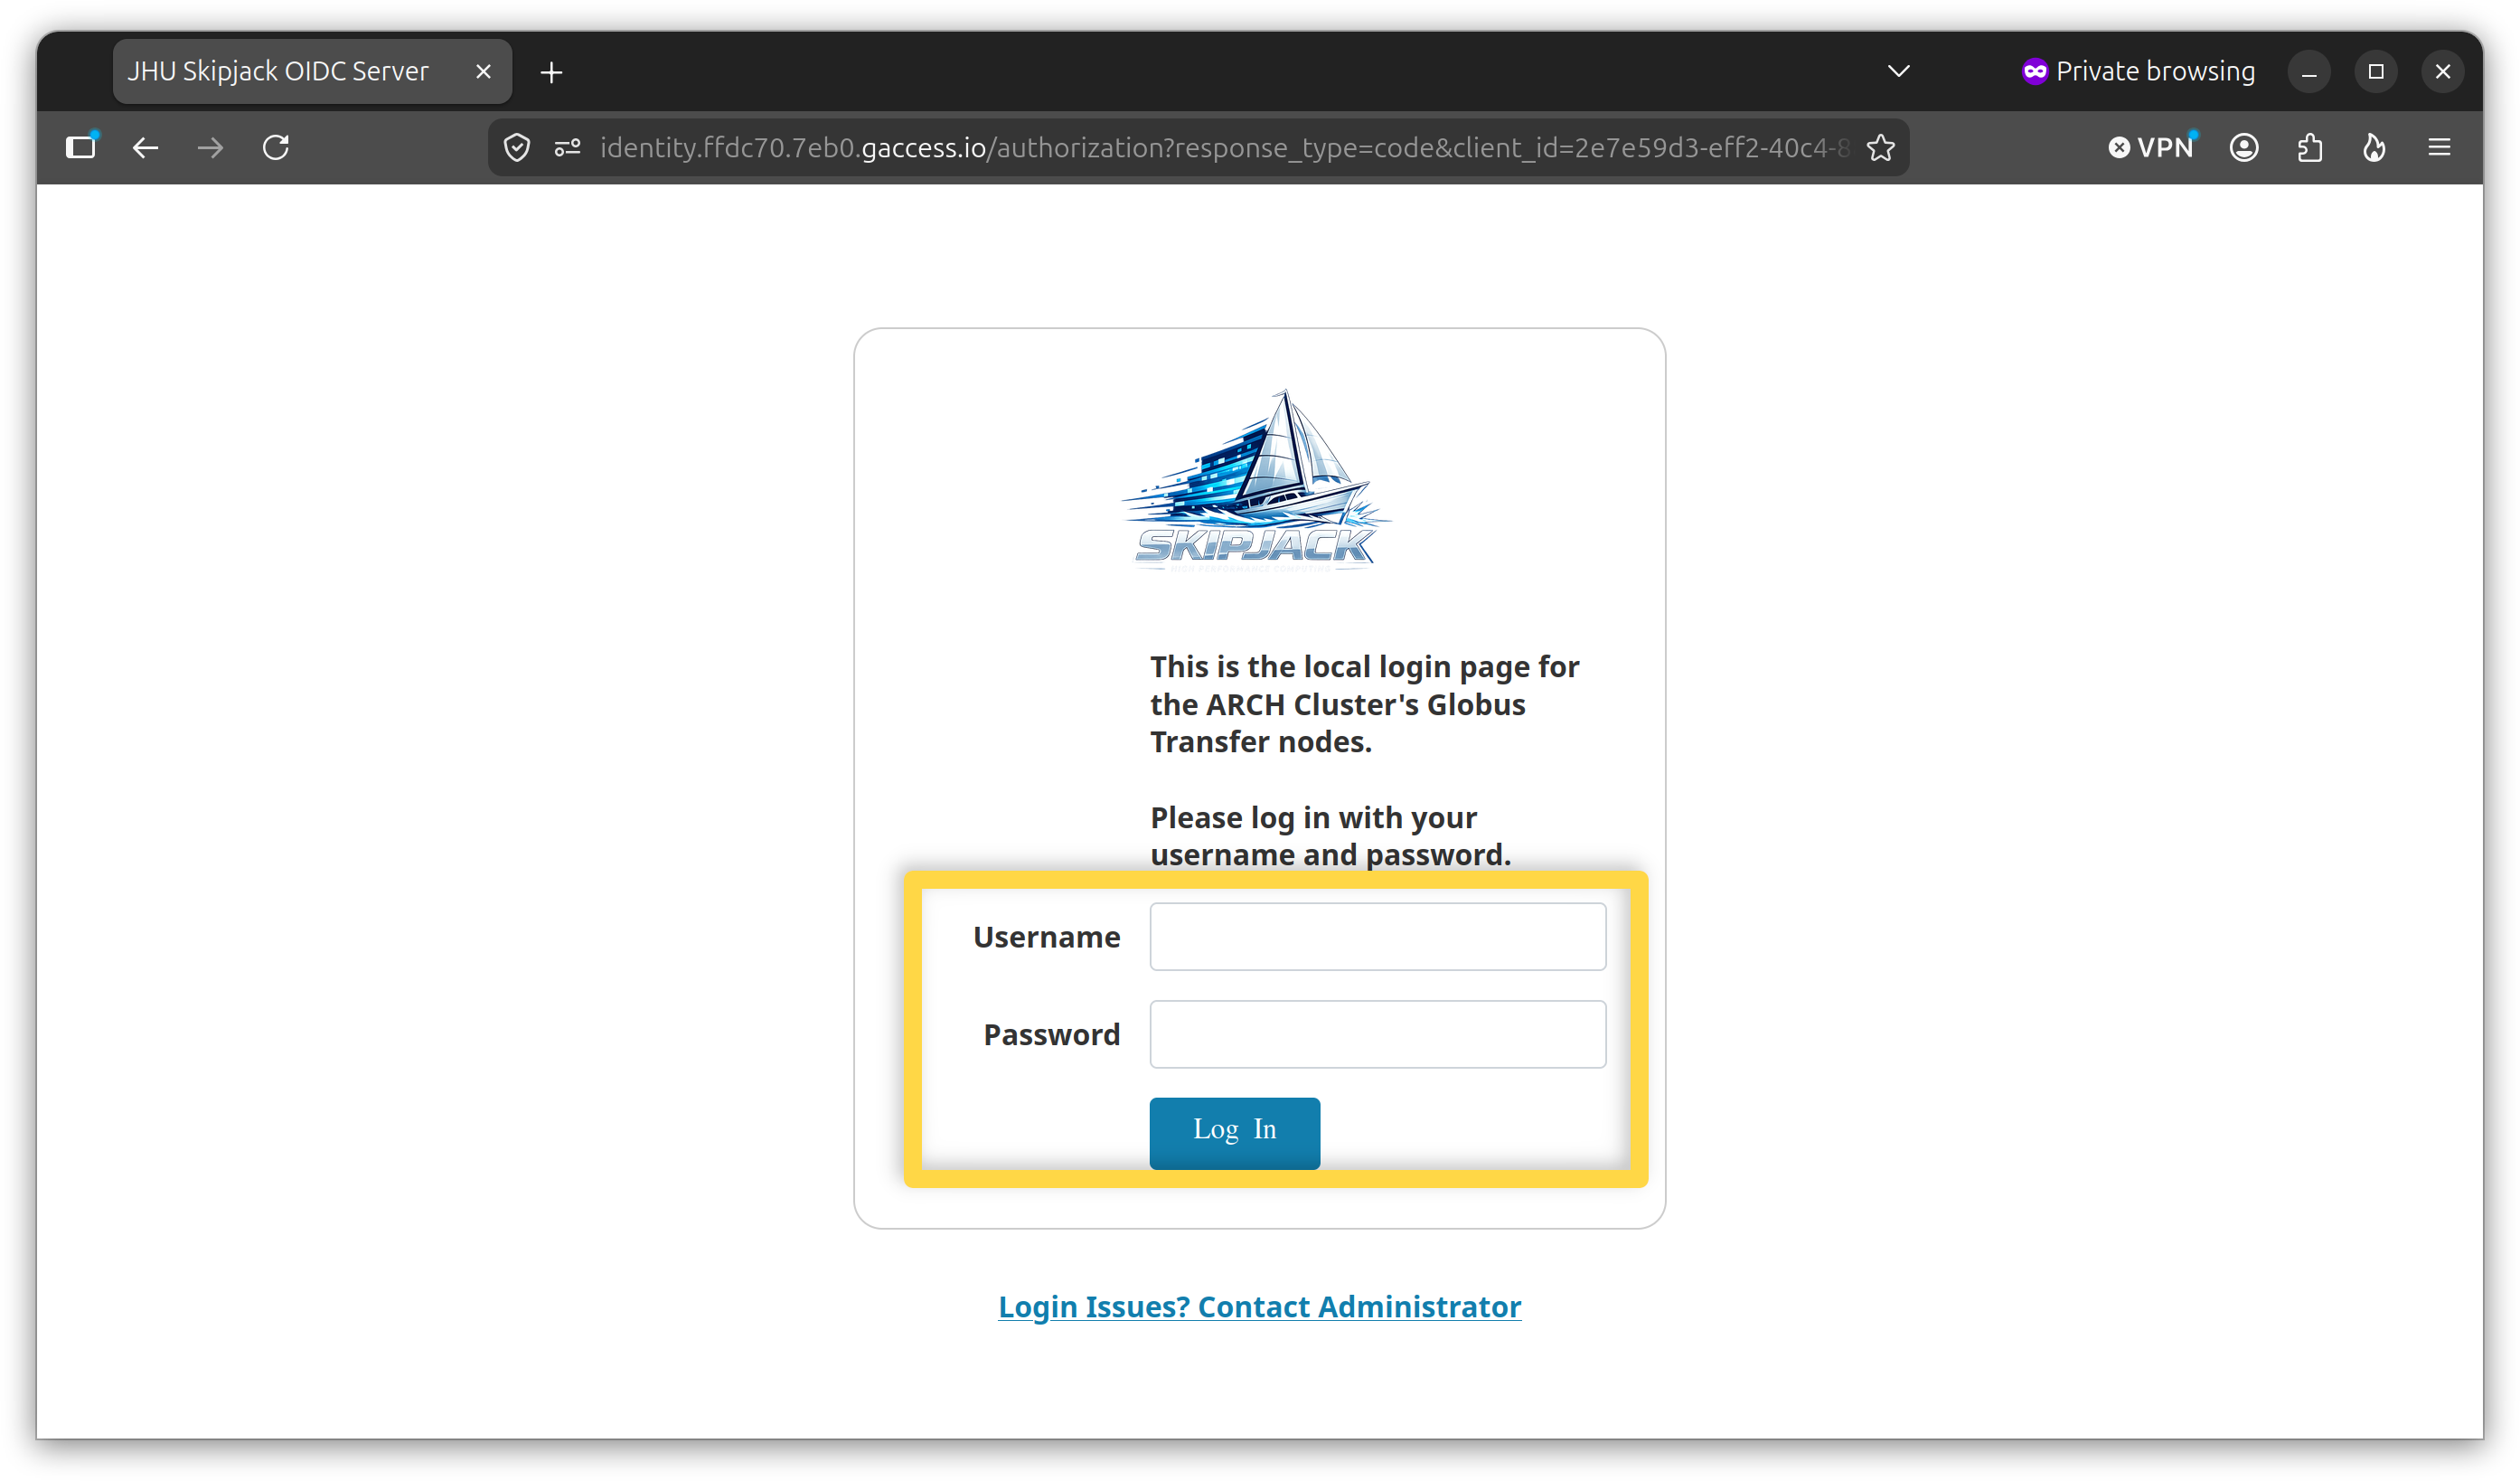
At the prompt, enter your Skipjack username and password (the same SSH credentials used to Connect to the Skipjack Cluster).
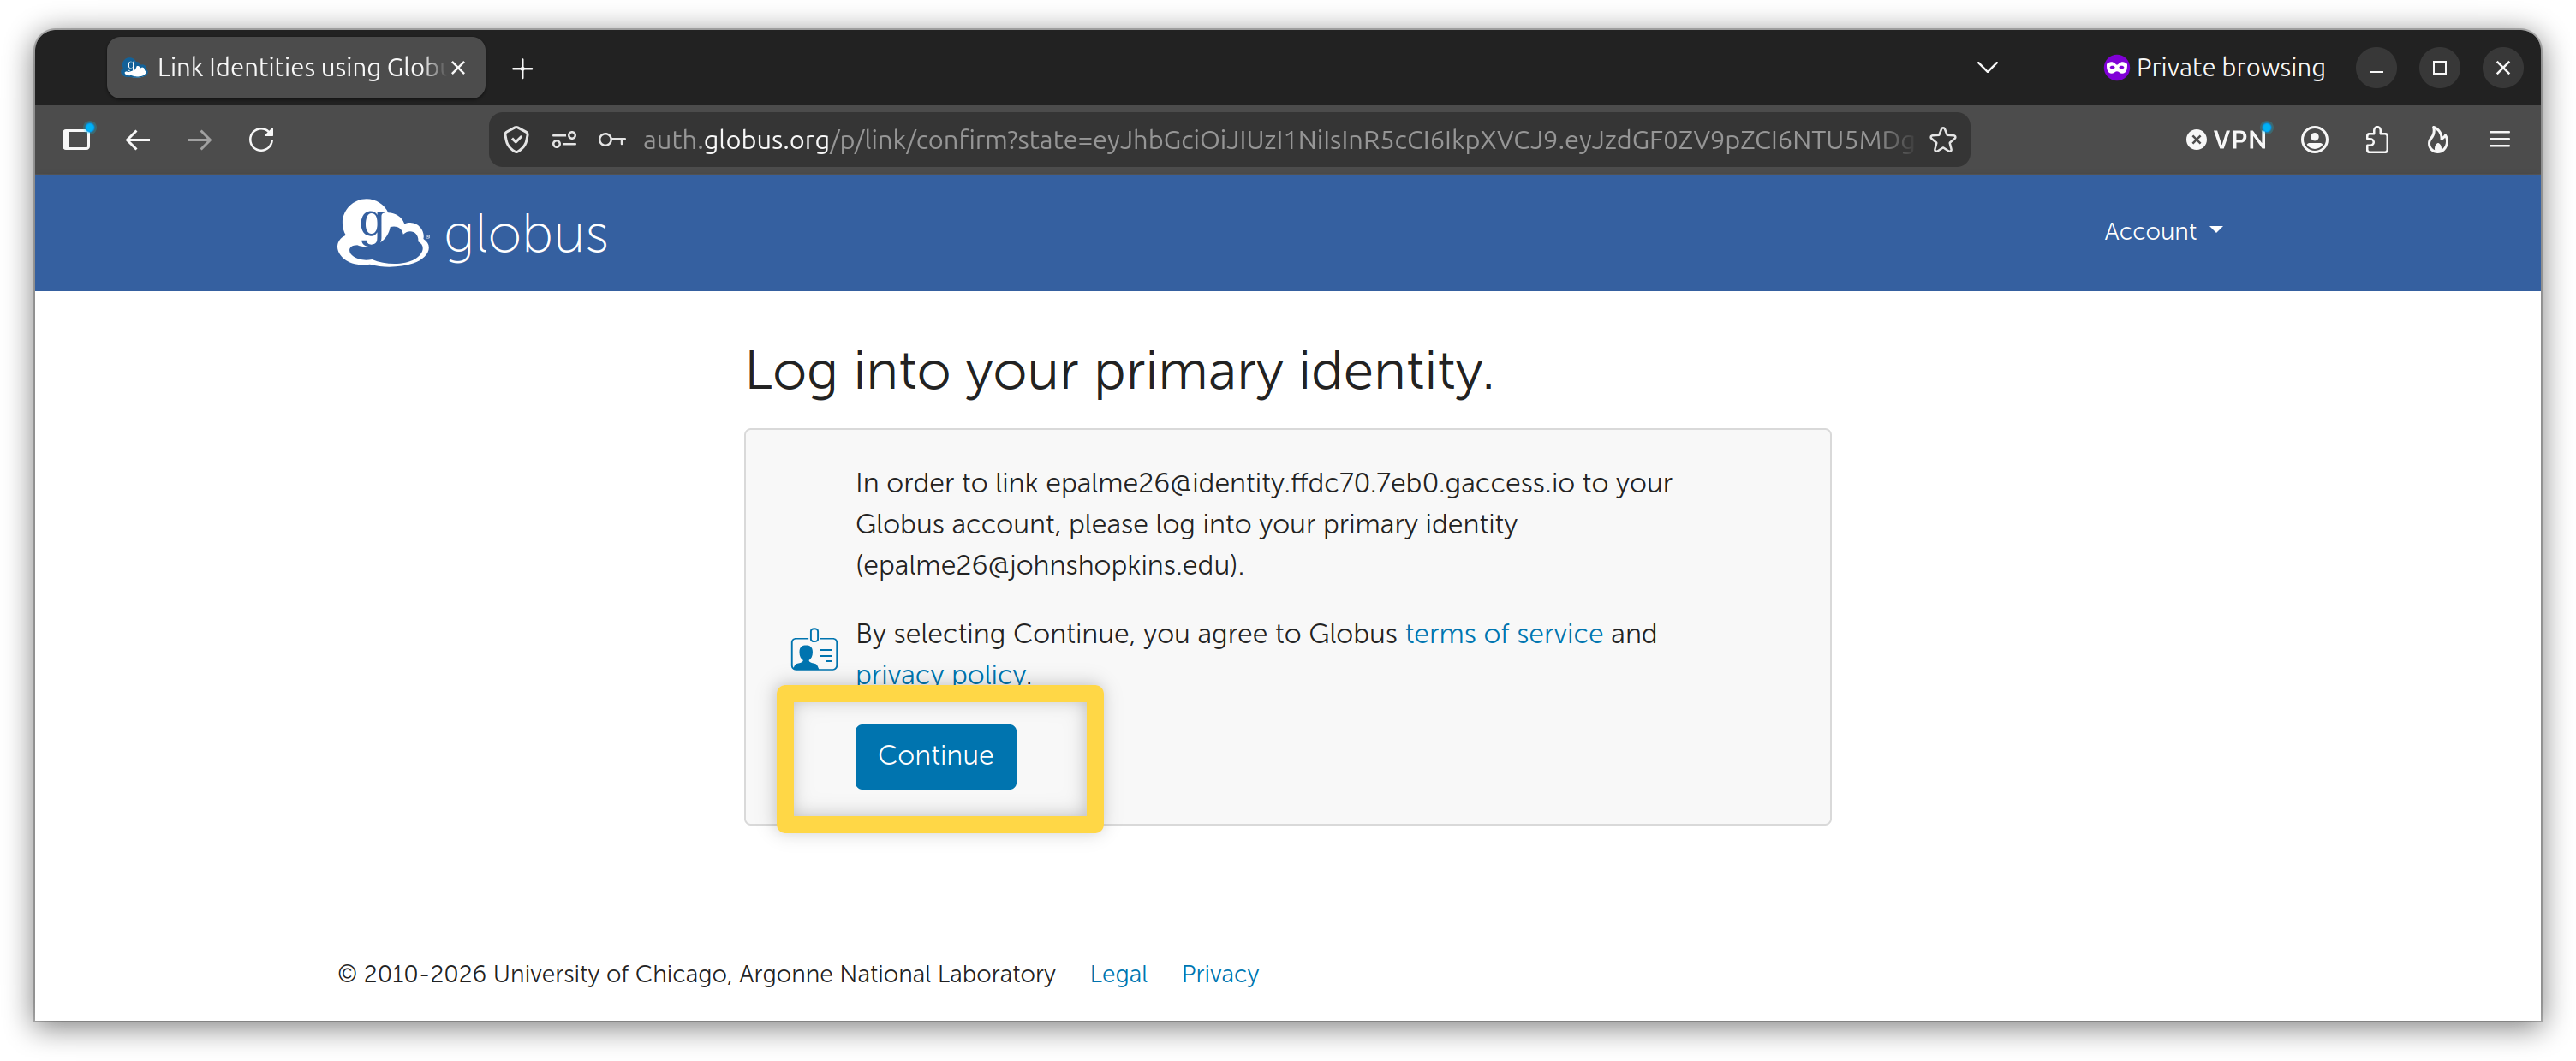
If prompted, log in to your primary identity, click Continue and follow the on-screen prompts to authenticate with your JHED ID.
Allow Globus Web App
Click Allow to allow the Globus Web App to manage your data on Skipjack.
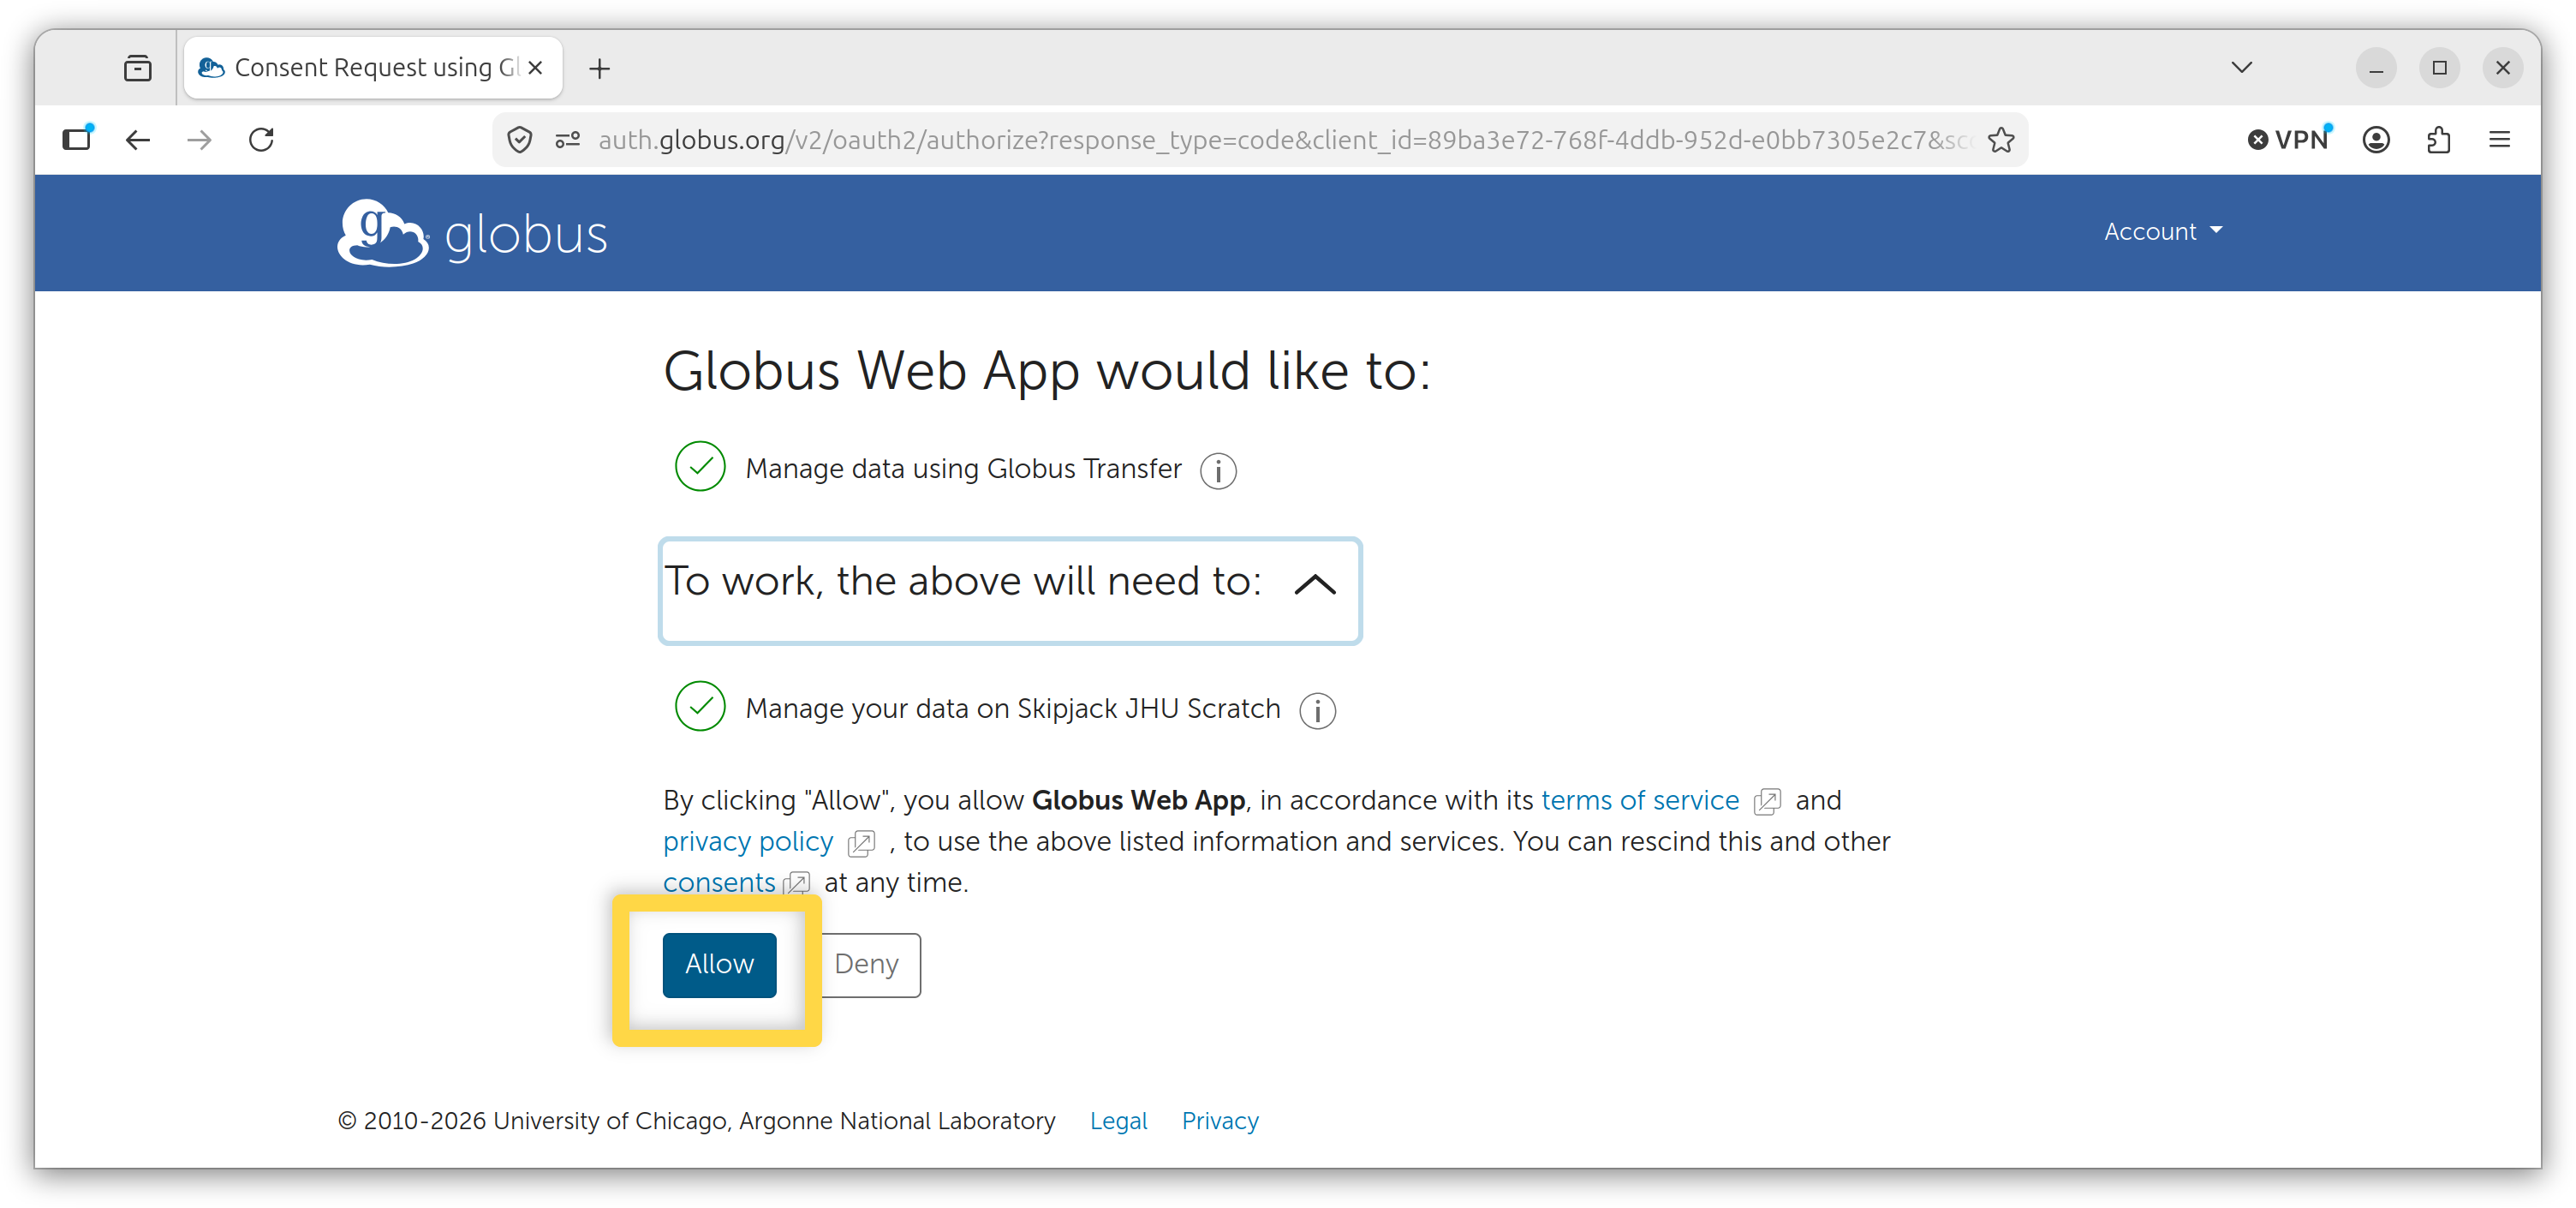
For subsequent file transfers, your permission will be stored.
After allowing access, you will return to the File Manager view. Confirm the endpoints, target directories, and selected files before proceeding.
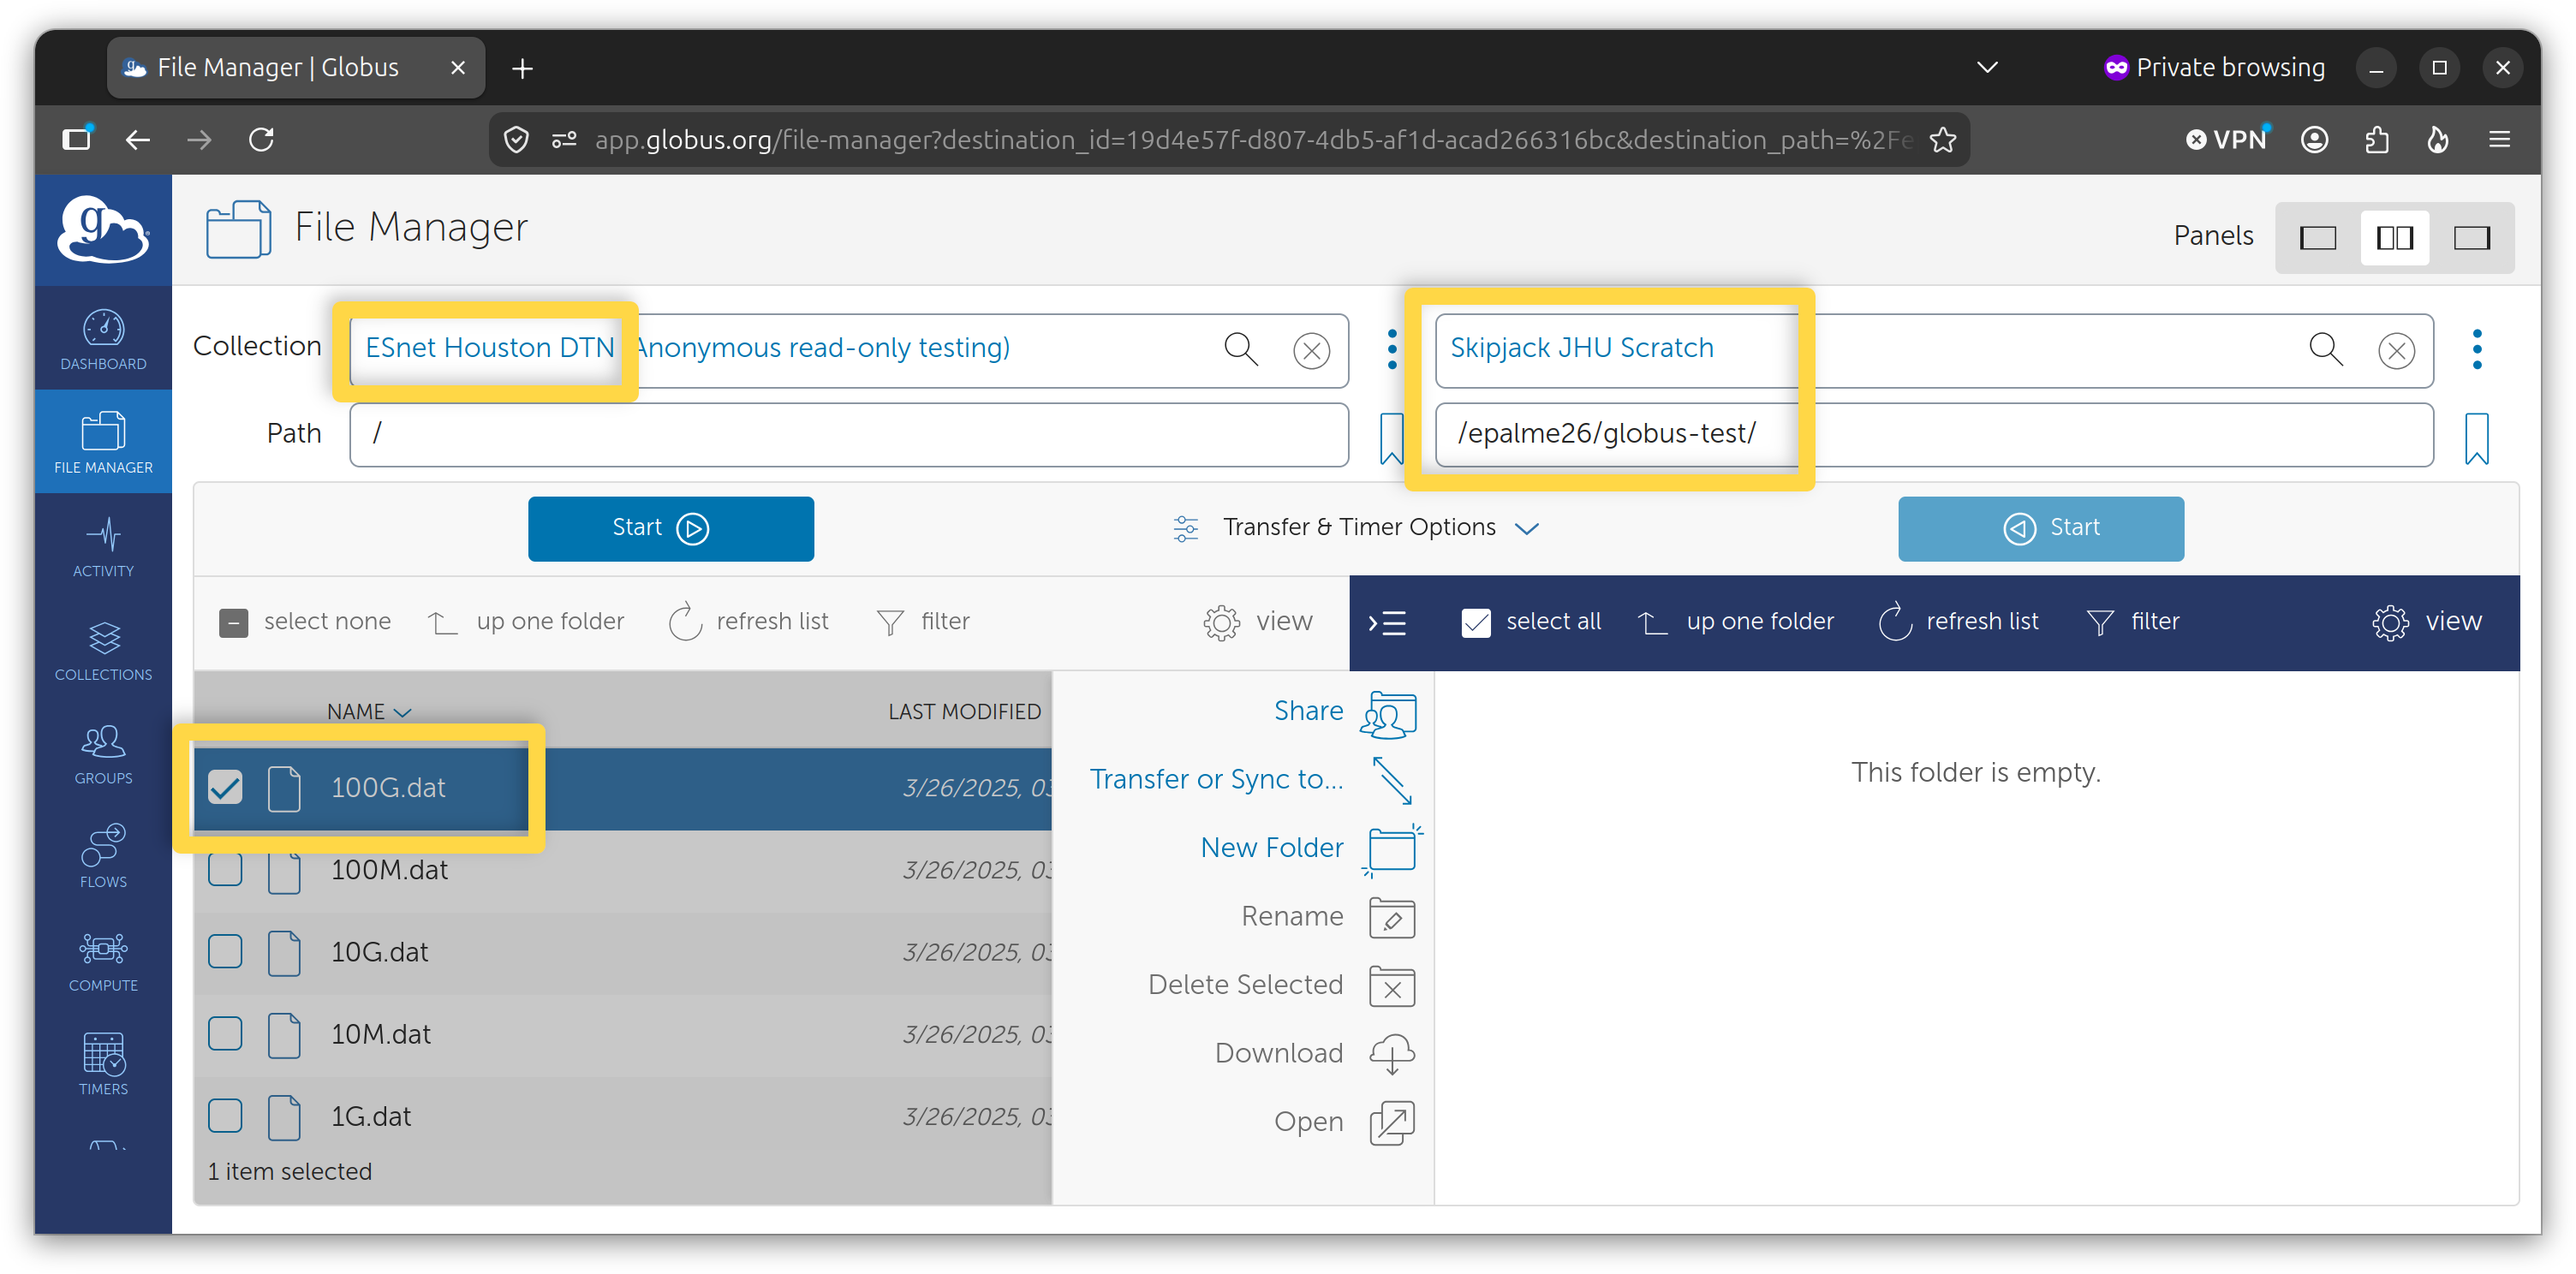
6. Start File Transfer
To transfer files from the endpoint on the left panel, to the endpoint on the right panel, click the Start button in the left panel with the right-pointing arrow.
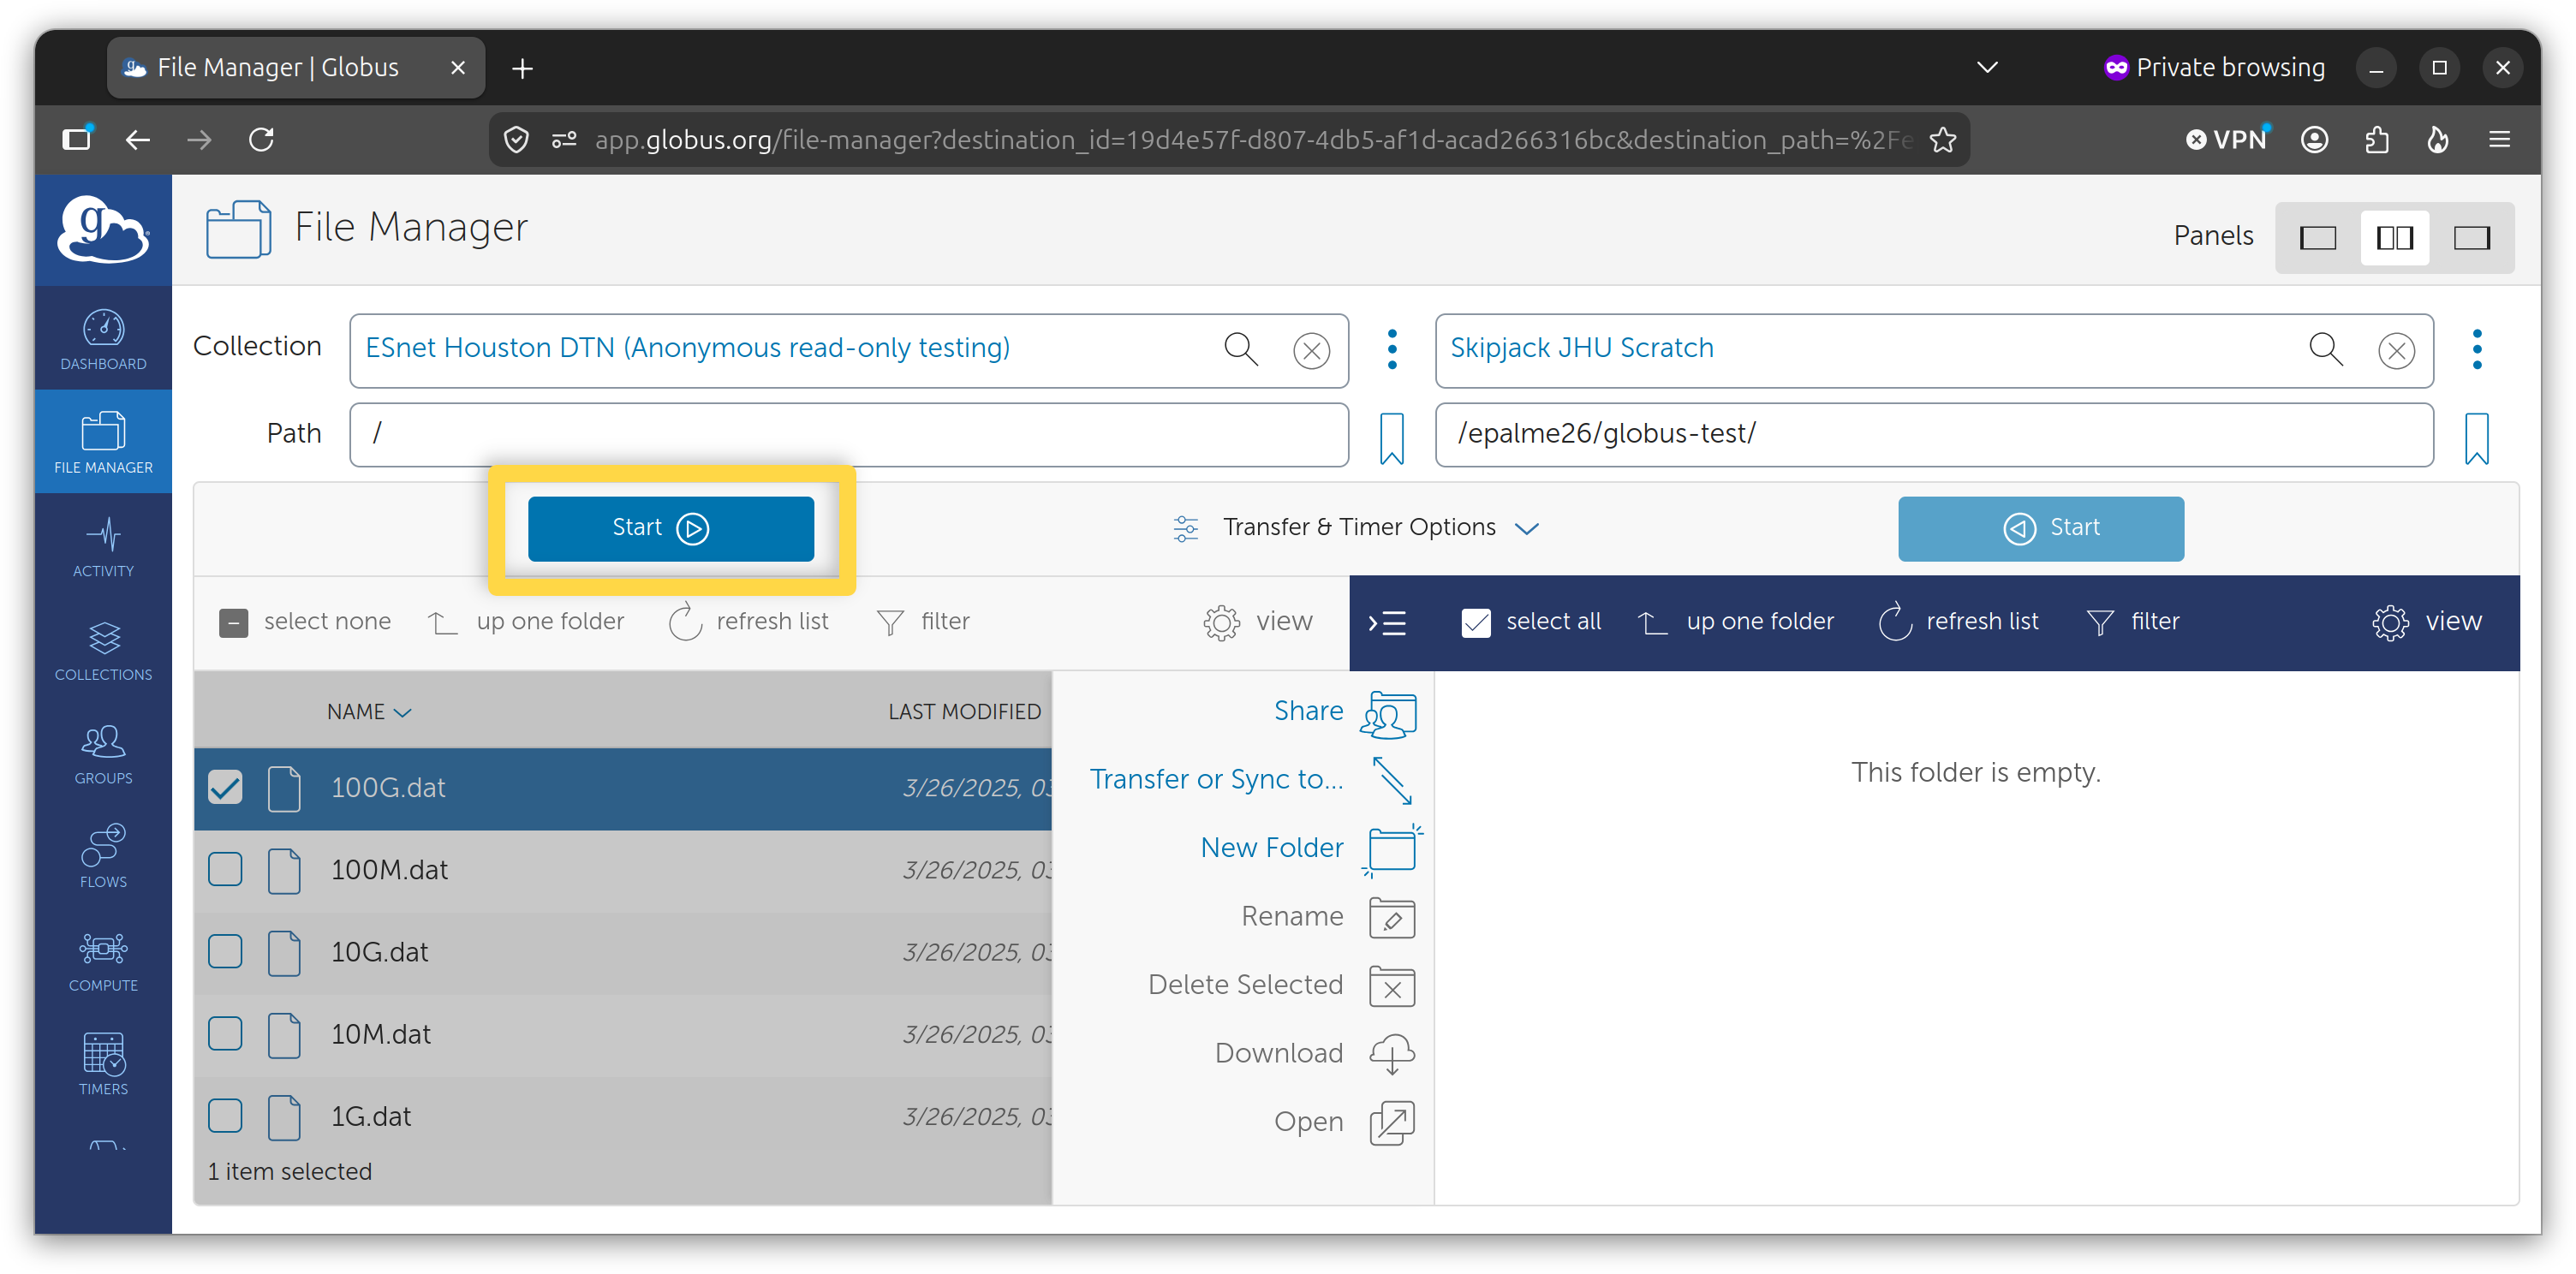
Note
You can transfer files in the opposite direction by selecting files on the right and clicking the Start button in the right panel with the left-pointing arrow.
You can monitor, manage and confirm transfer activity under the Activity tab.
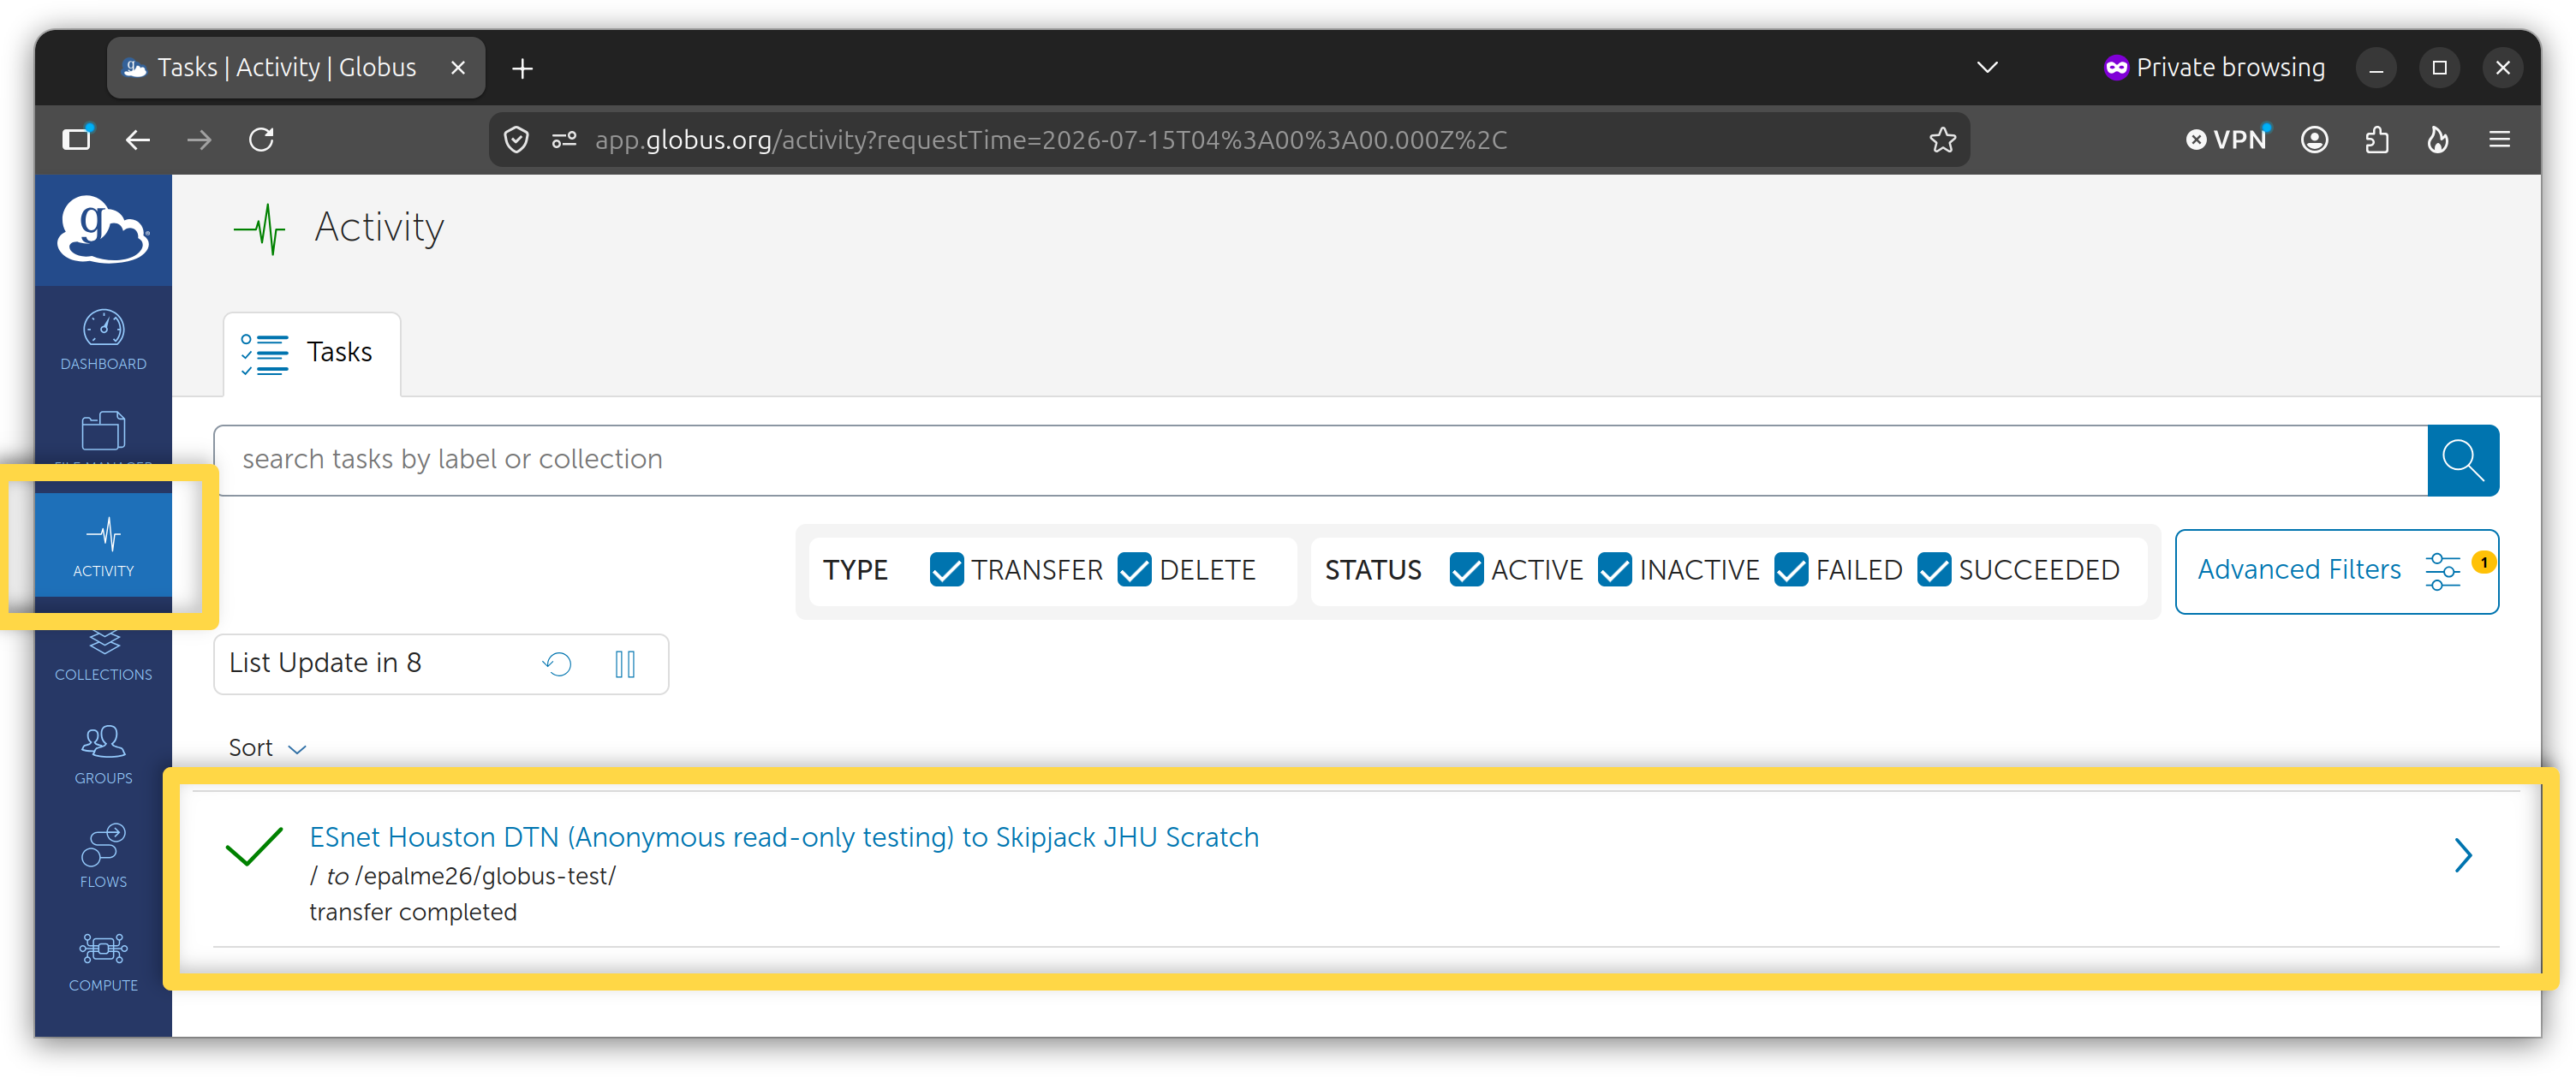
Note
For more file transfer behavior options, click Transfer & Sync Options located in the middle column between the two File Manager panels.
Support
For support, Schmidt Sciences users should email help@schmidtsciences.jhu.edu.
All other users, please email help@arch.jhu.edu.
Principal Investigators
Request Account Upgrade to PI
Note
This section is for Principal Investigators actively conducting research with Skipjack.
Principal Investigators (PI) on Skipjack can request to have their account upgraded to PI status. Requests are reviewed by staff. When an account is upgraded from User to PI, a default project is created and associated with the requesting PI.
To request an account upgrade to PI:
In the Arch Portal, click on the dropdown menu in the upper right next to the username and icon. Select My Profile.
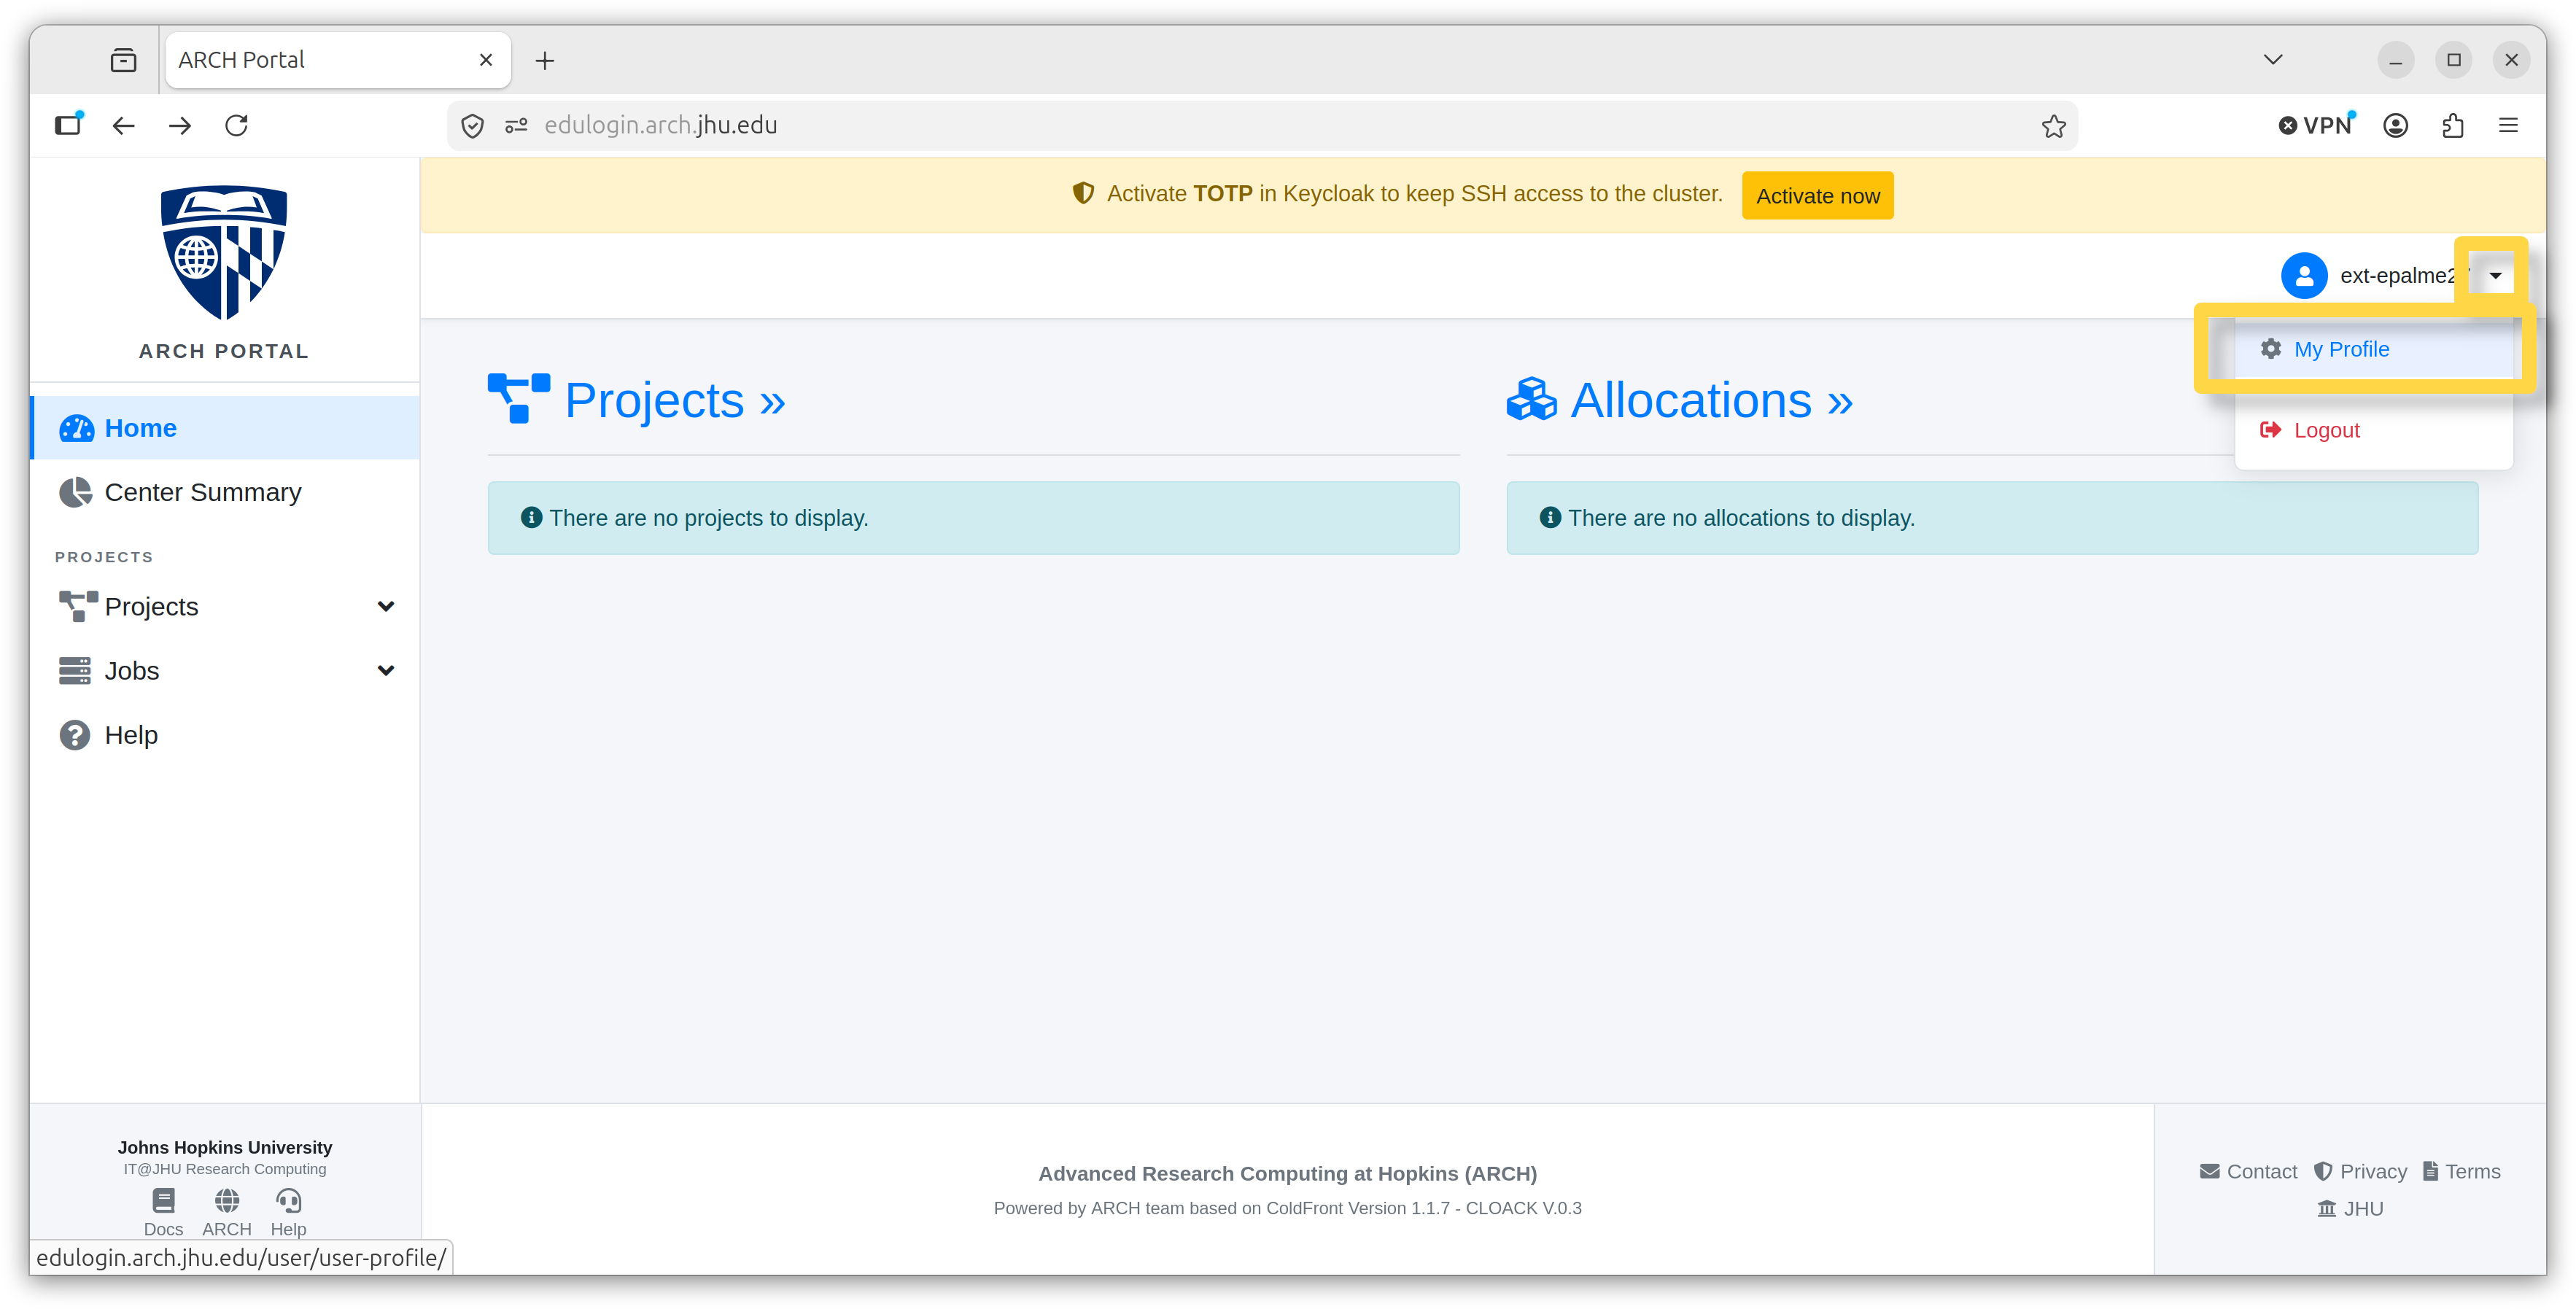
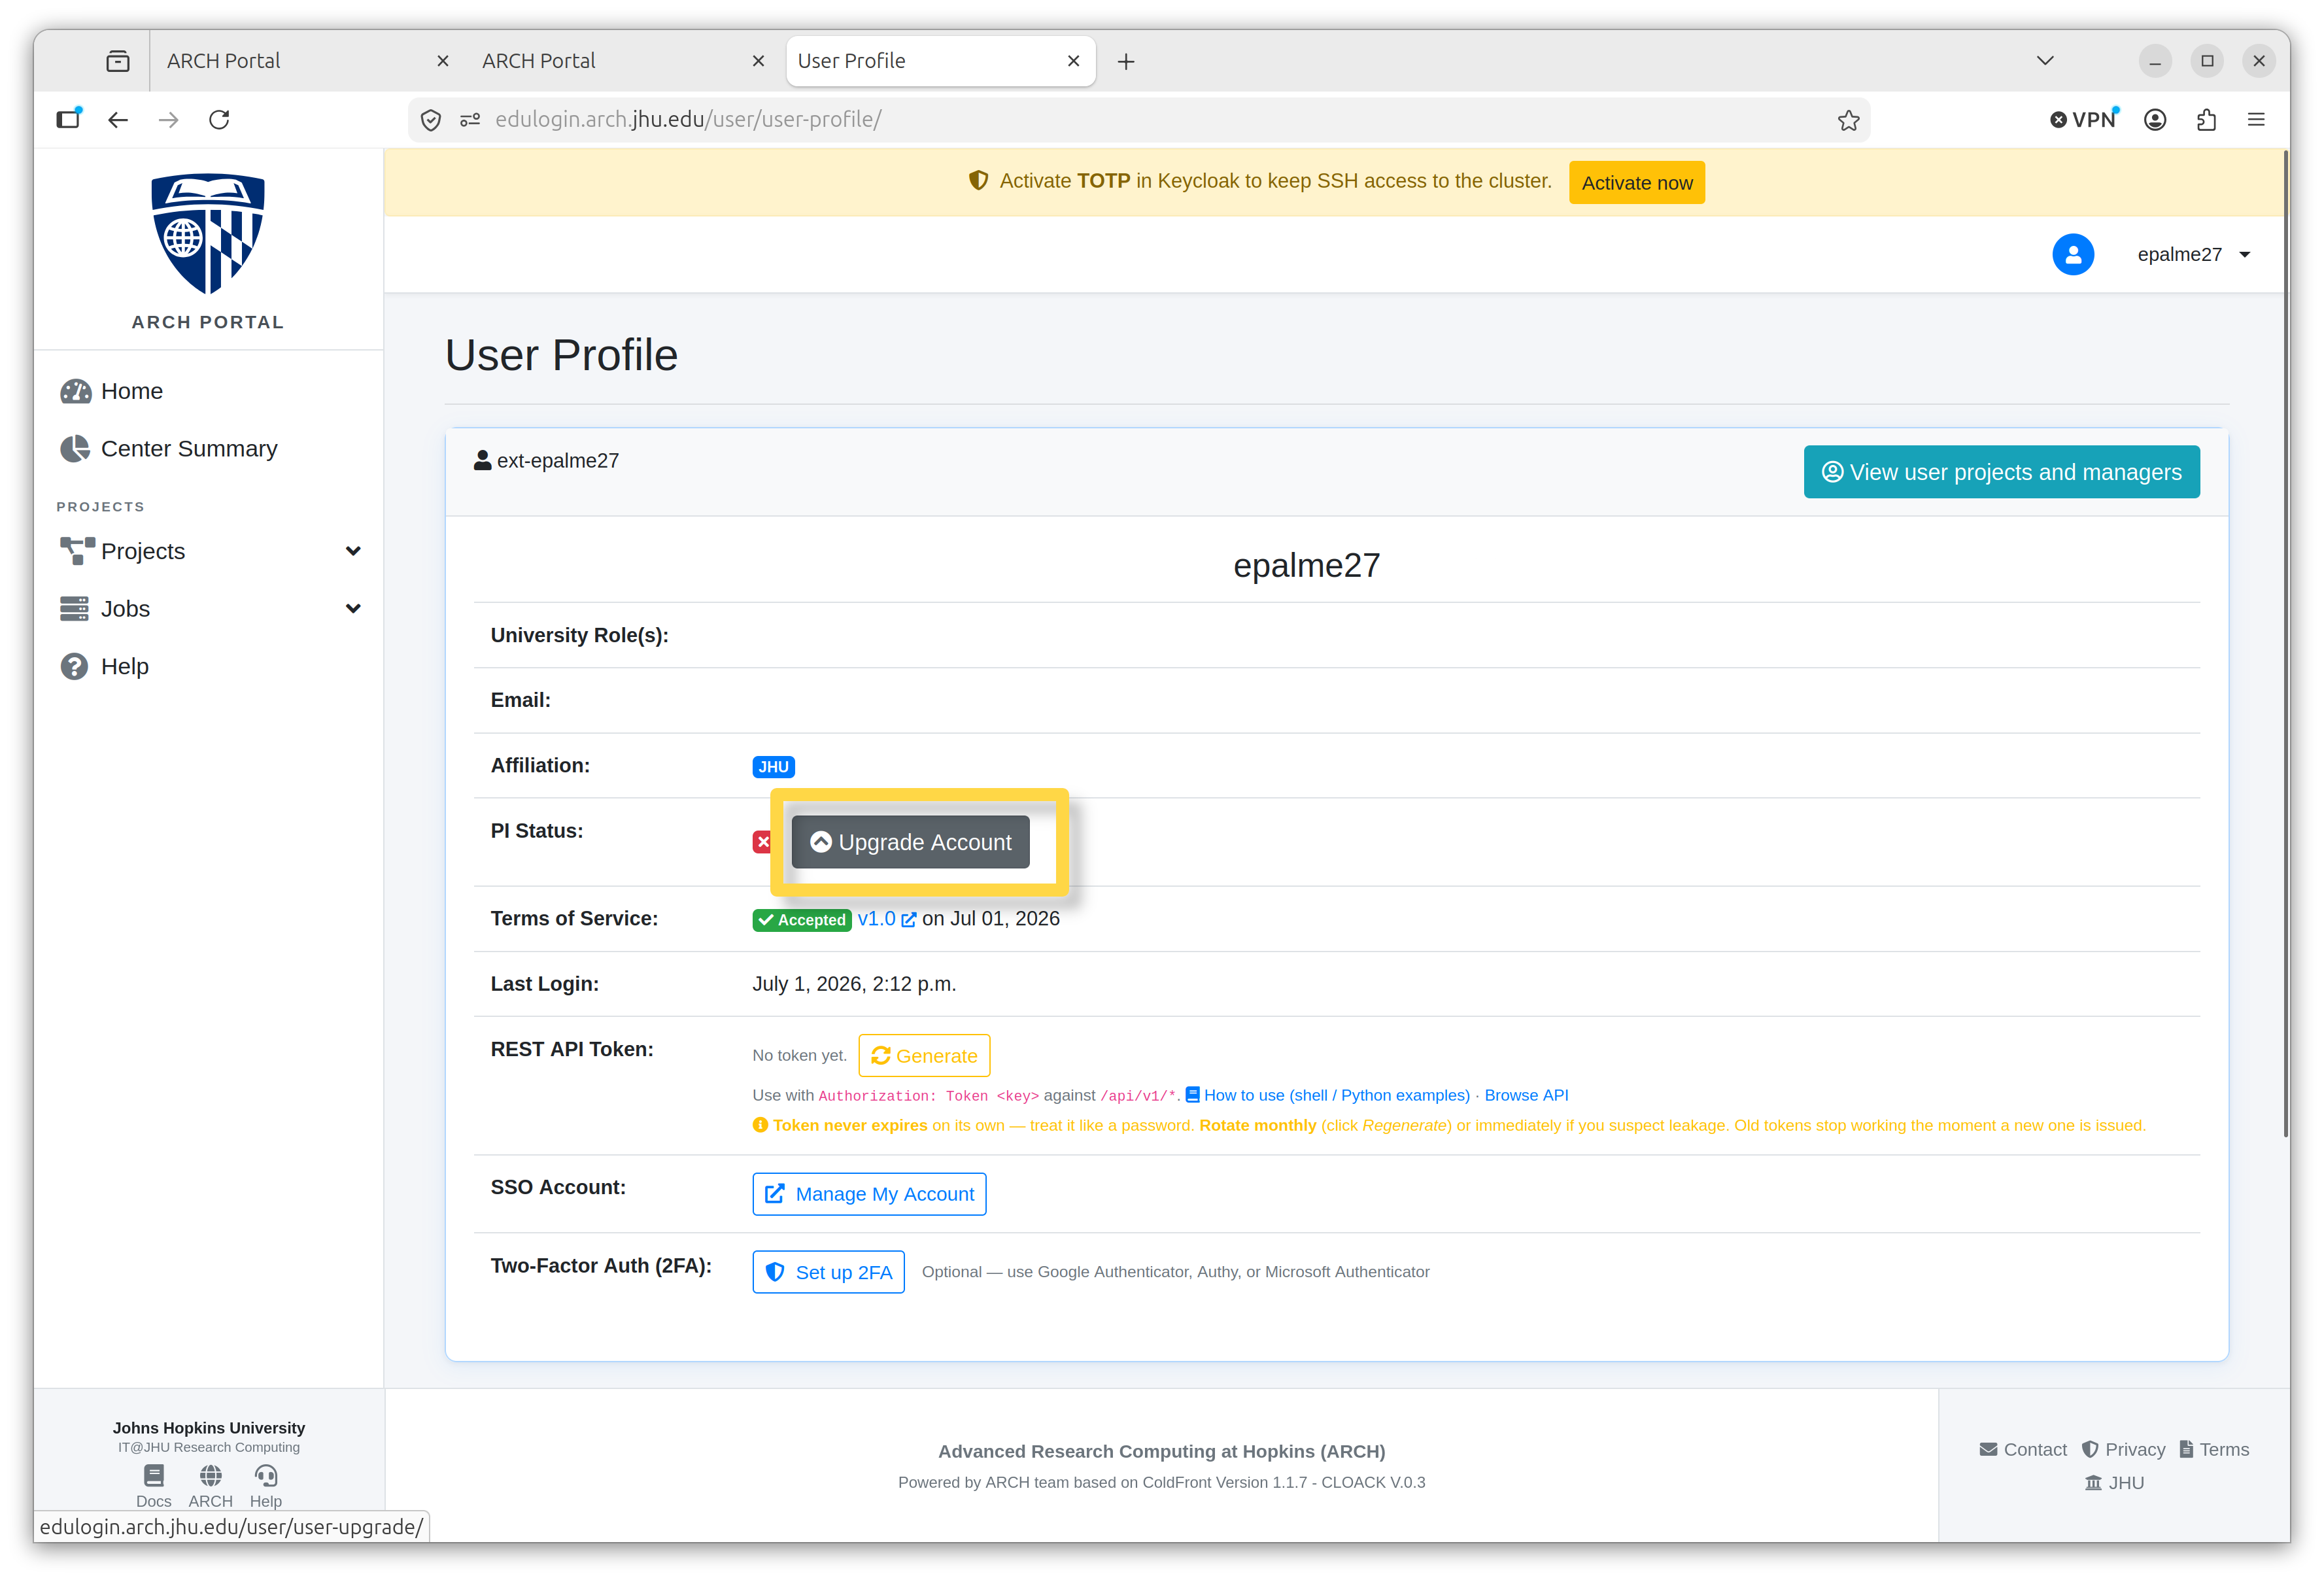
Click on the grey Upgrade Account button.
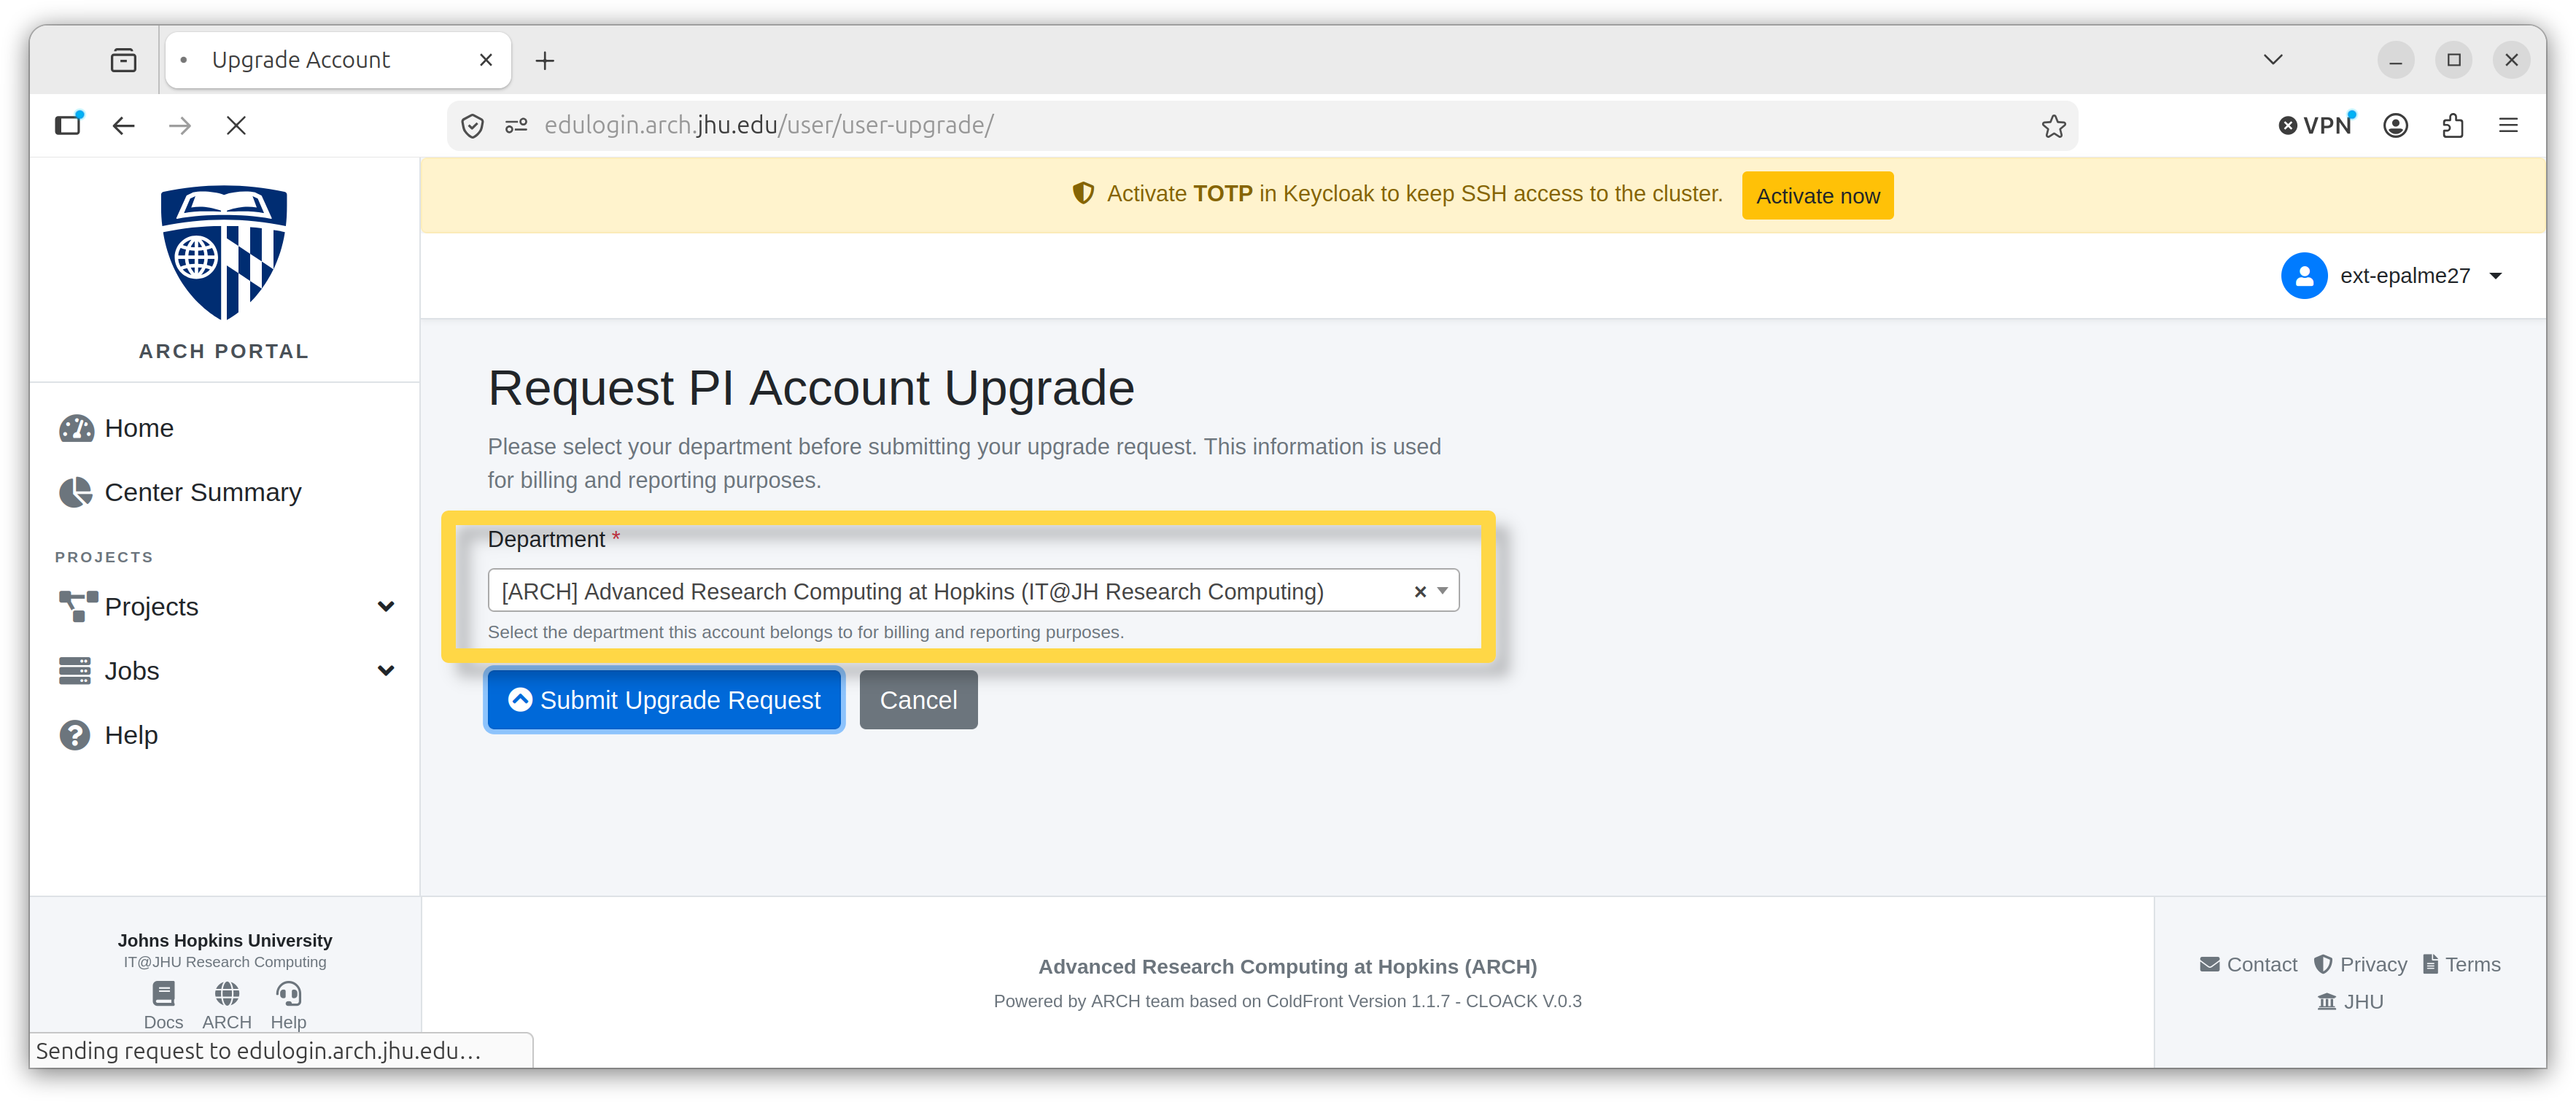
Select a department from the dropdown menu and click Submit Upgrade Request.
Once the request is submitted, a confirmation banner will appear at the top of the page.
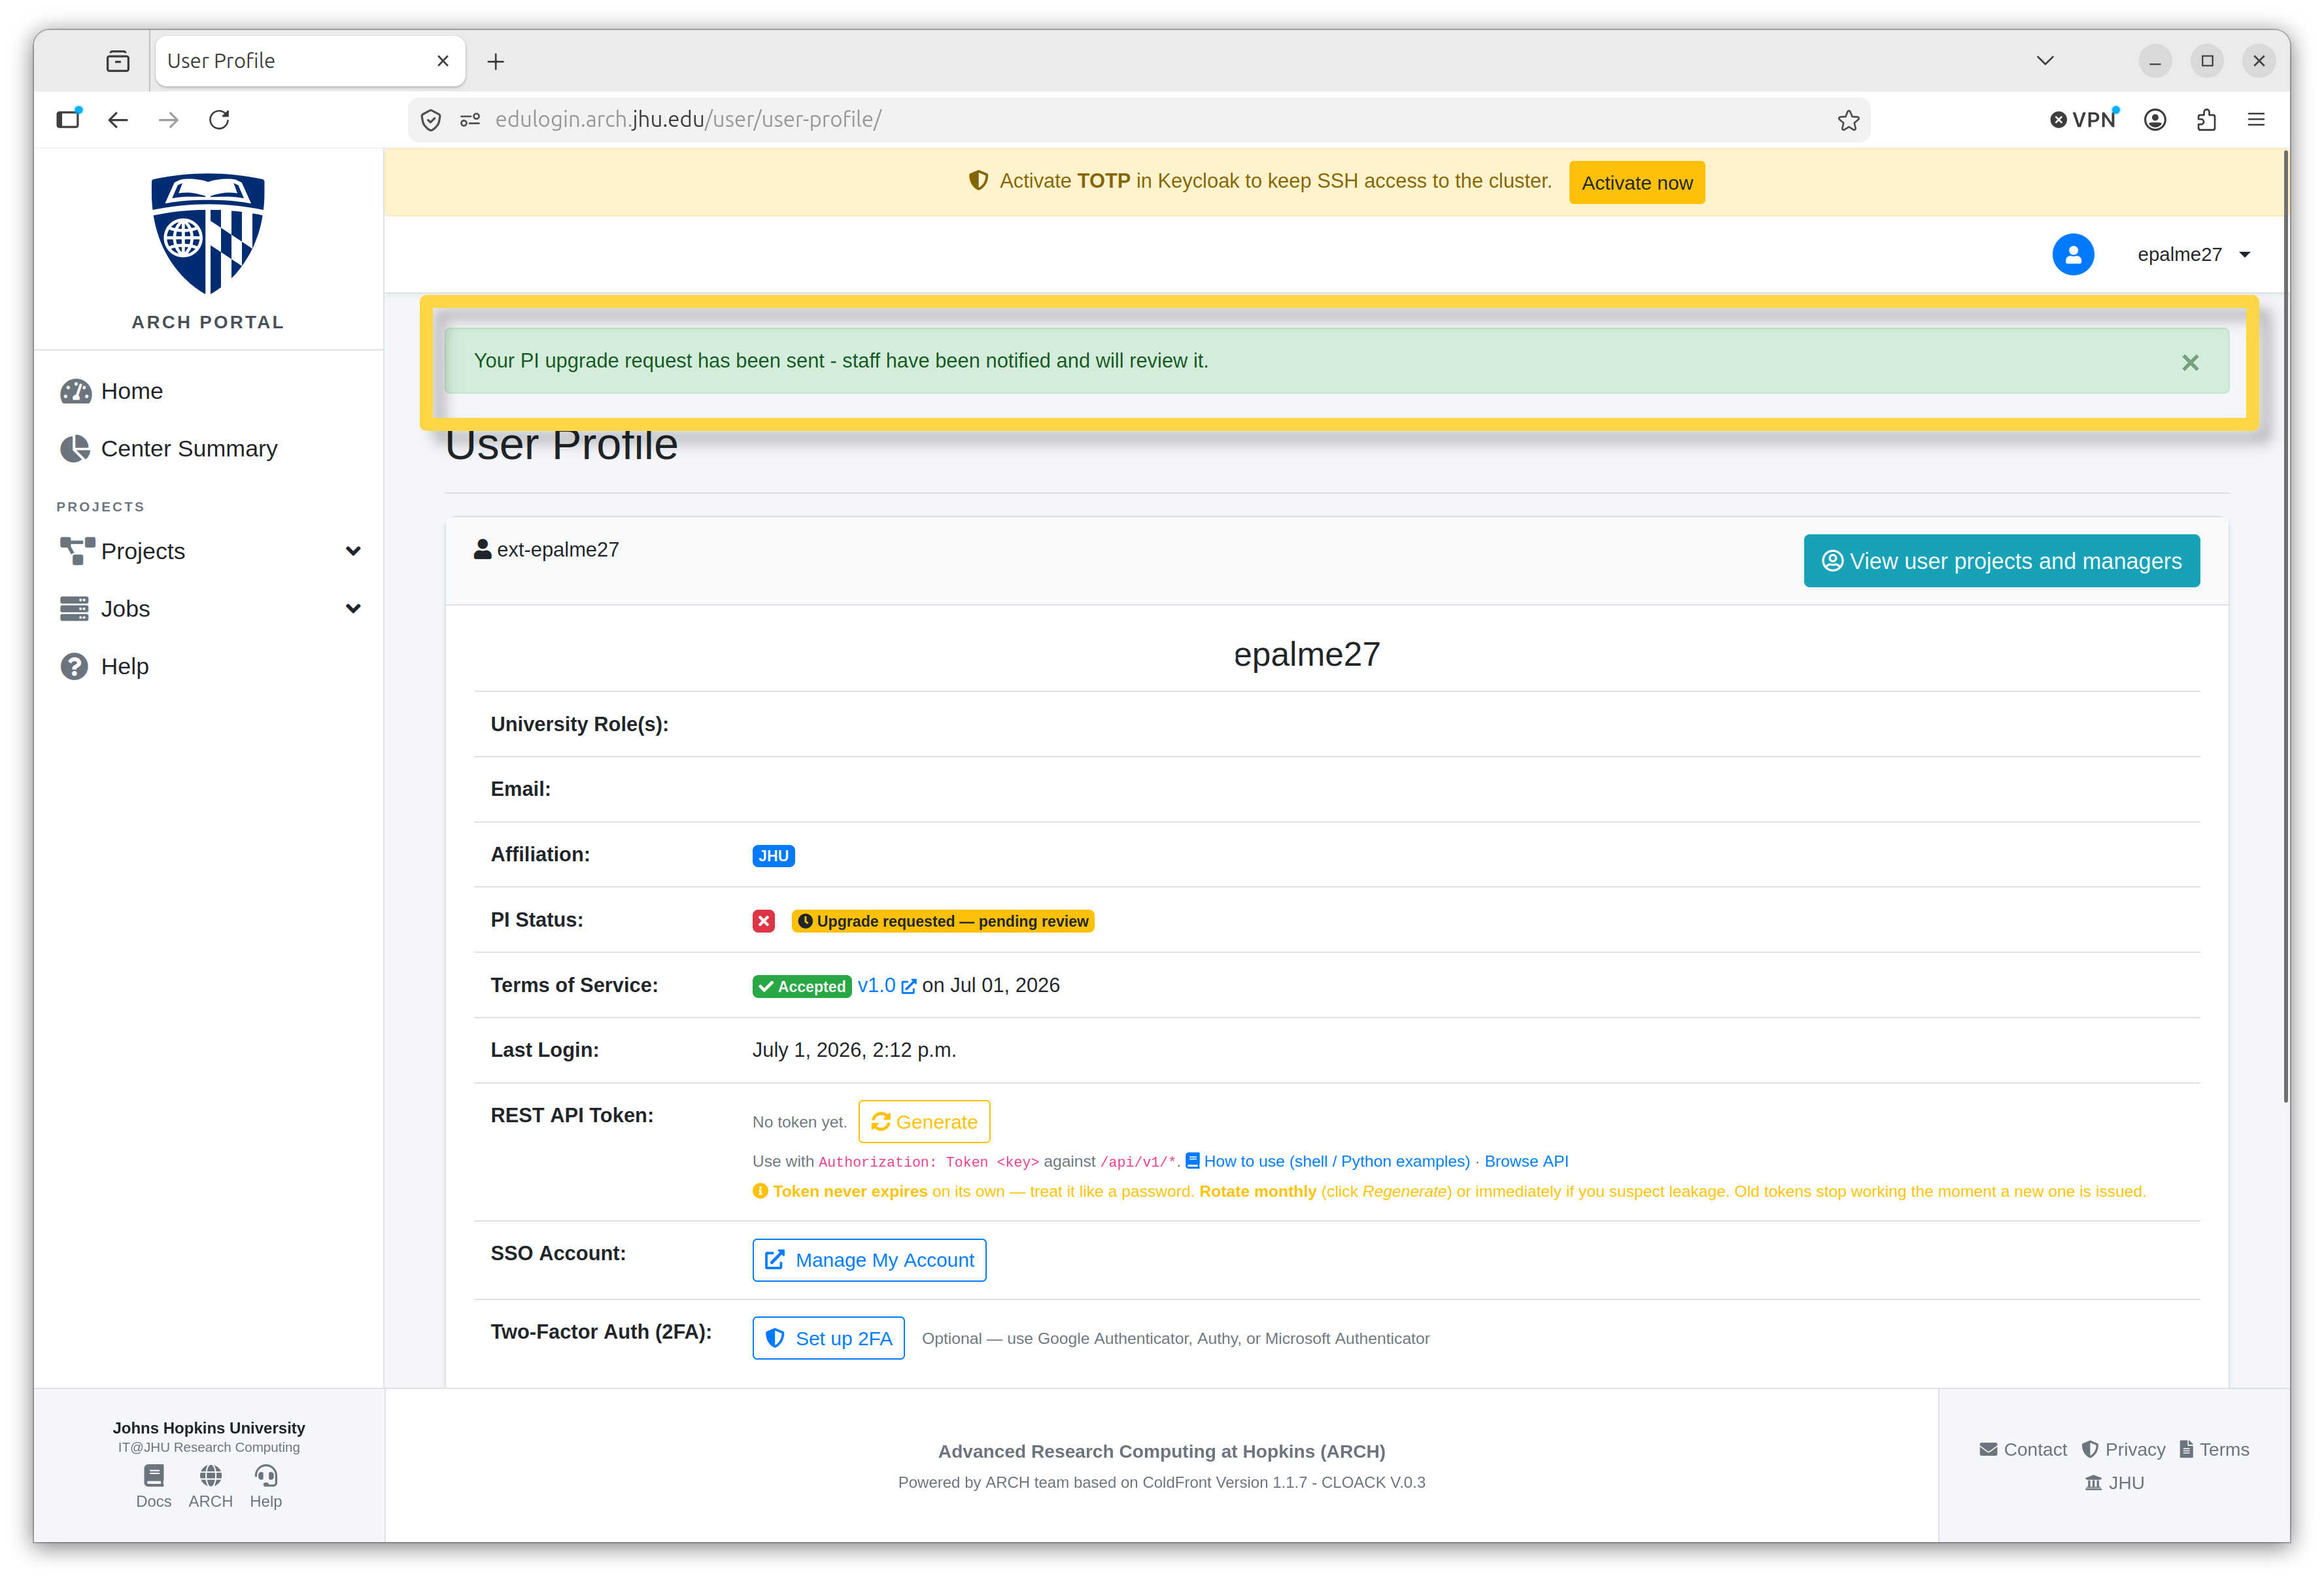
When a request is made, a notification is sent to staff to review. Your request will remain in the pending state until it is approved.
Add a Cost Center
Note
Only PIs can add a cost center.
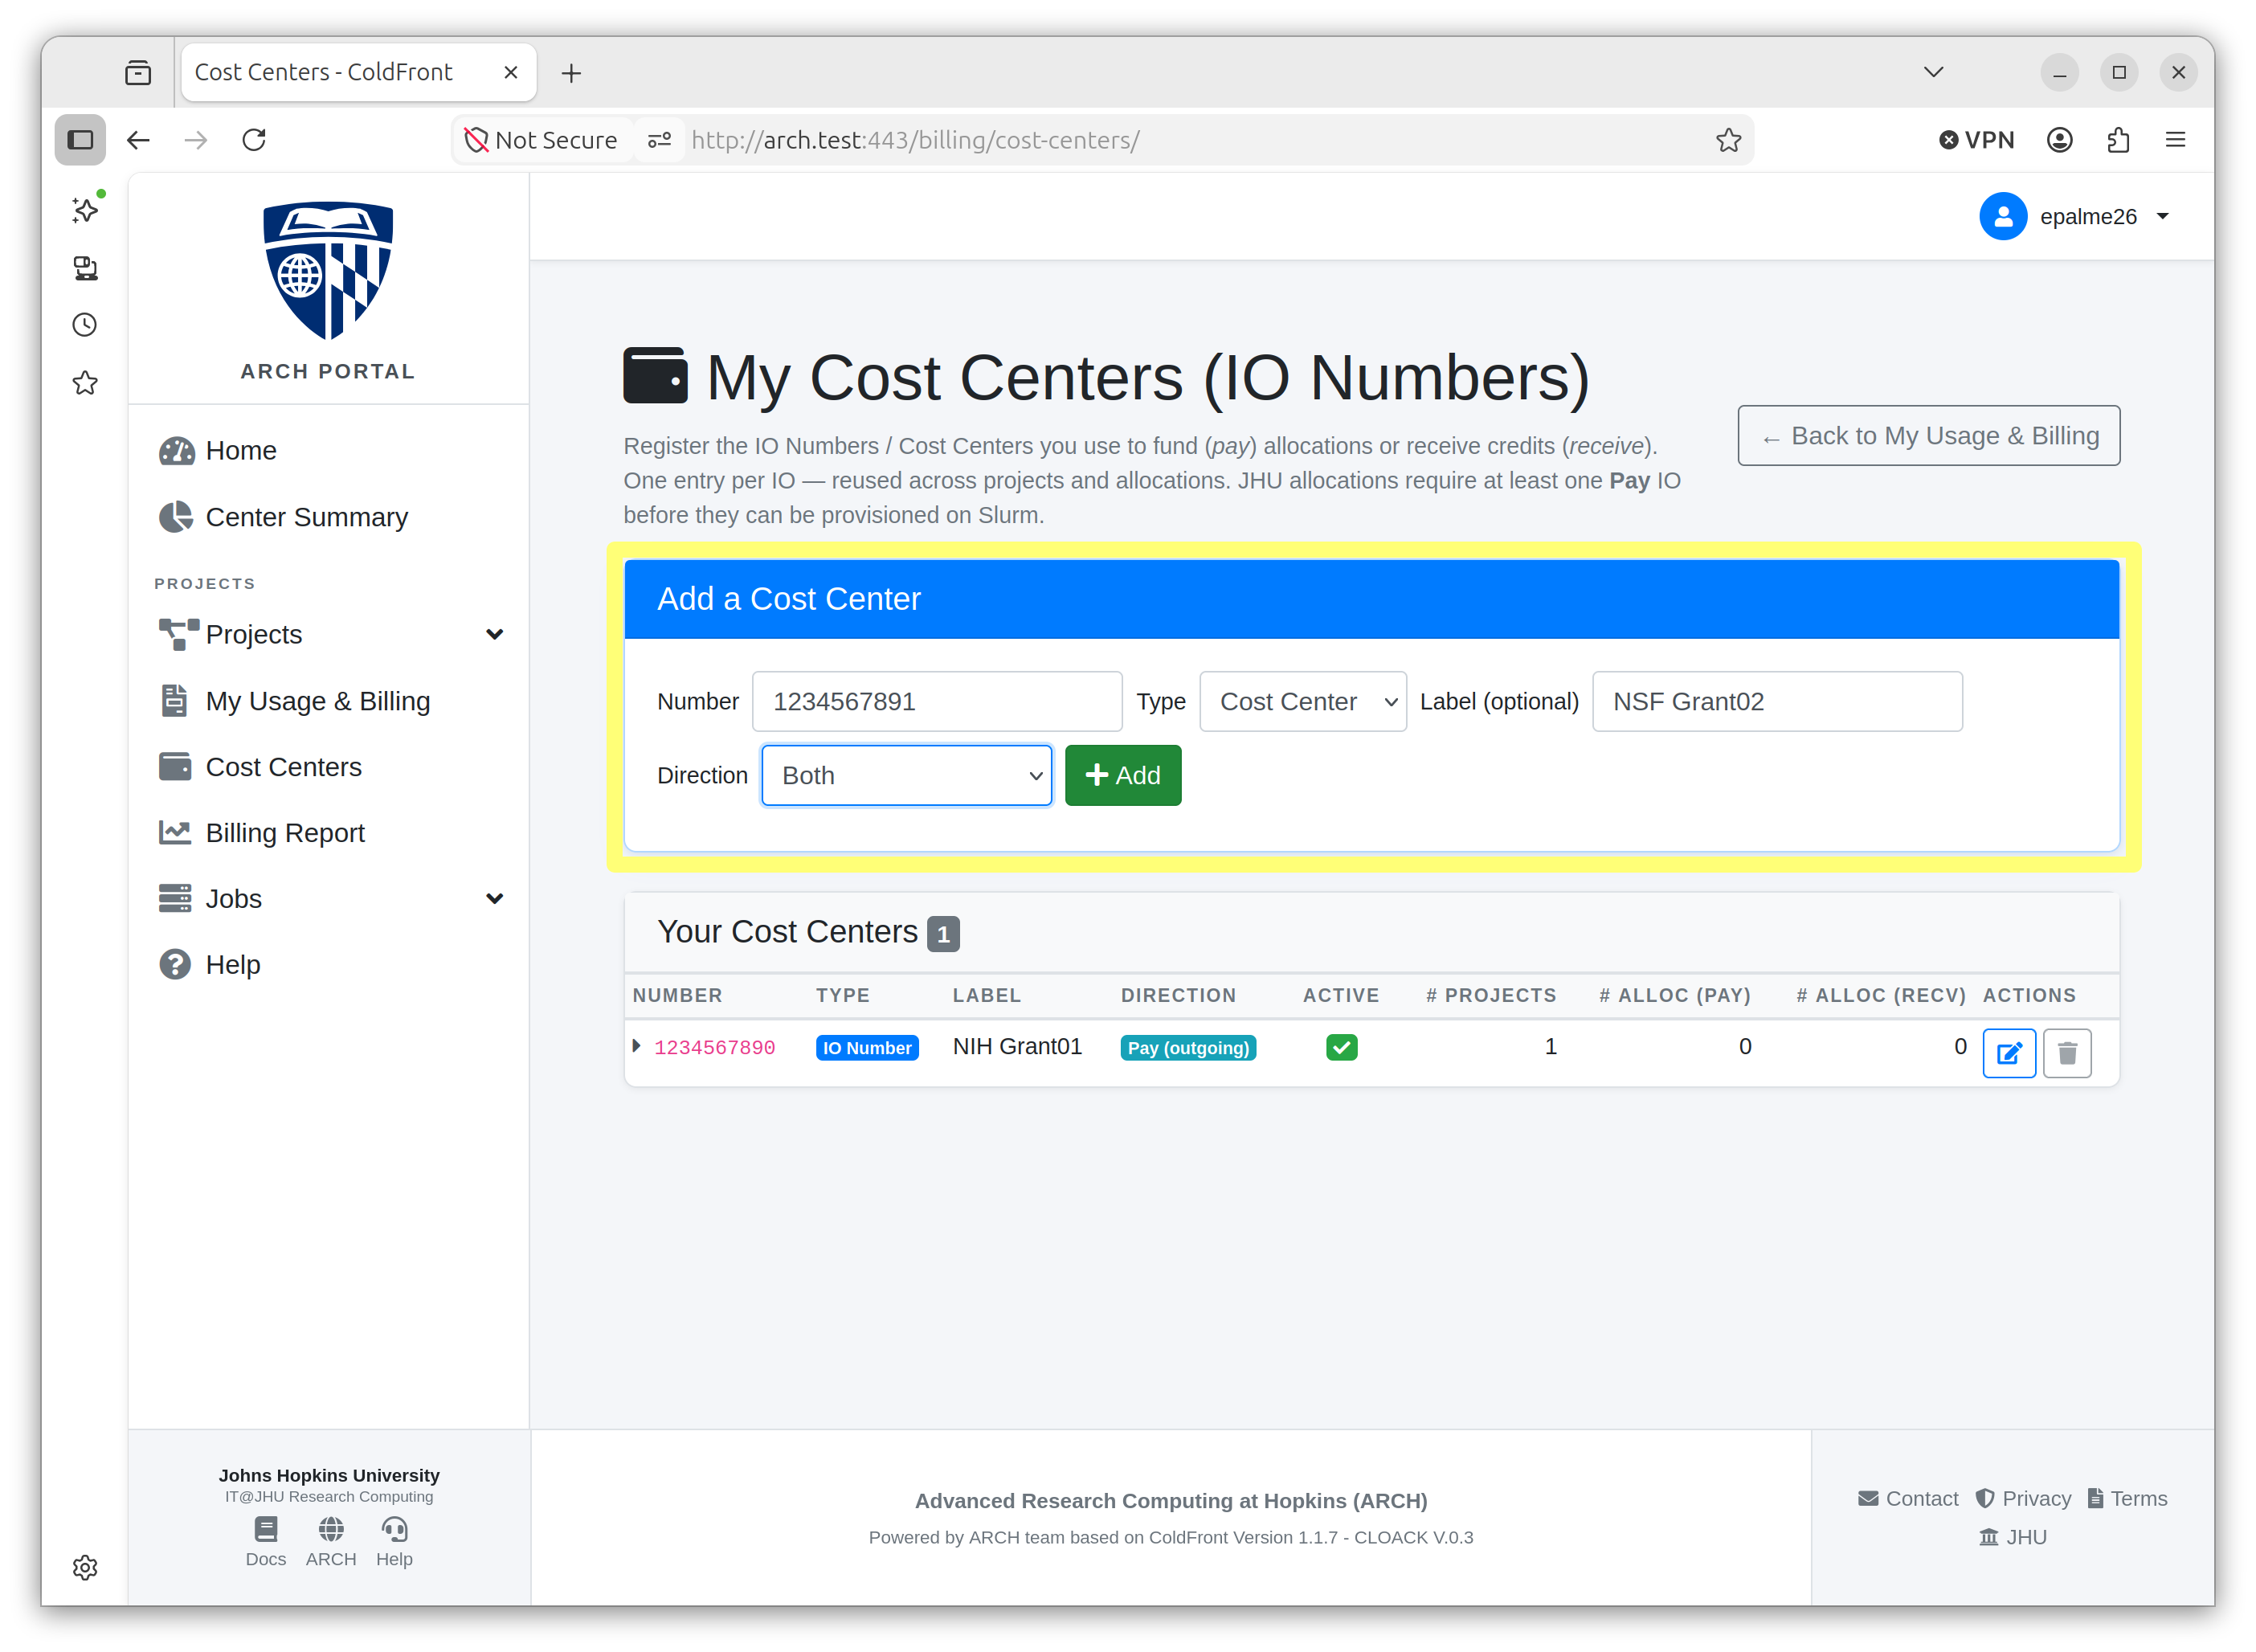
In the left navigation pane, select Cost Centers.
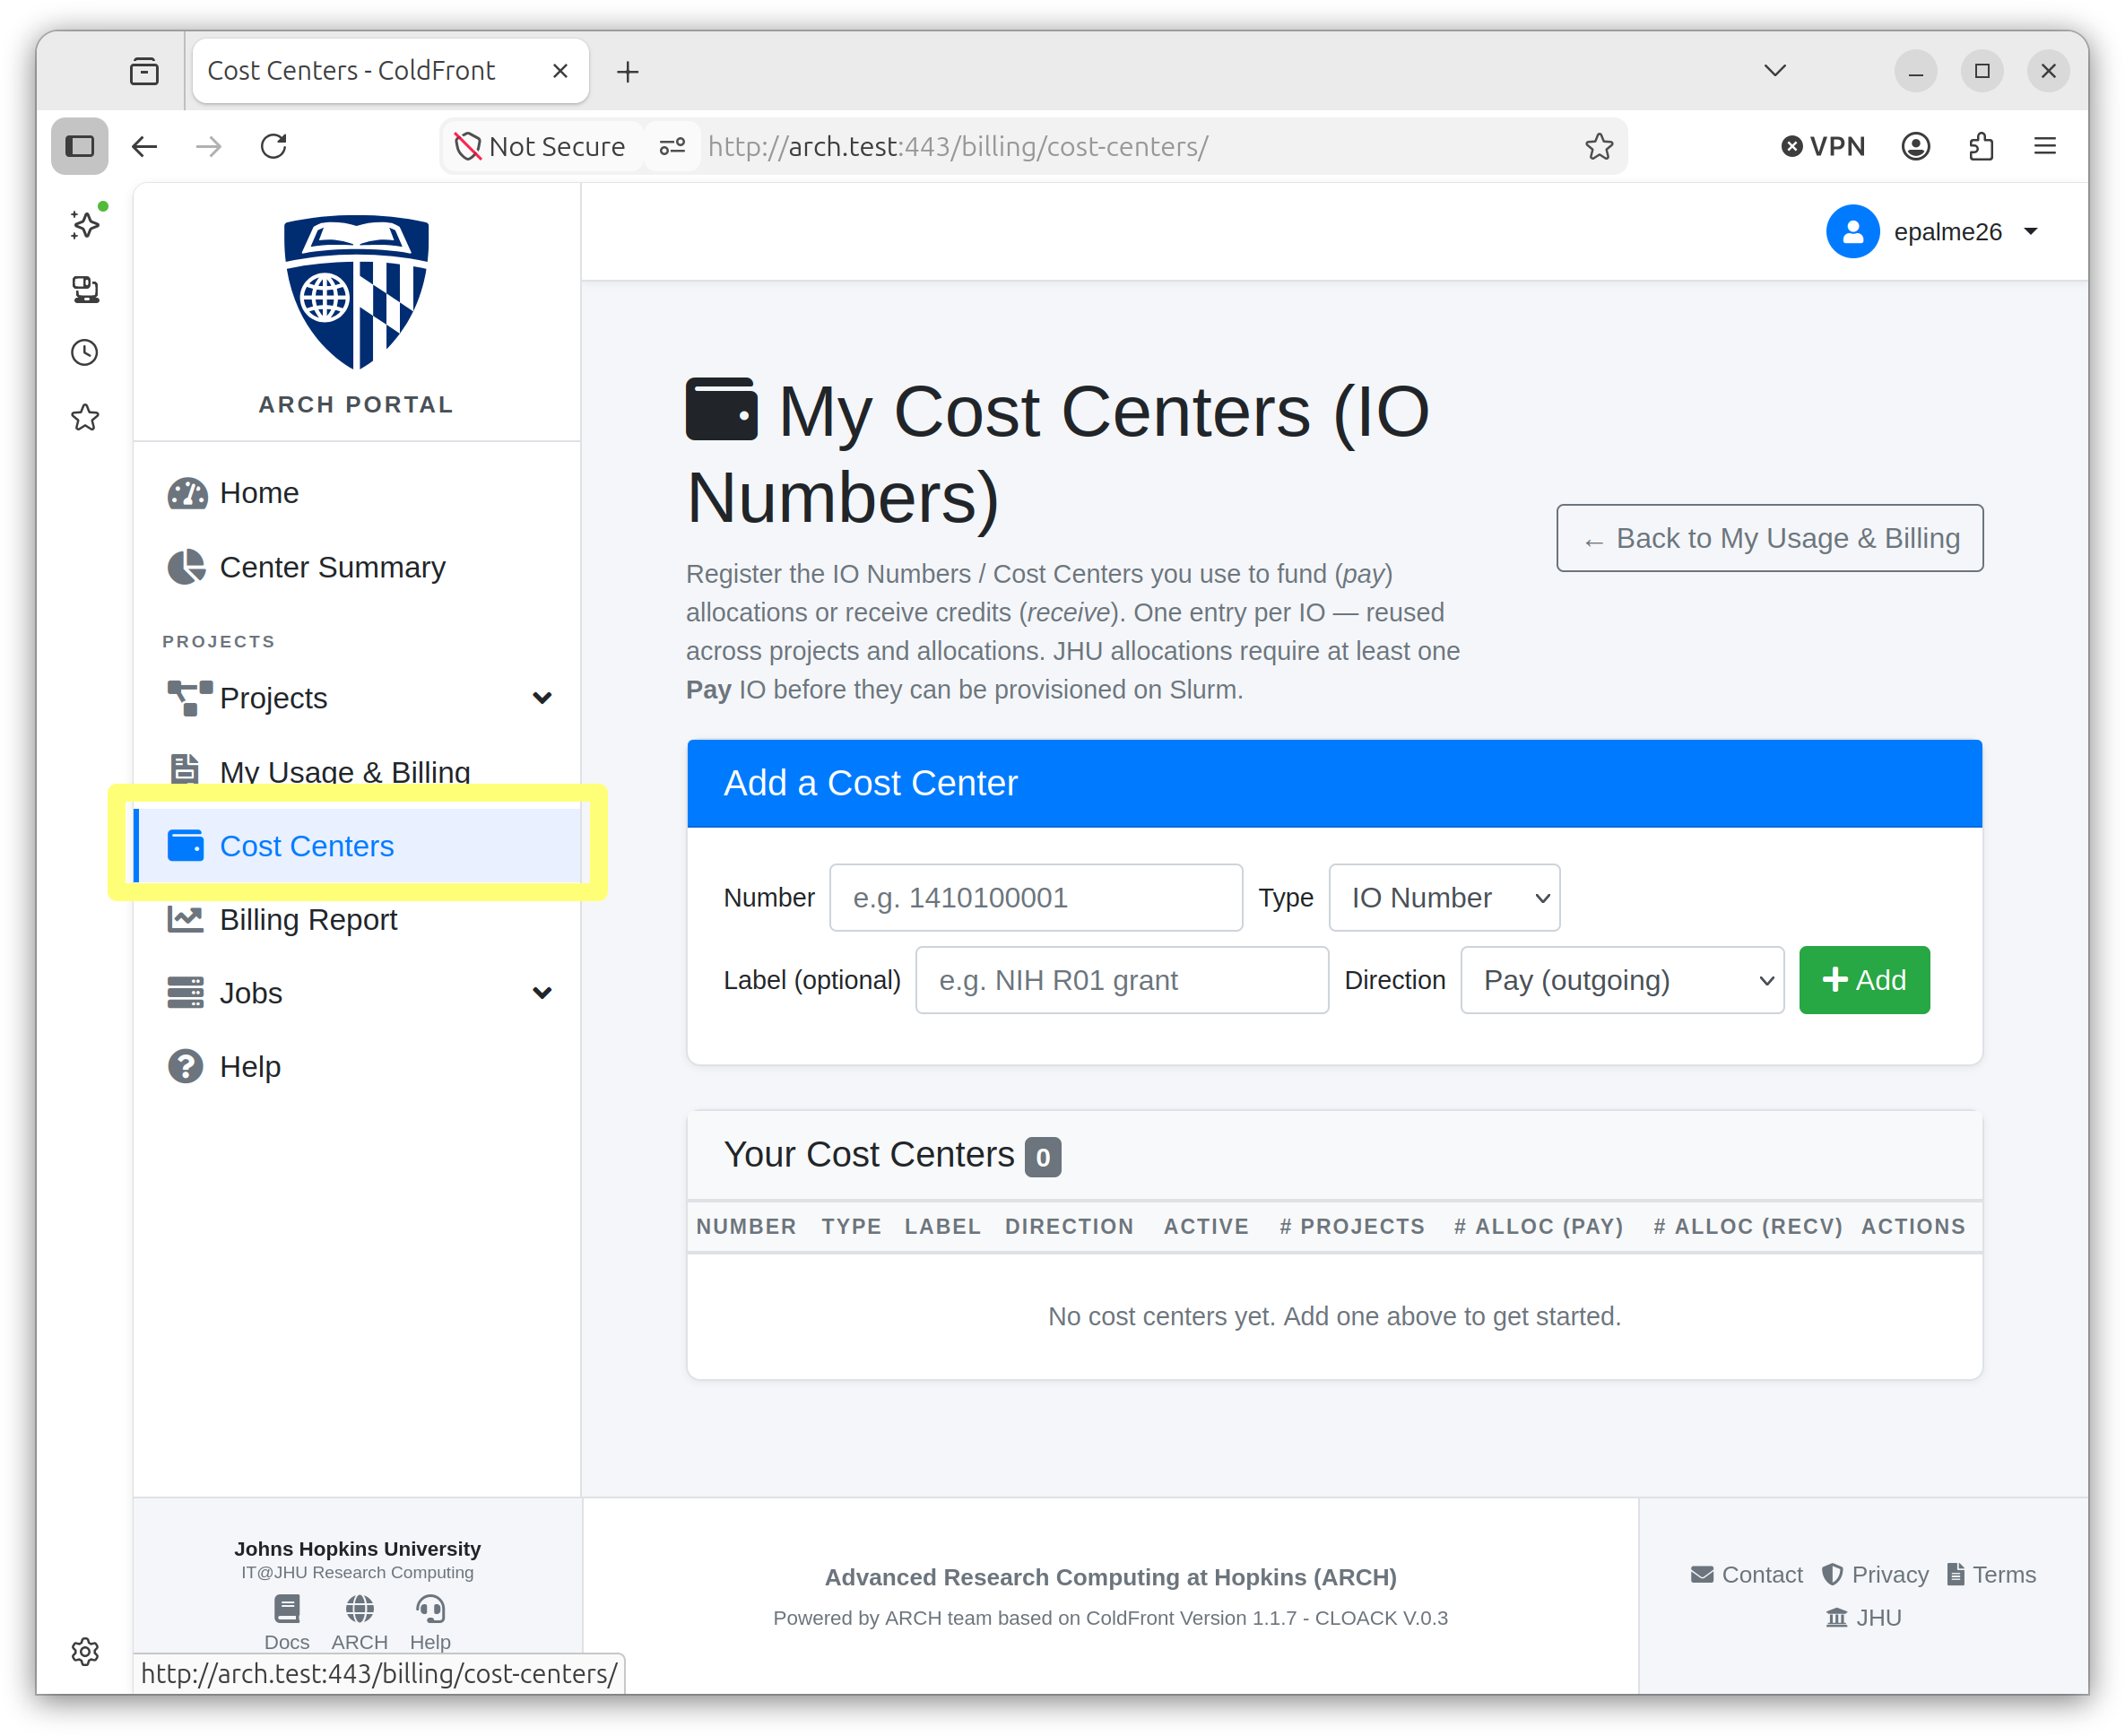
Fill out the required information and click “+ Add.”
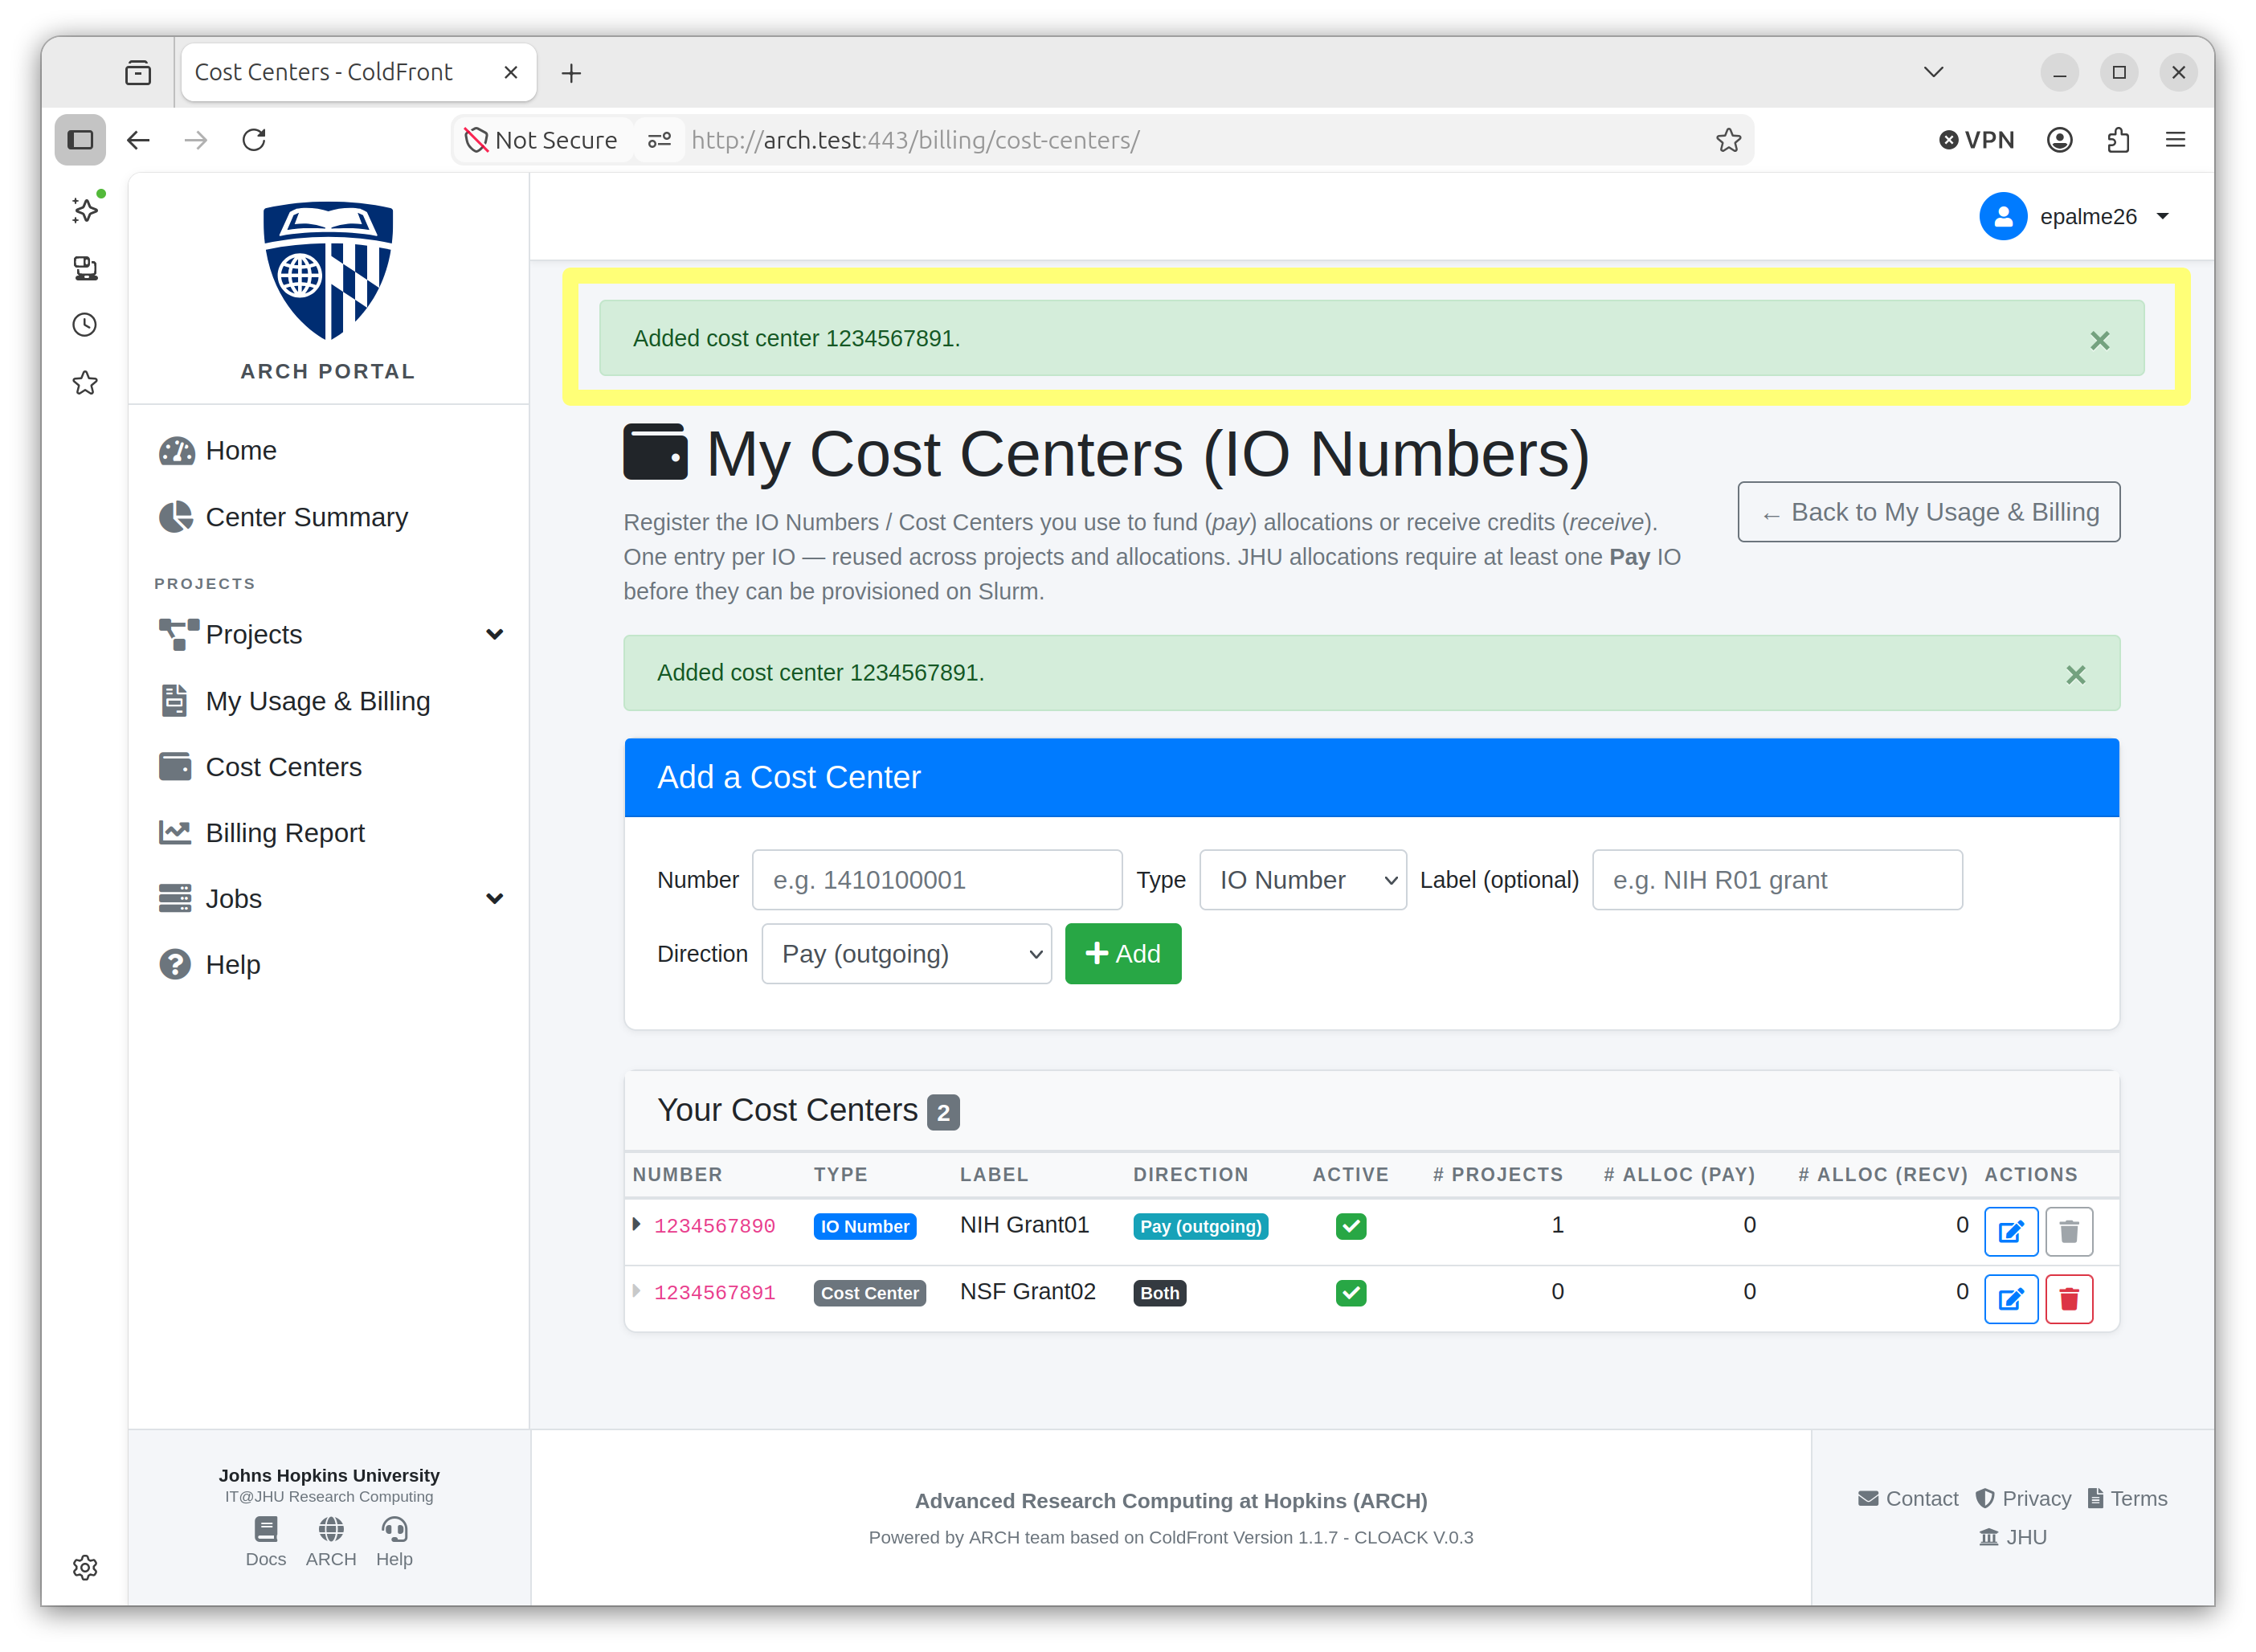
A confirmation banner will appear.
Create a Project
Note
Only PIs can create a project.
Before starting, if you are creating a JHU-affiliated project, you need to first create a Cost Center (see Add a Cost Center above).
In the left navigation pane, select Projects -> My Projects
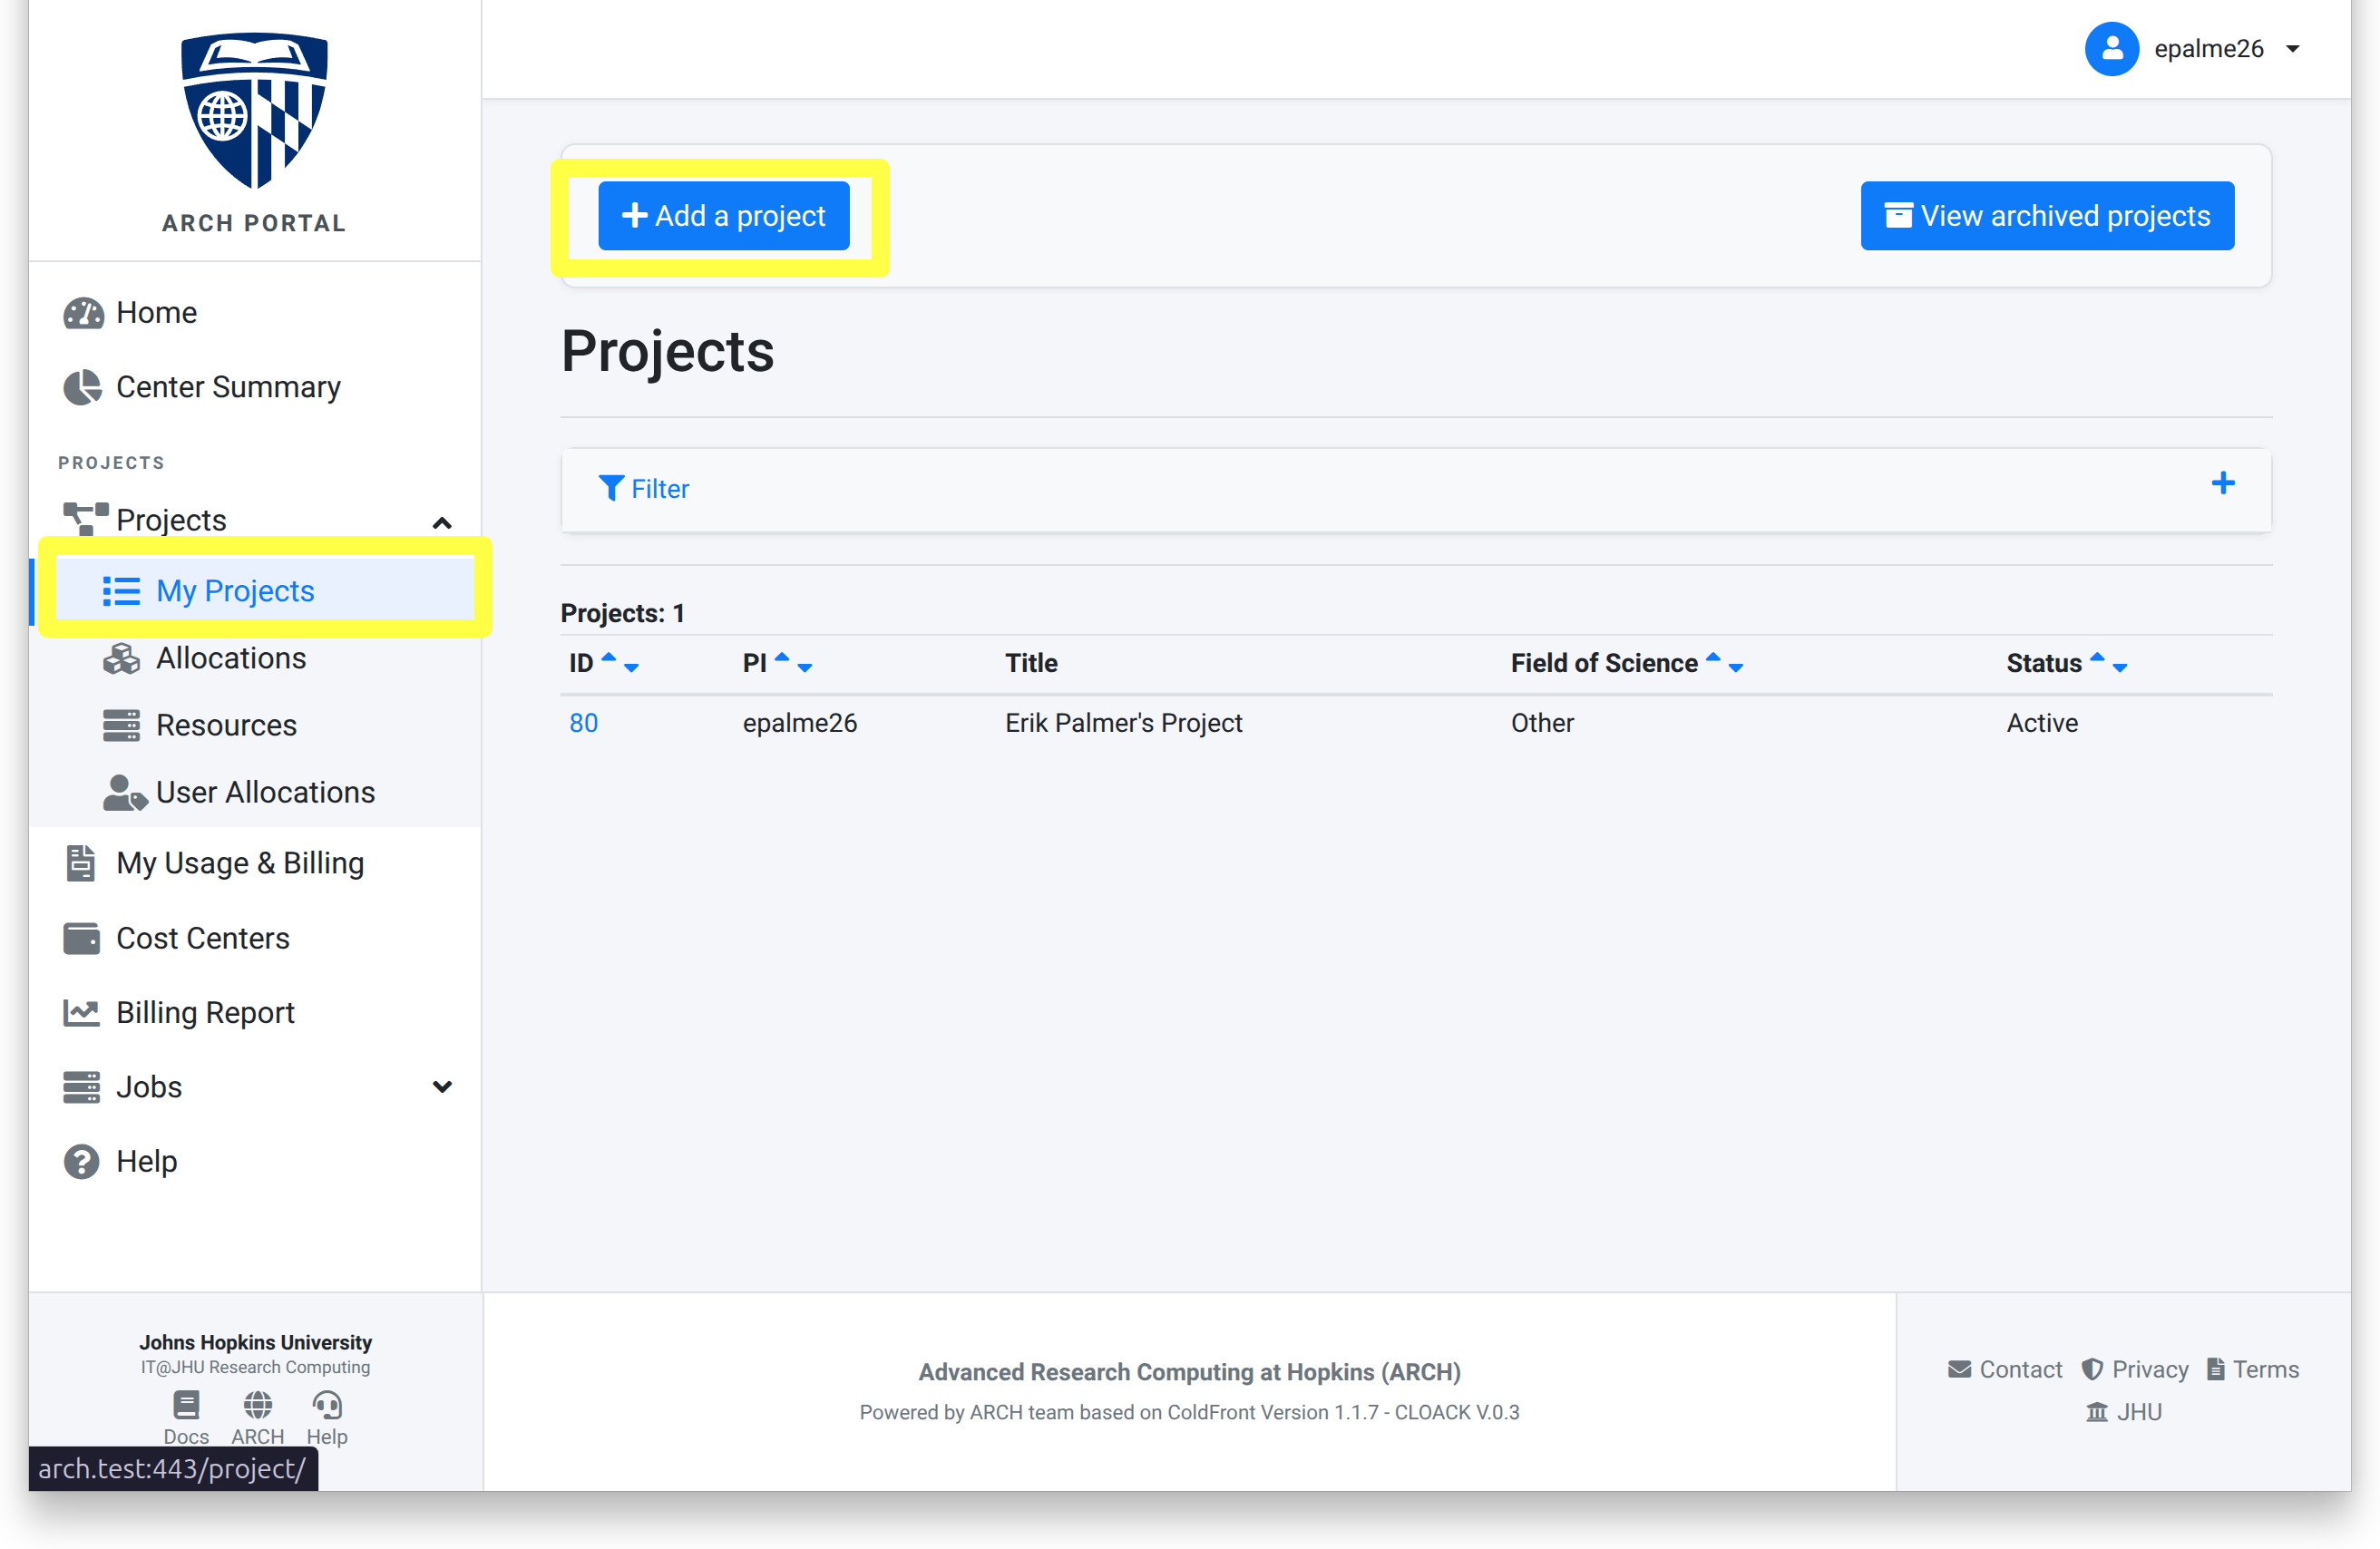
To start the process, click + Add a project.
Fill in the required information.
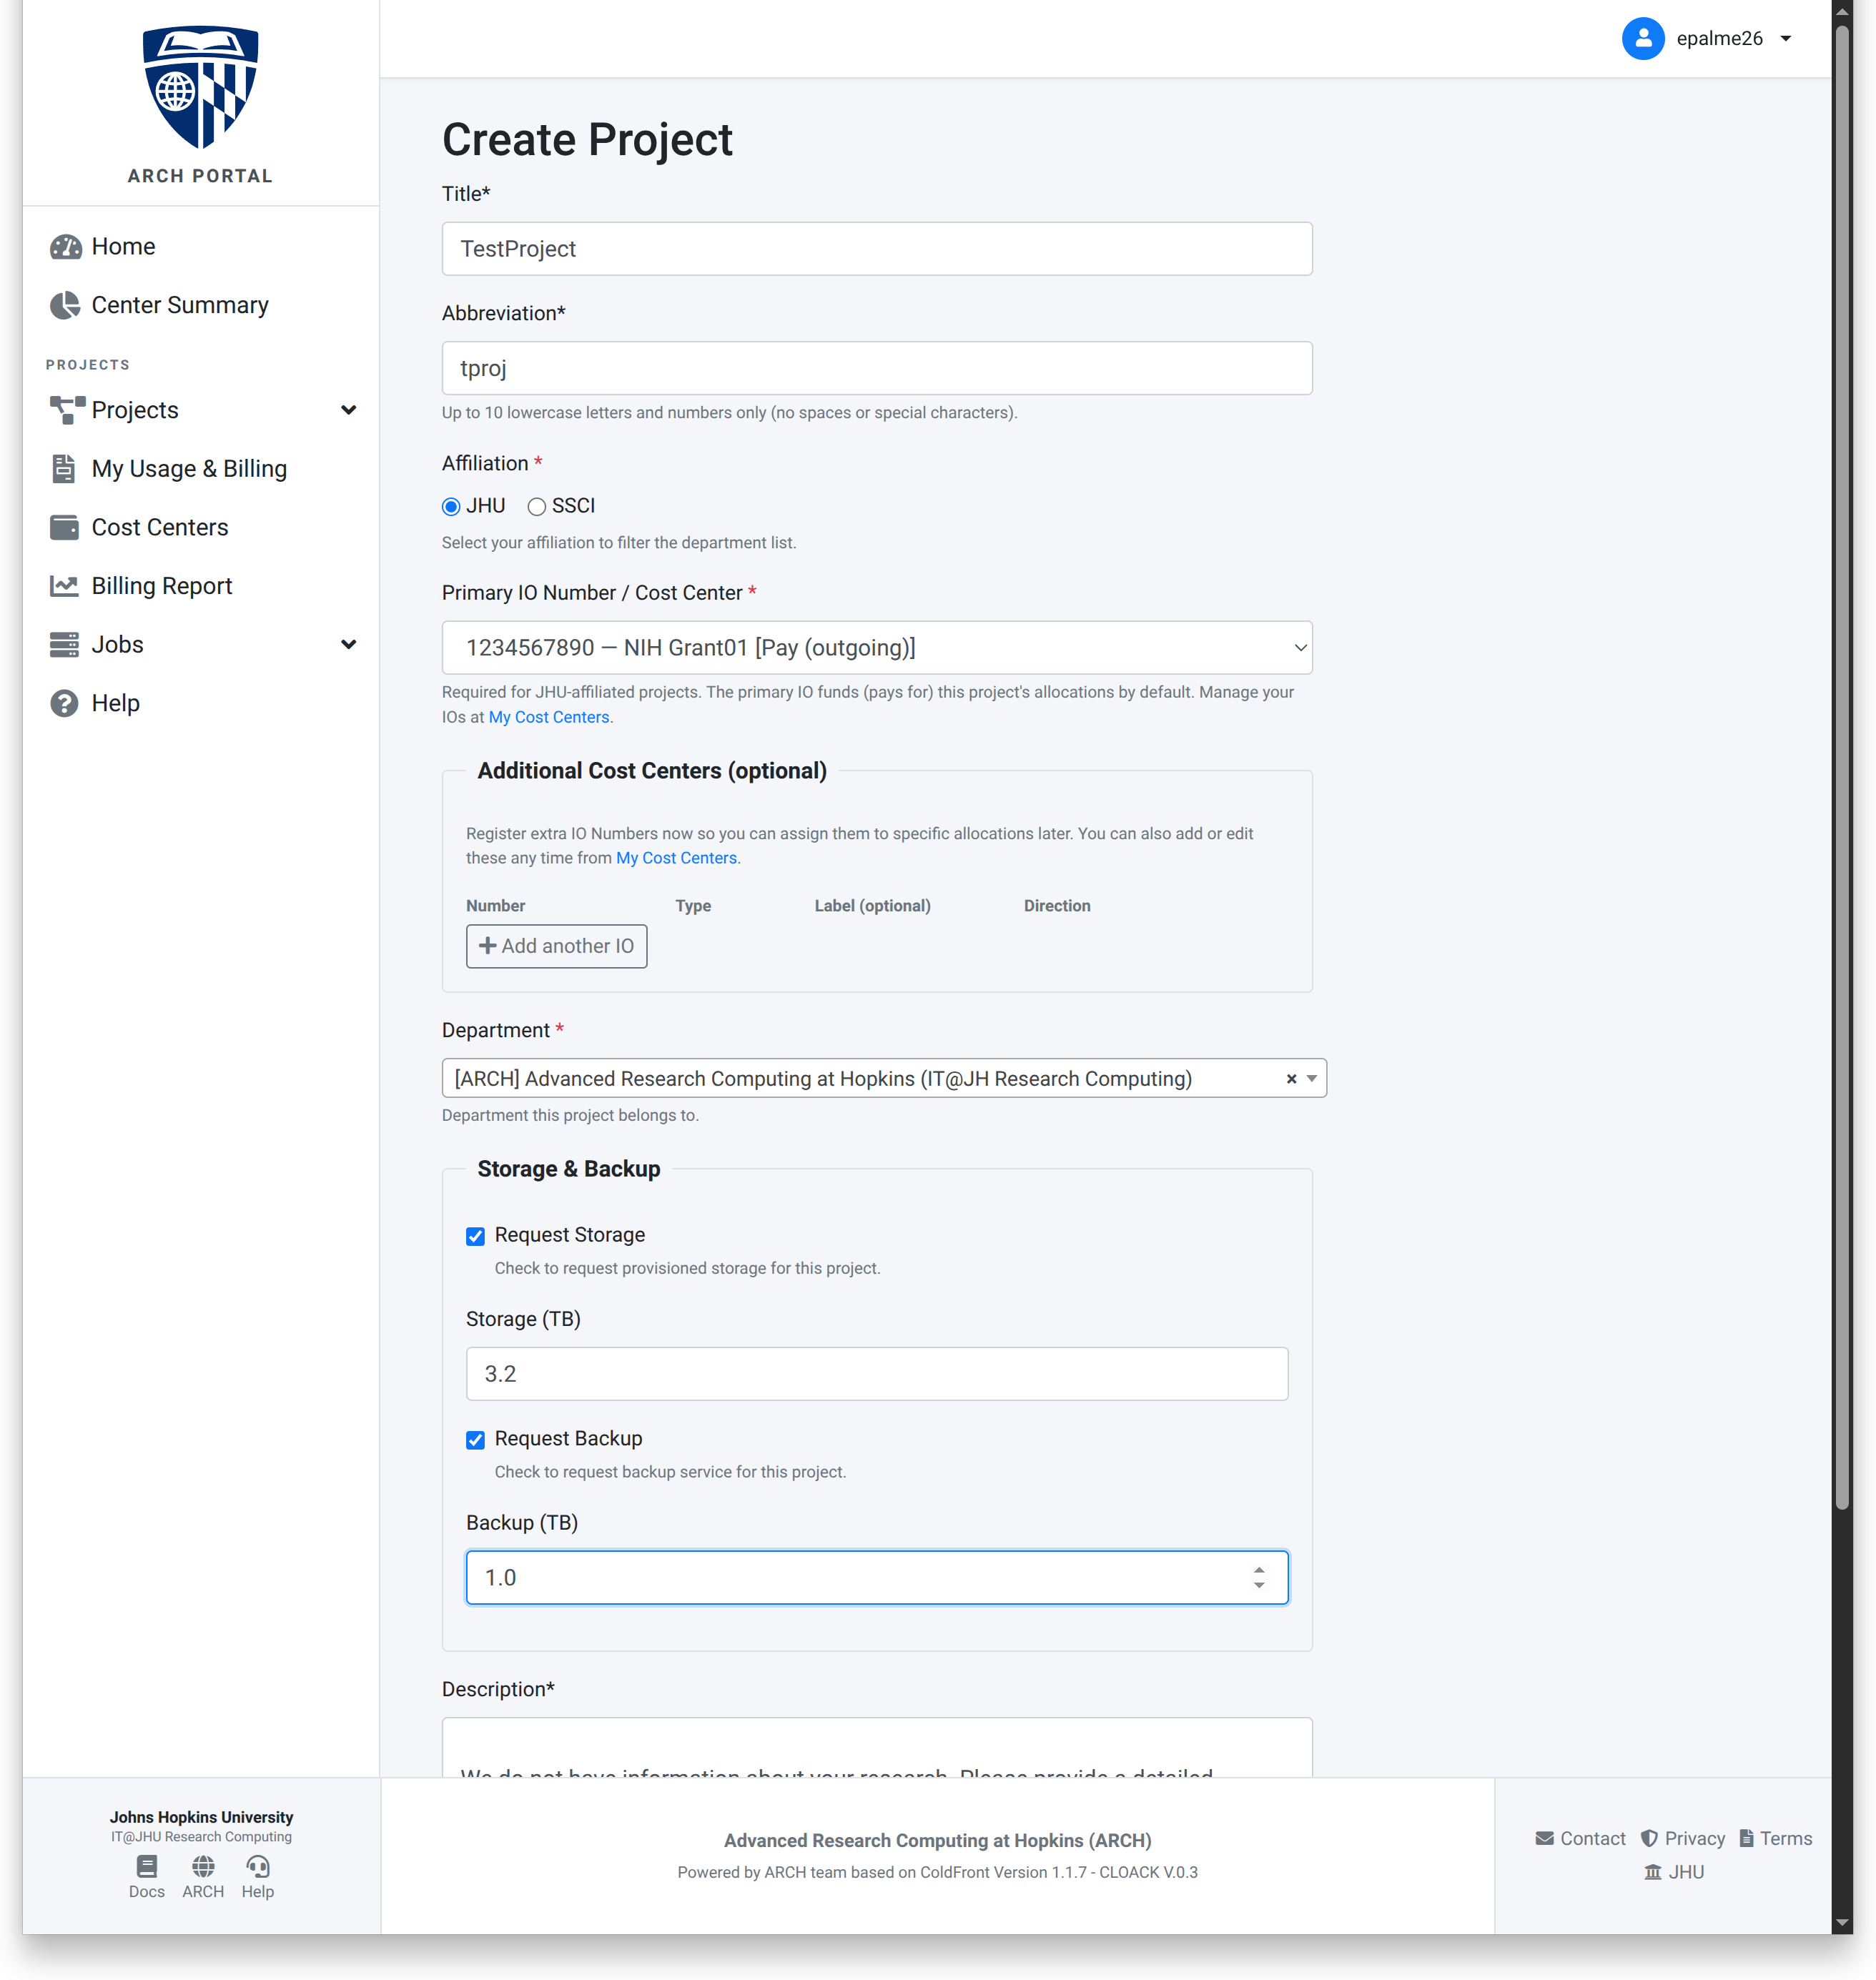
Click Save to submit the project.
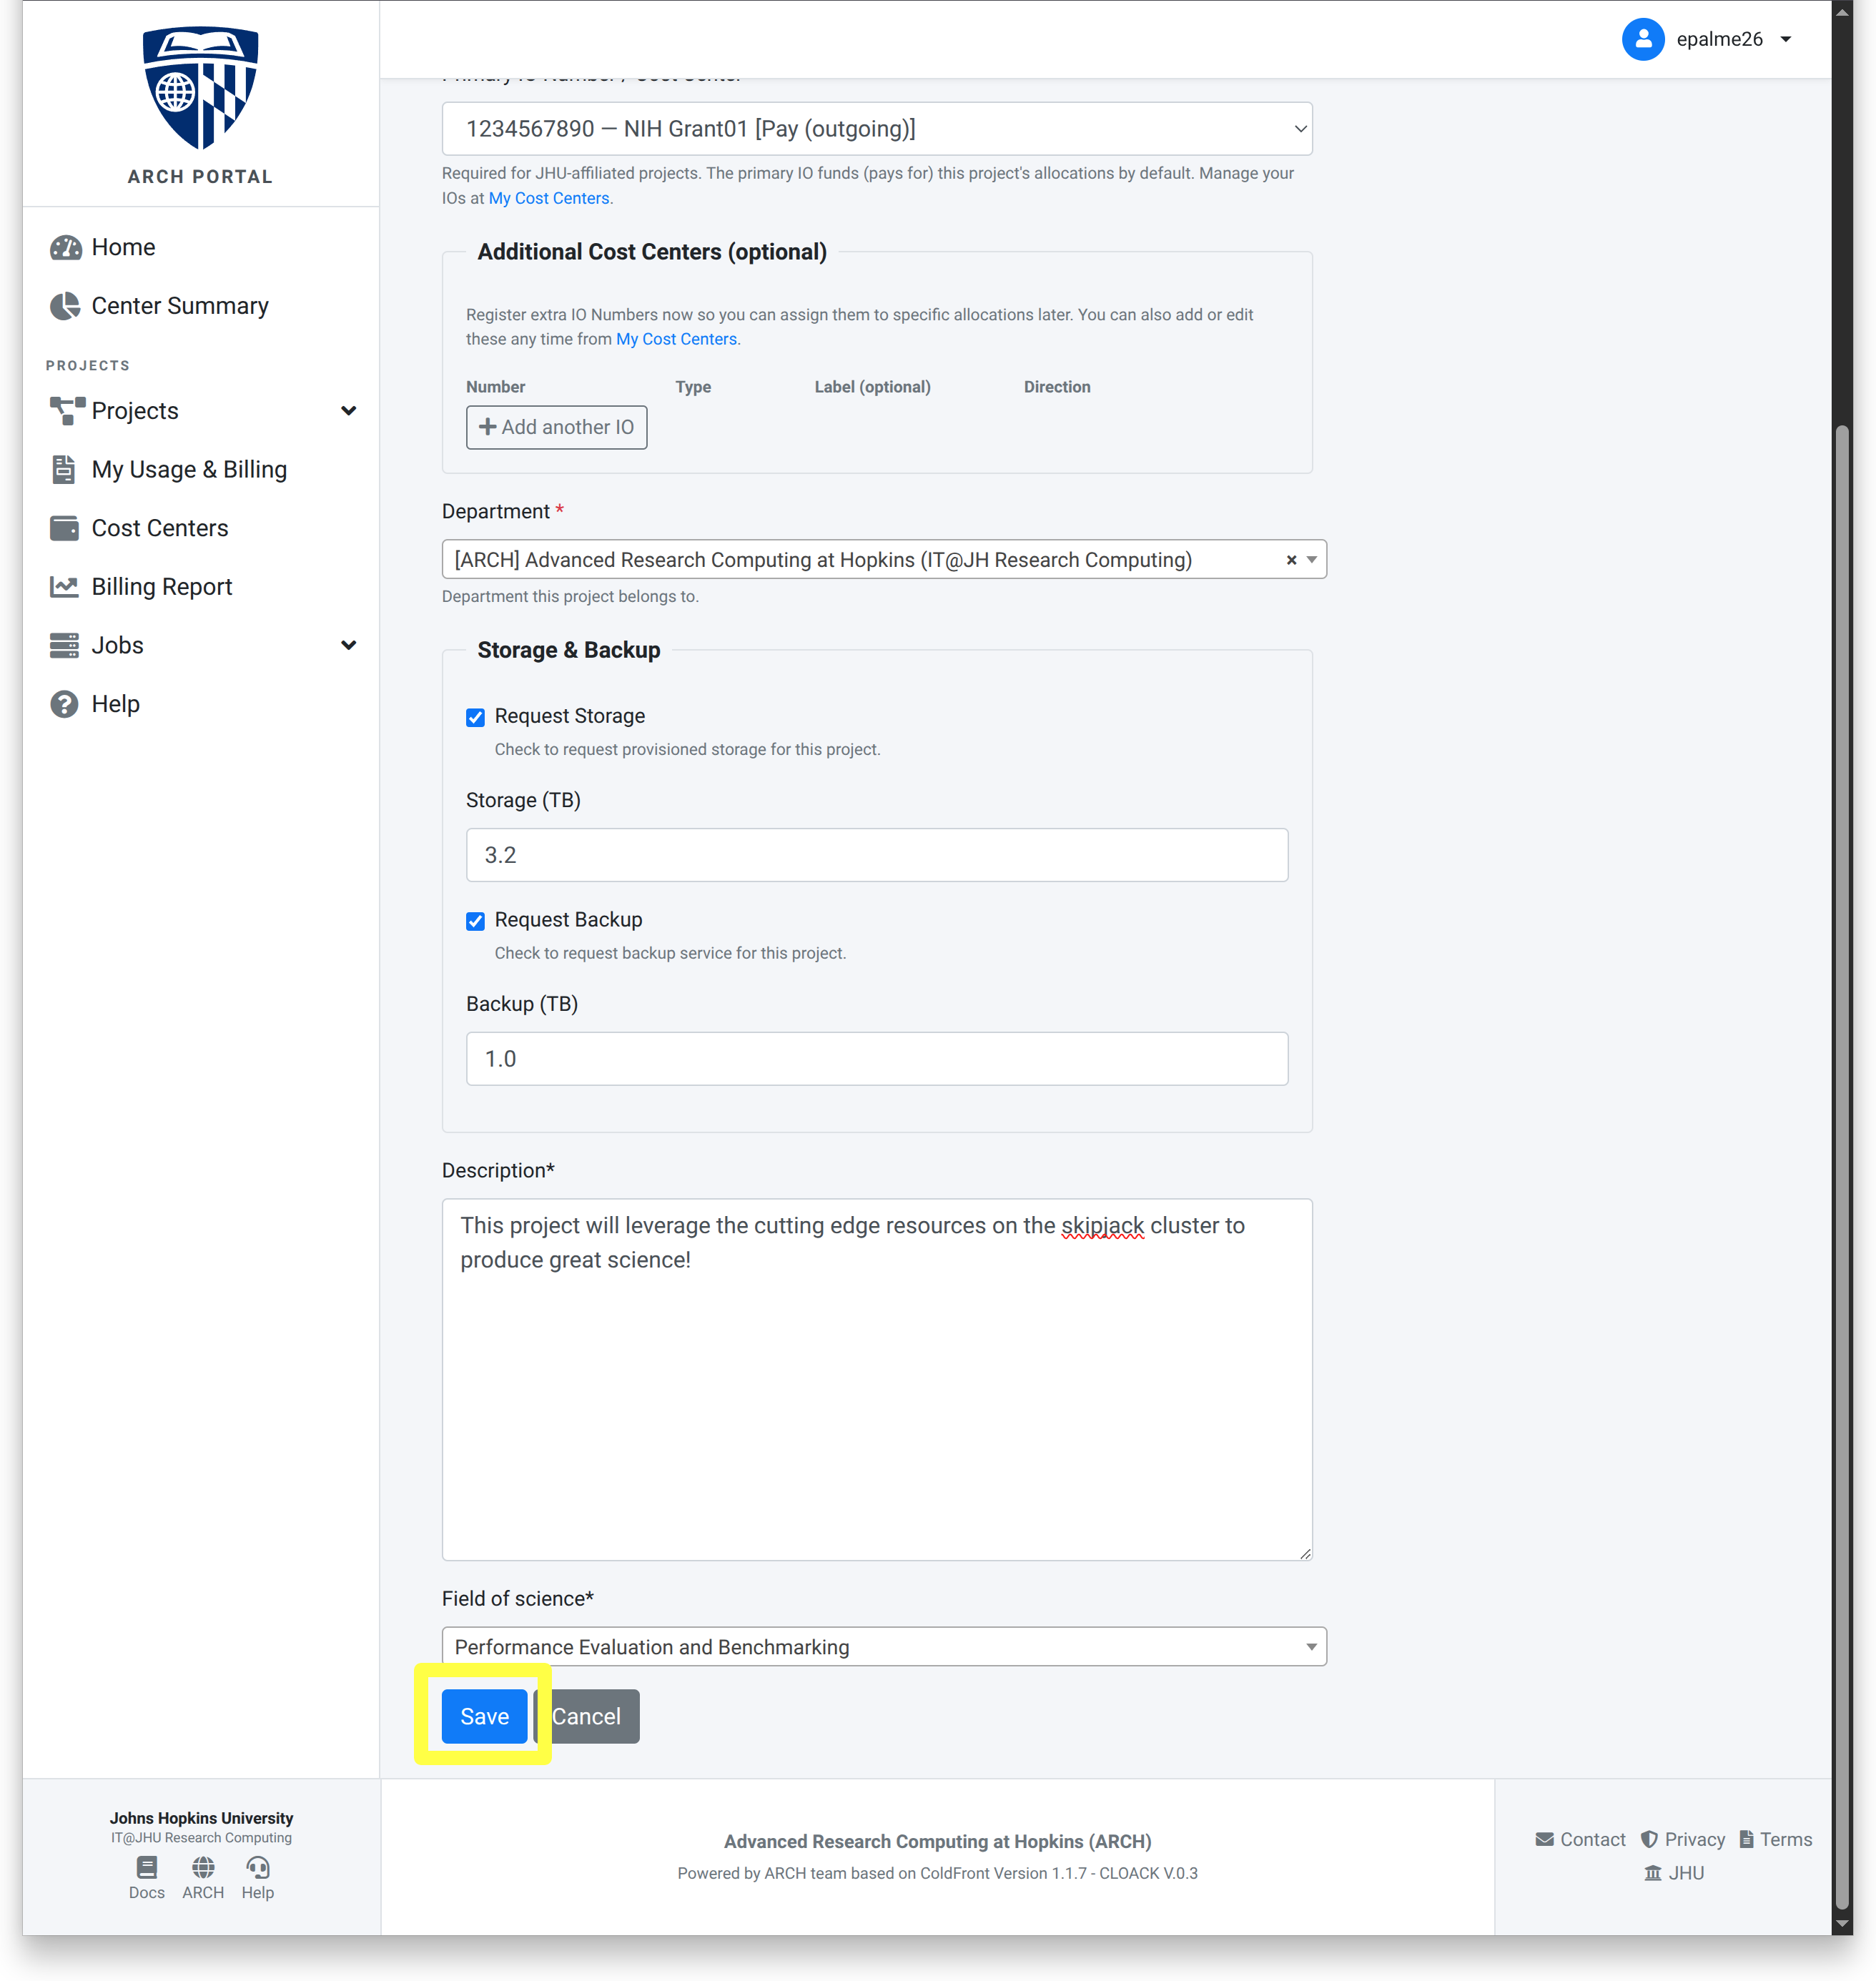
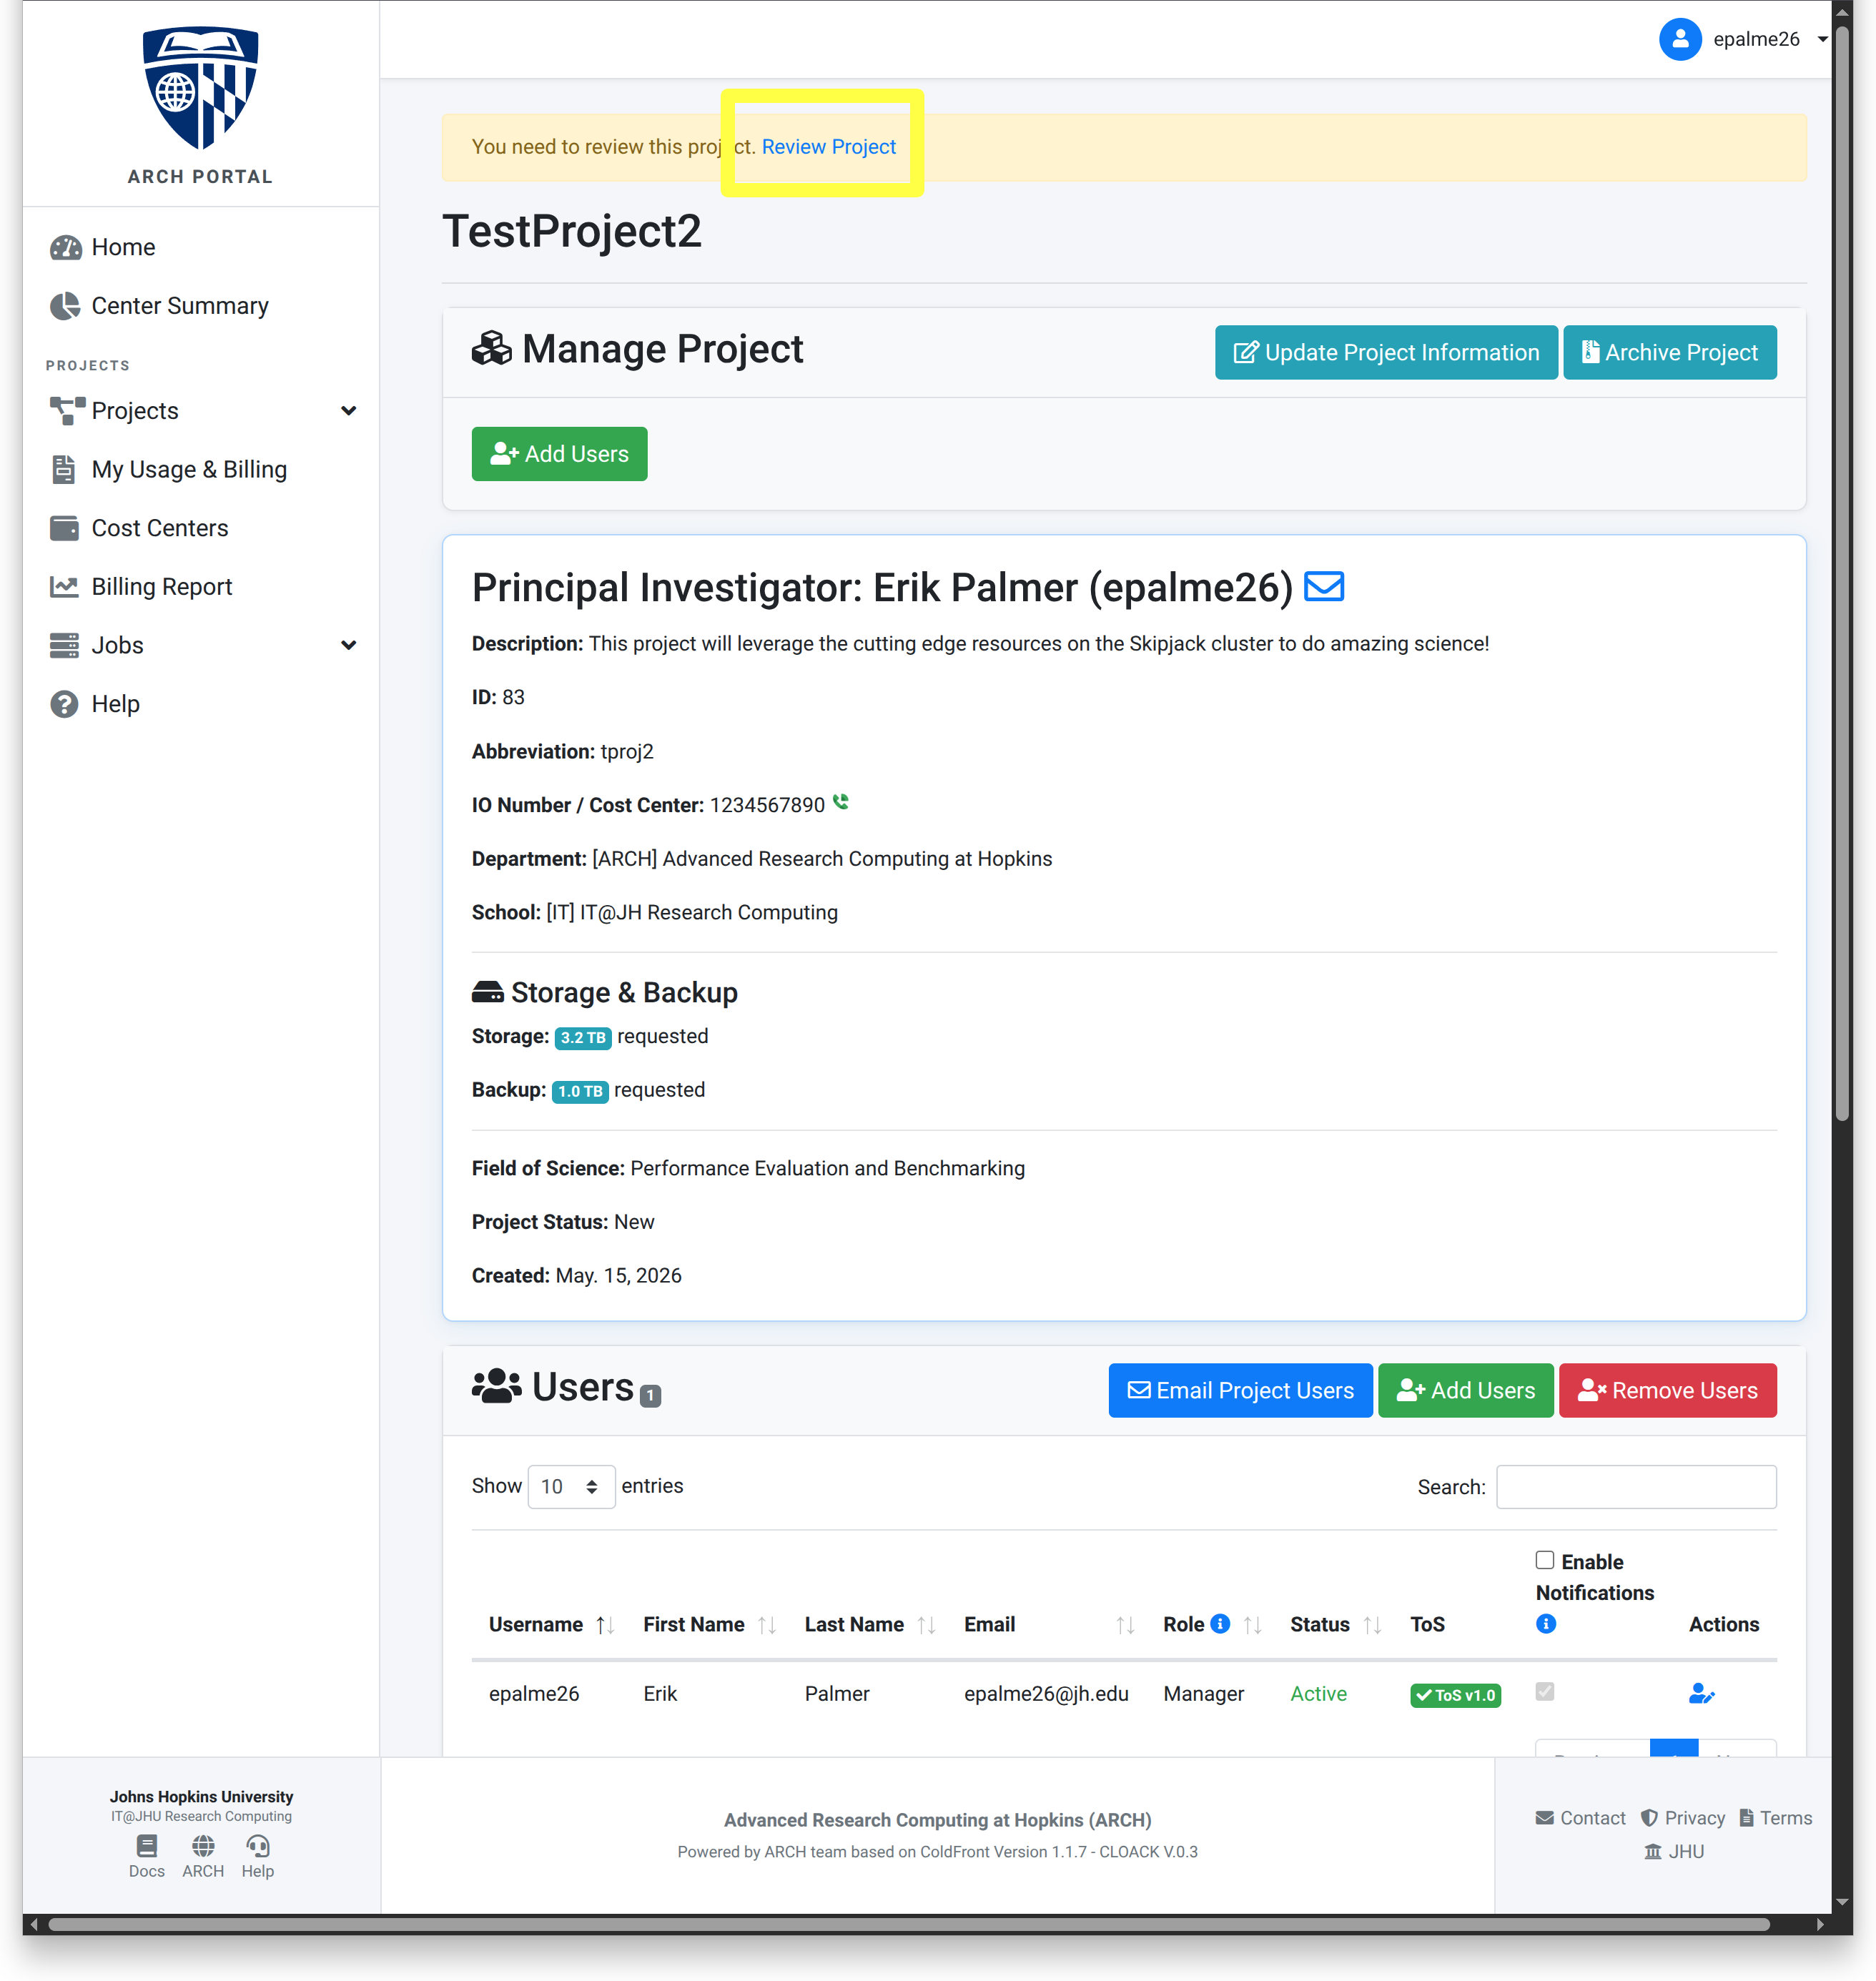
Once the new project is created, you will be prompted to review the project.
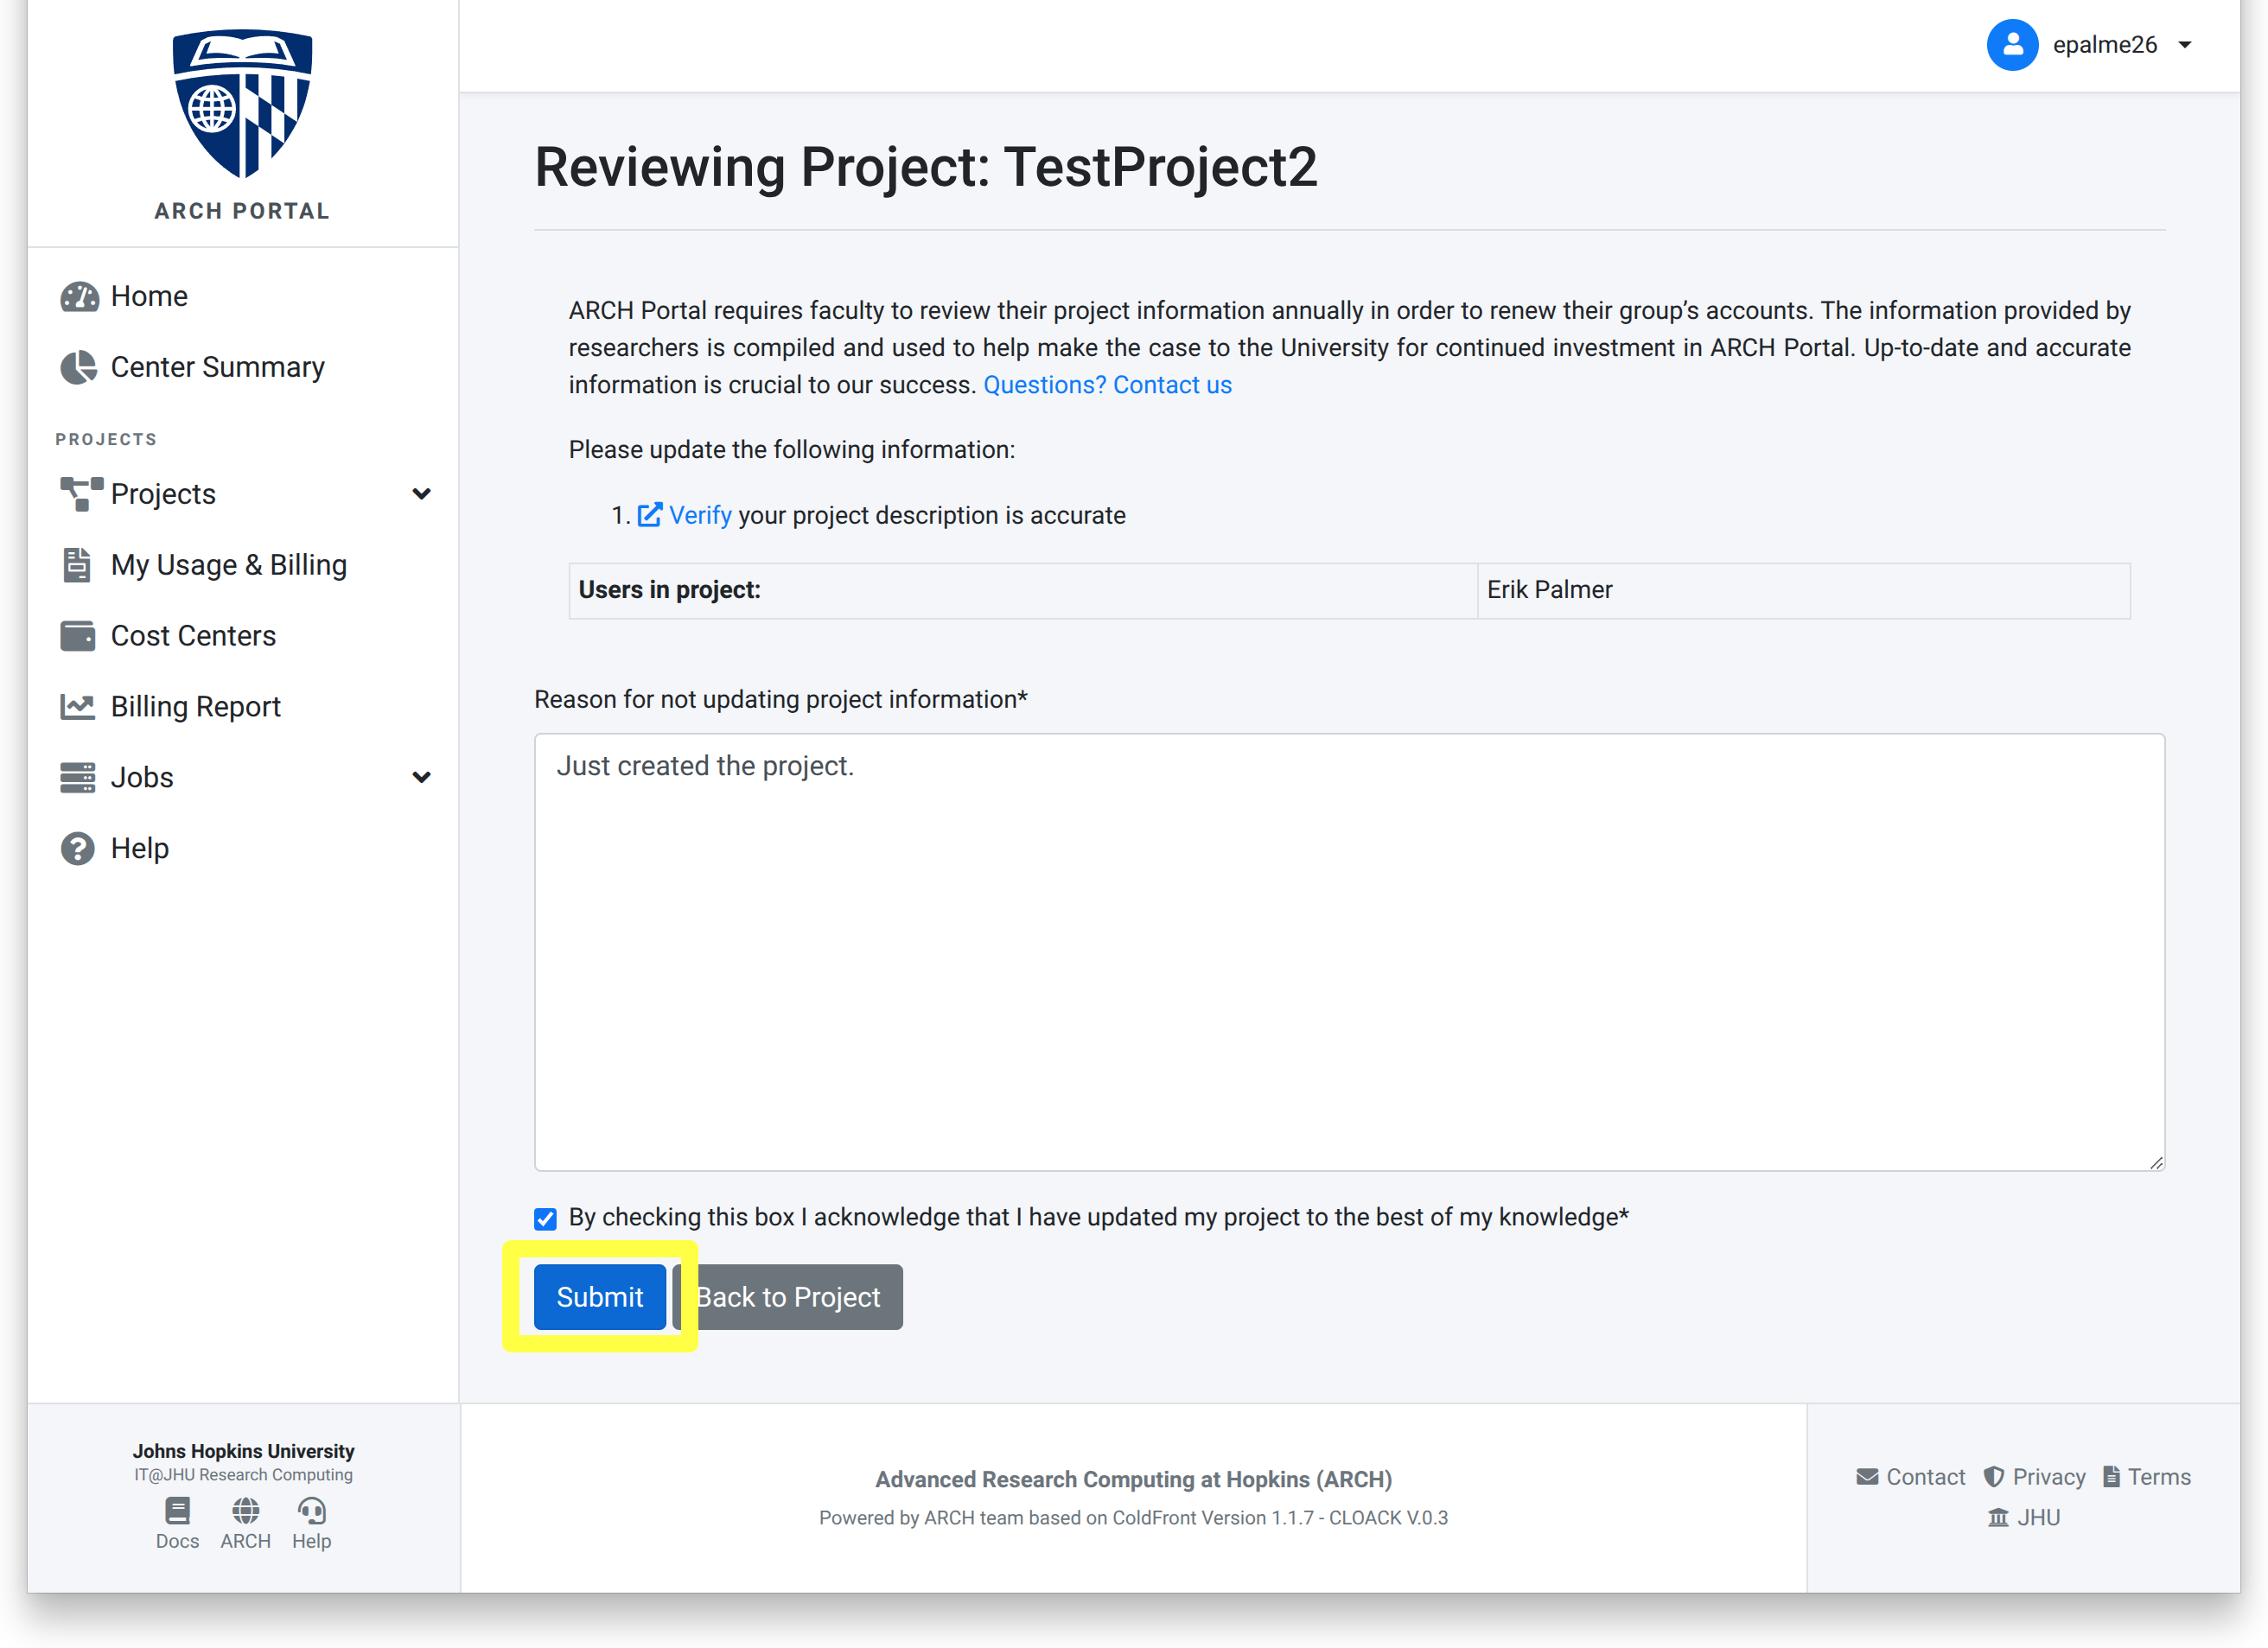
Click the link to initiate the review.
Once your review is complete, check the acknowledgement box and click Submit.
Once complete, a “Project reviewed successfully” banner will appear.
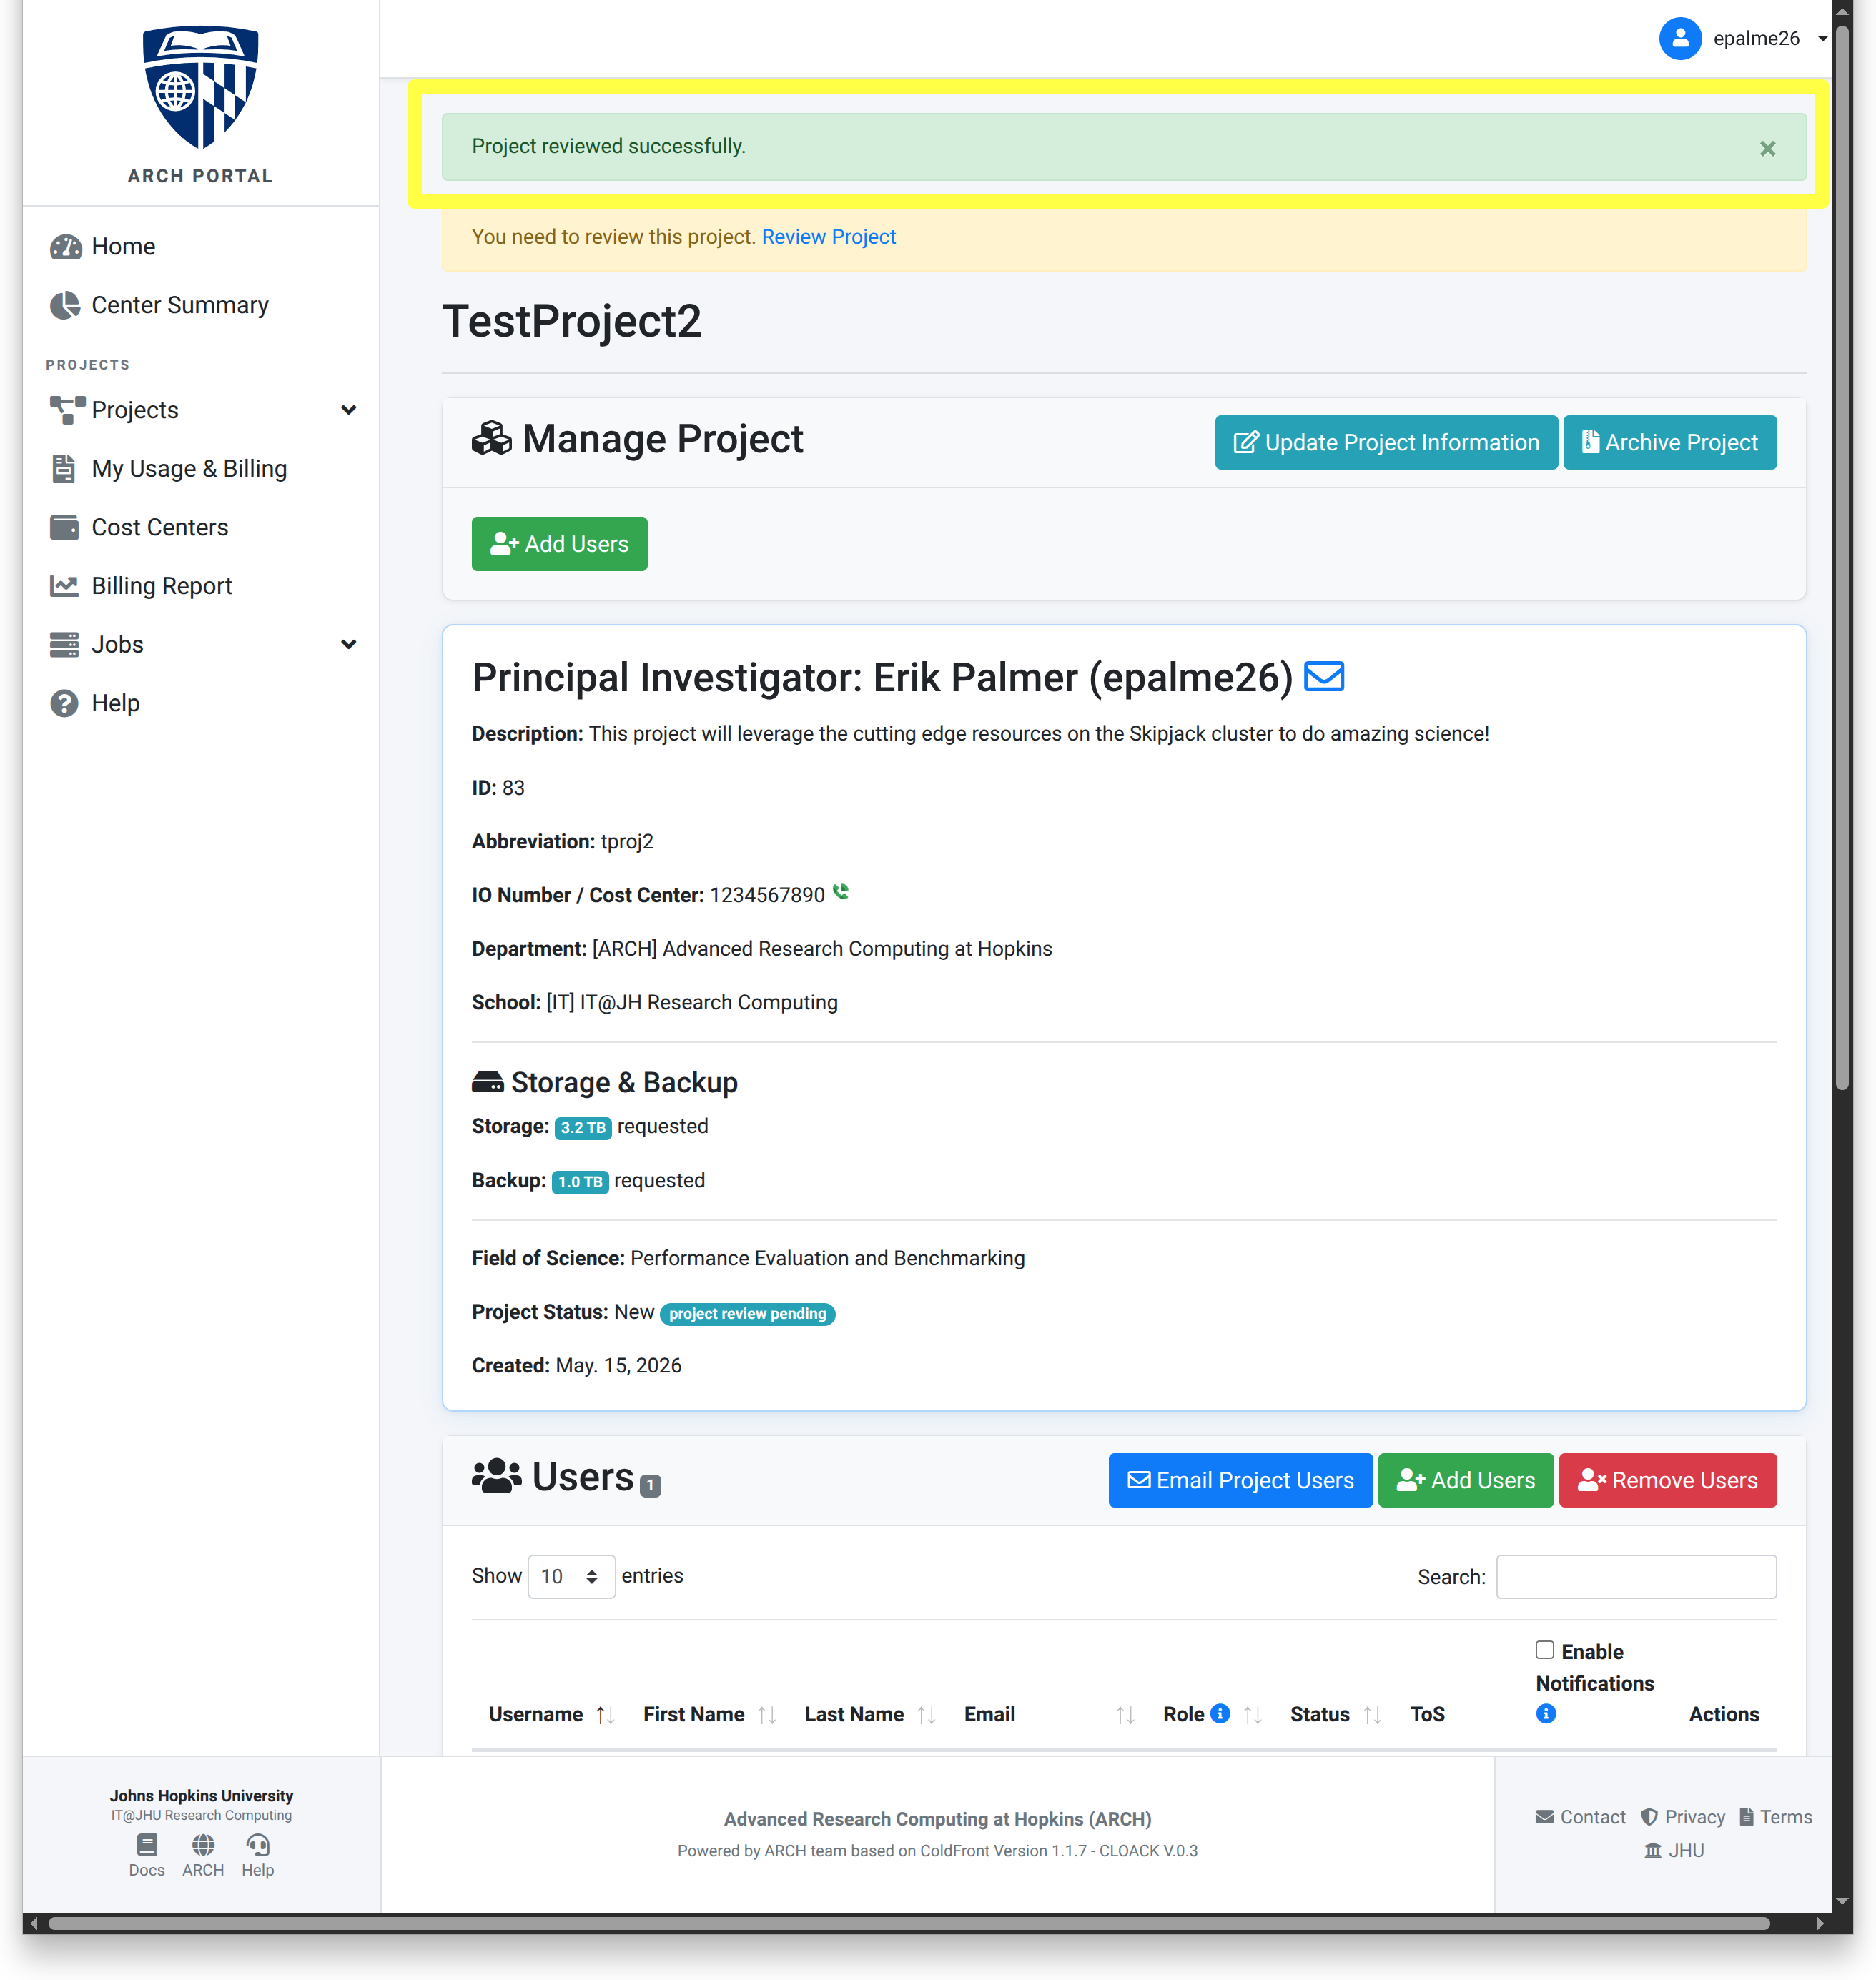
At this point, the project needs to be reviewed and approved by a staff user before an allocation can be requested.
Create an Allocation
Note
This section is for PIs with an approved project.
Once a project is approved, a resource allocation for time on the cluster can be requested.
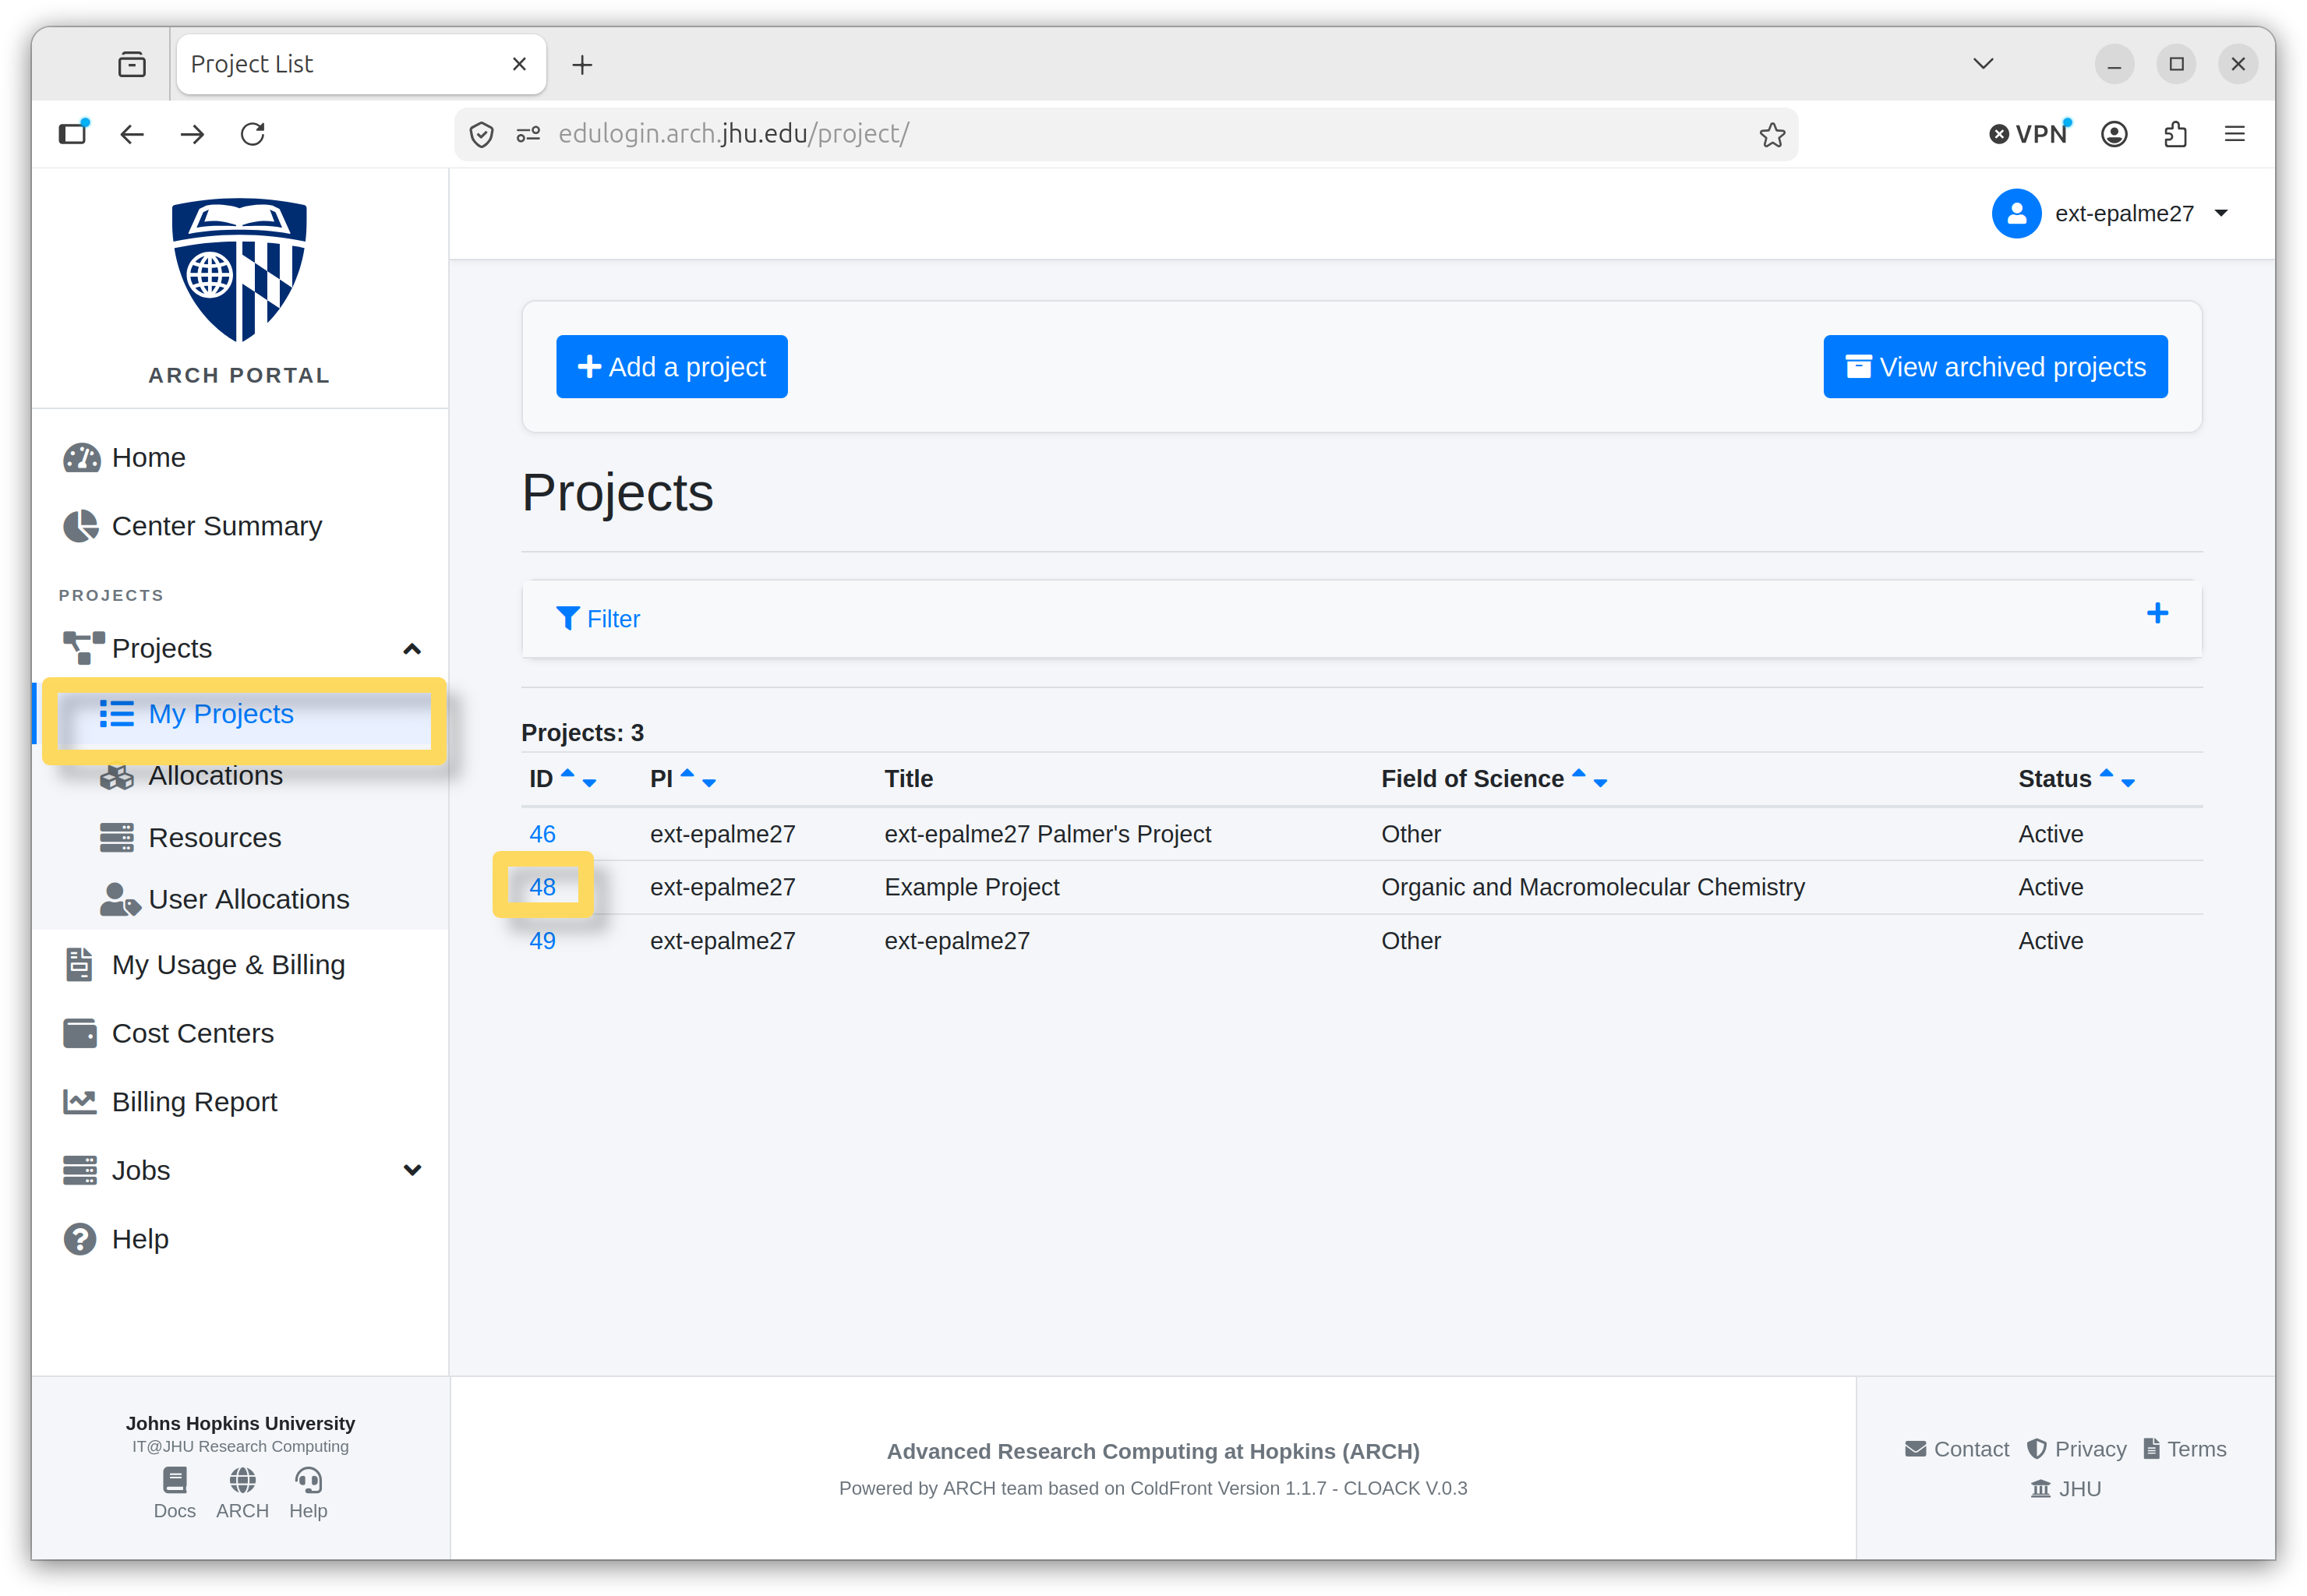
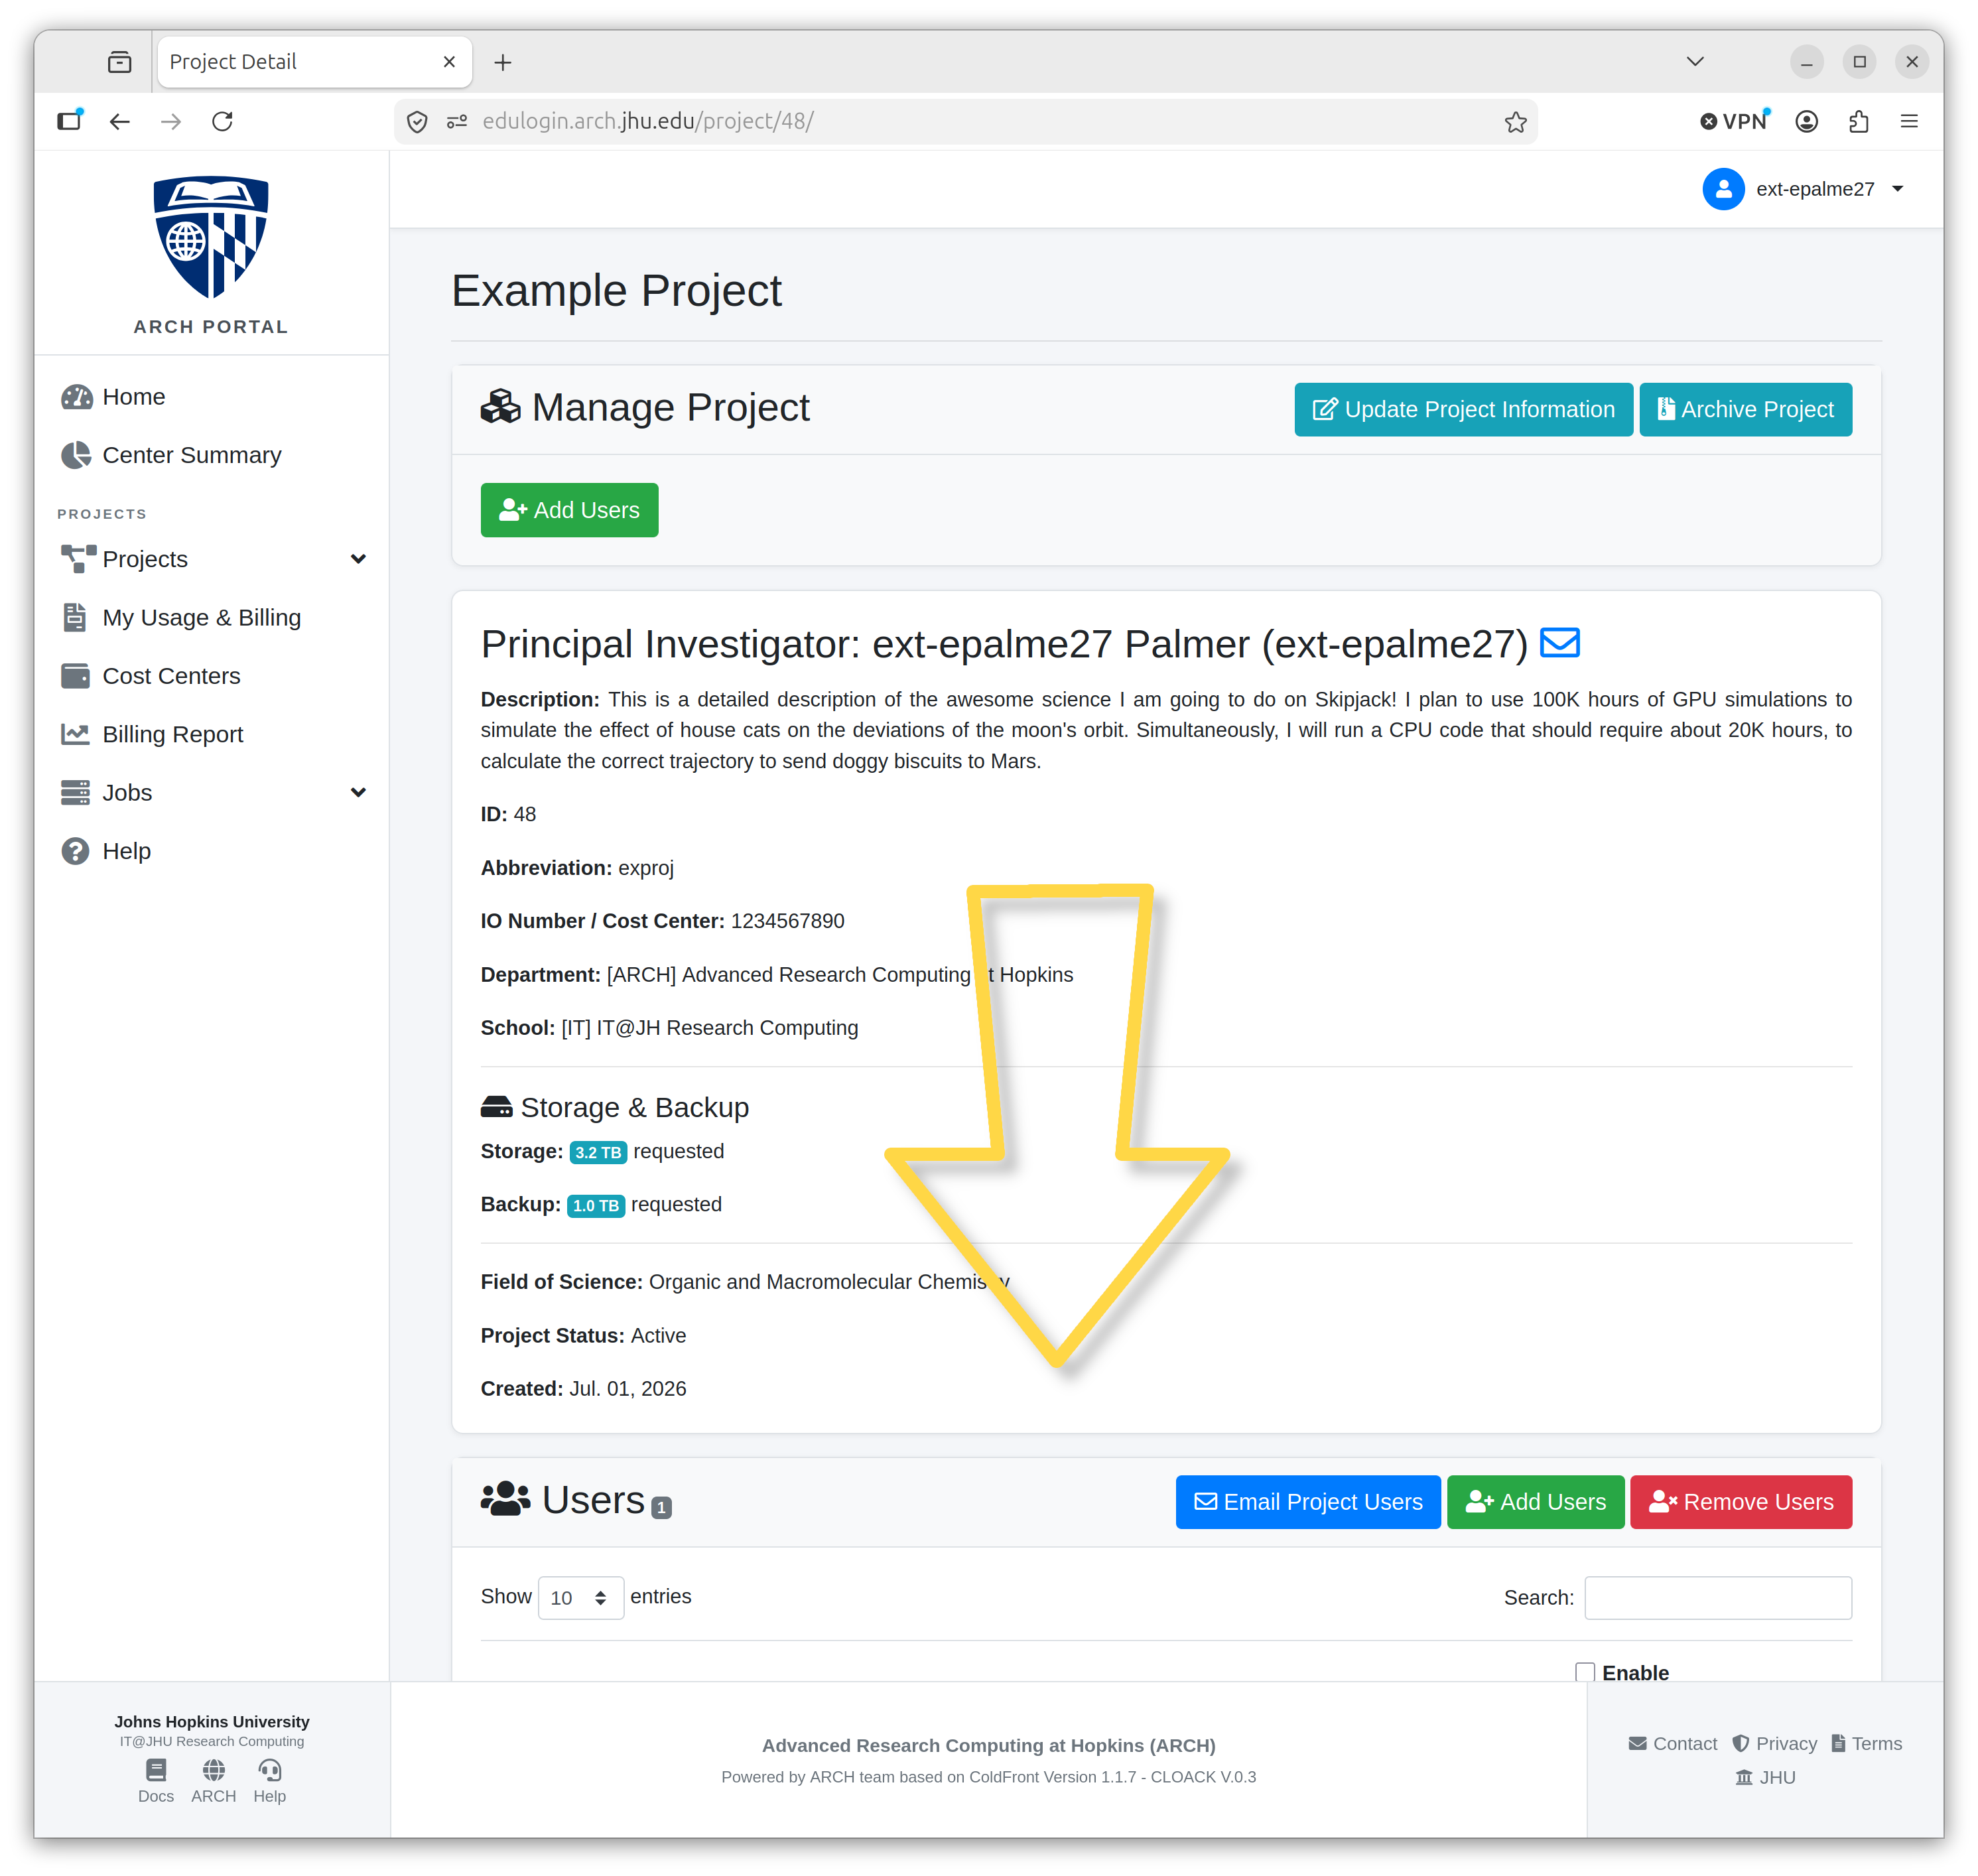
From the portal home screen, navigate to the project for which to request an allocation. You can follow Projects -> My Projects. Then select the project from the table by clicking on the number hyperlink.
Once on the Project page, scroll down and click + Request Resource Allocation.
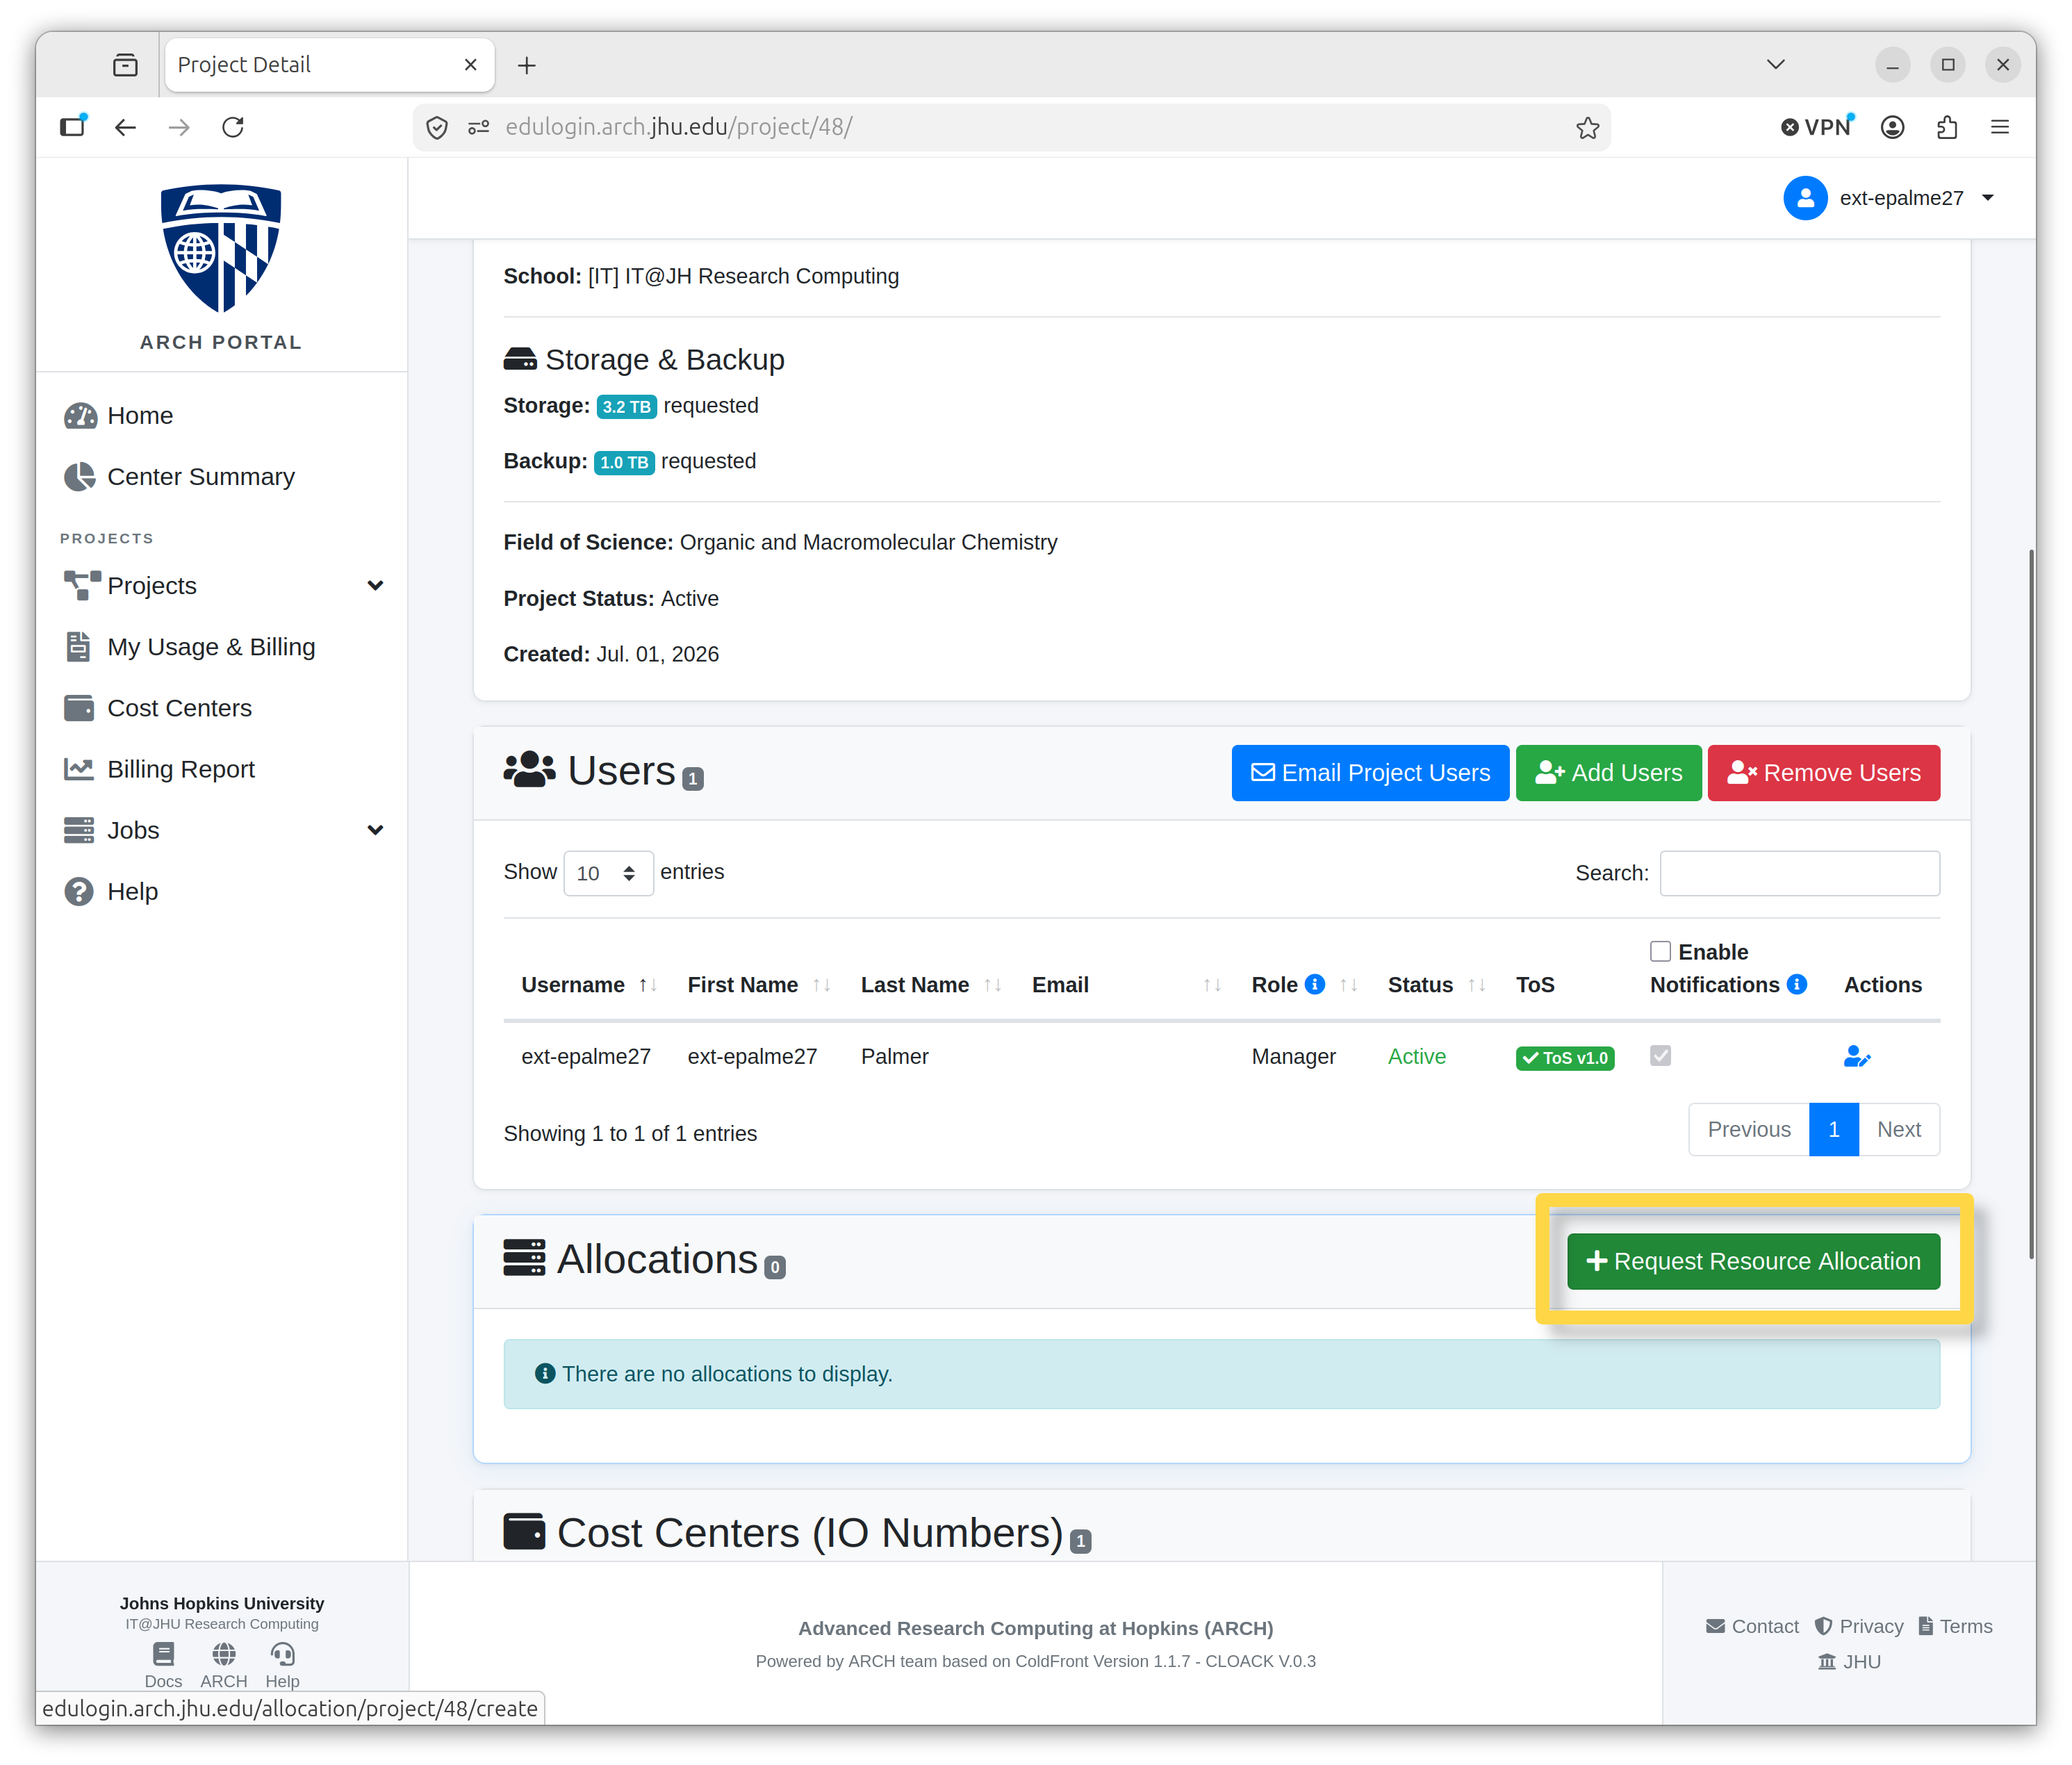
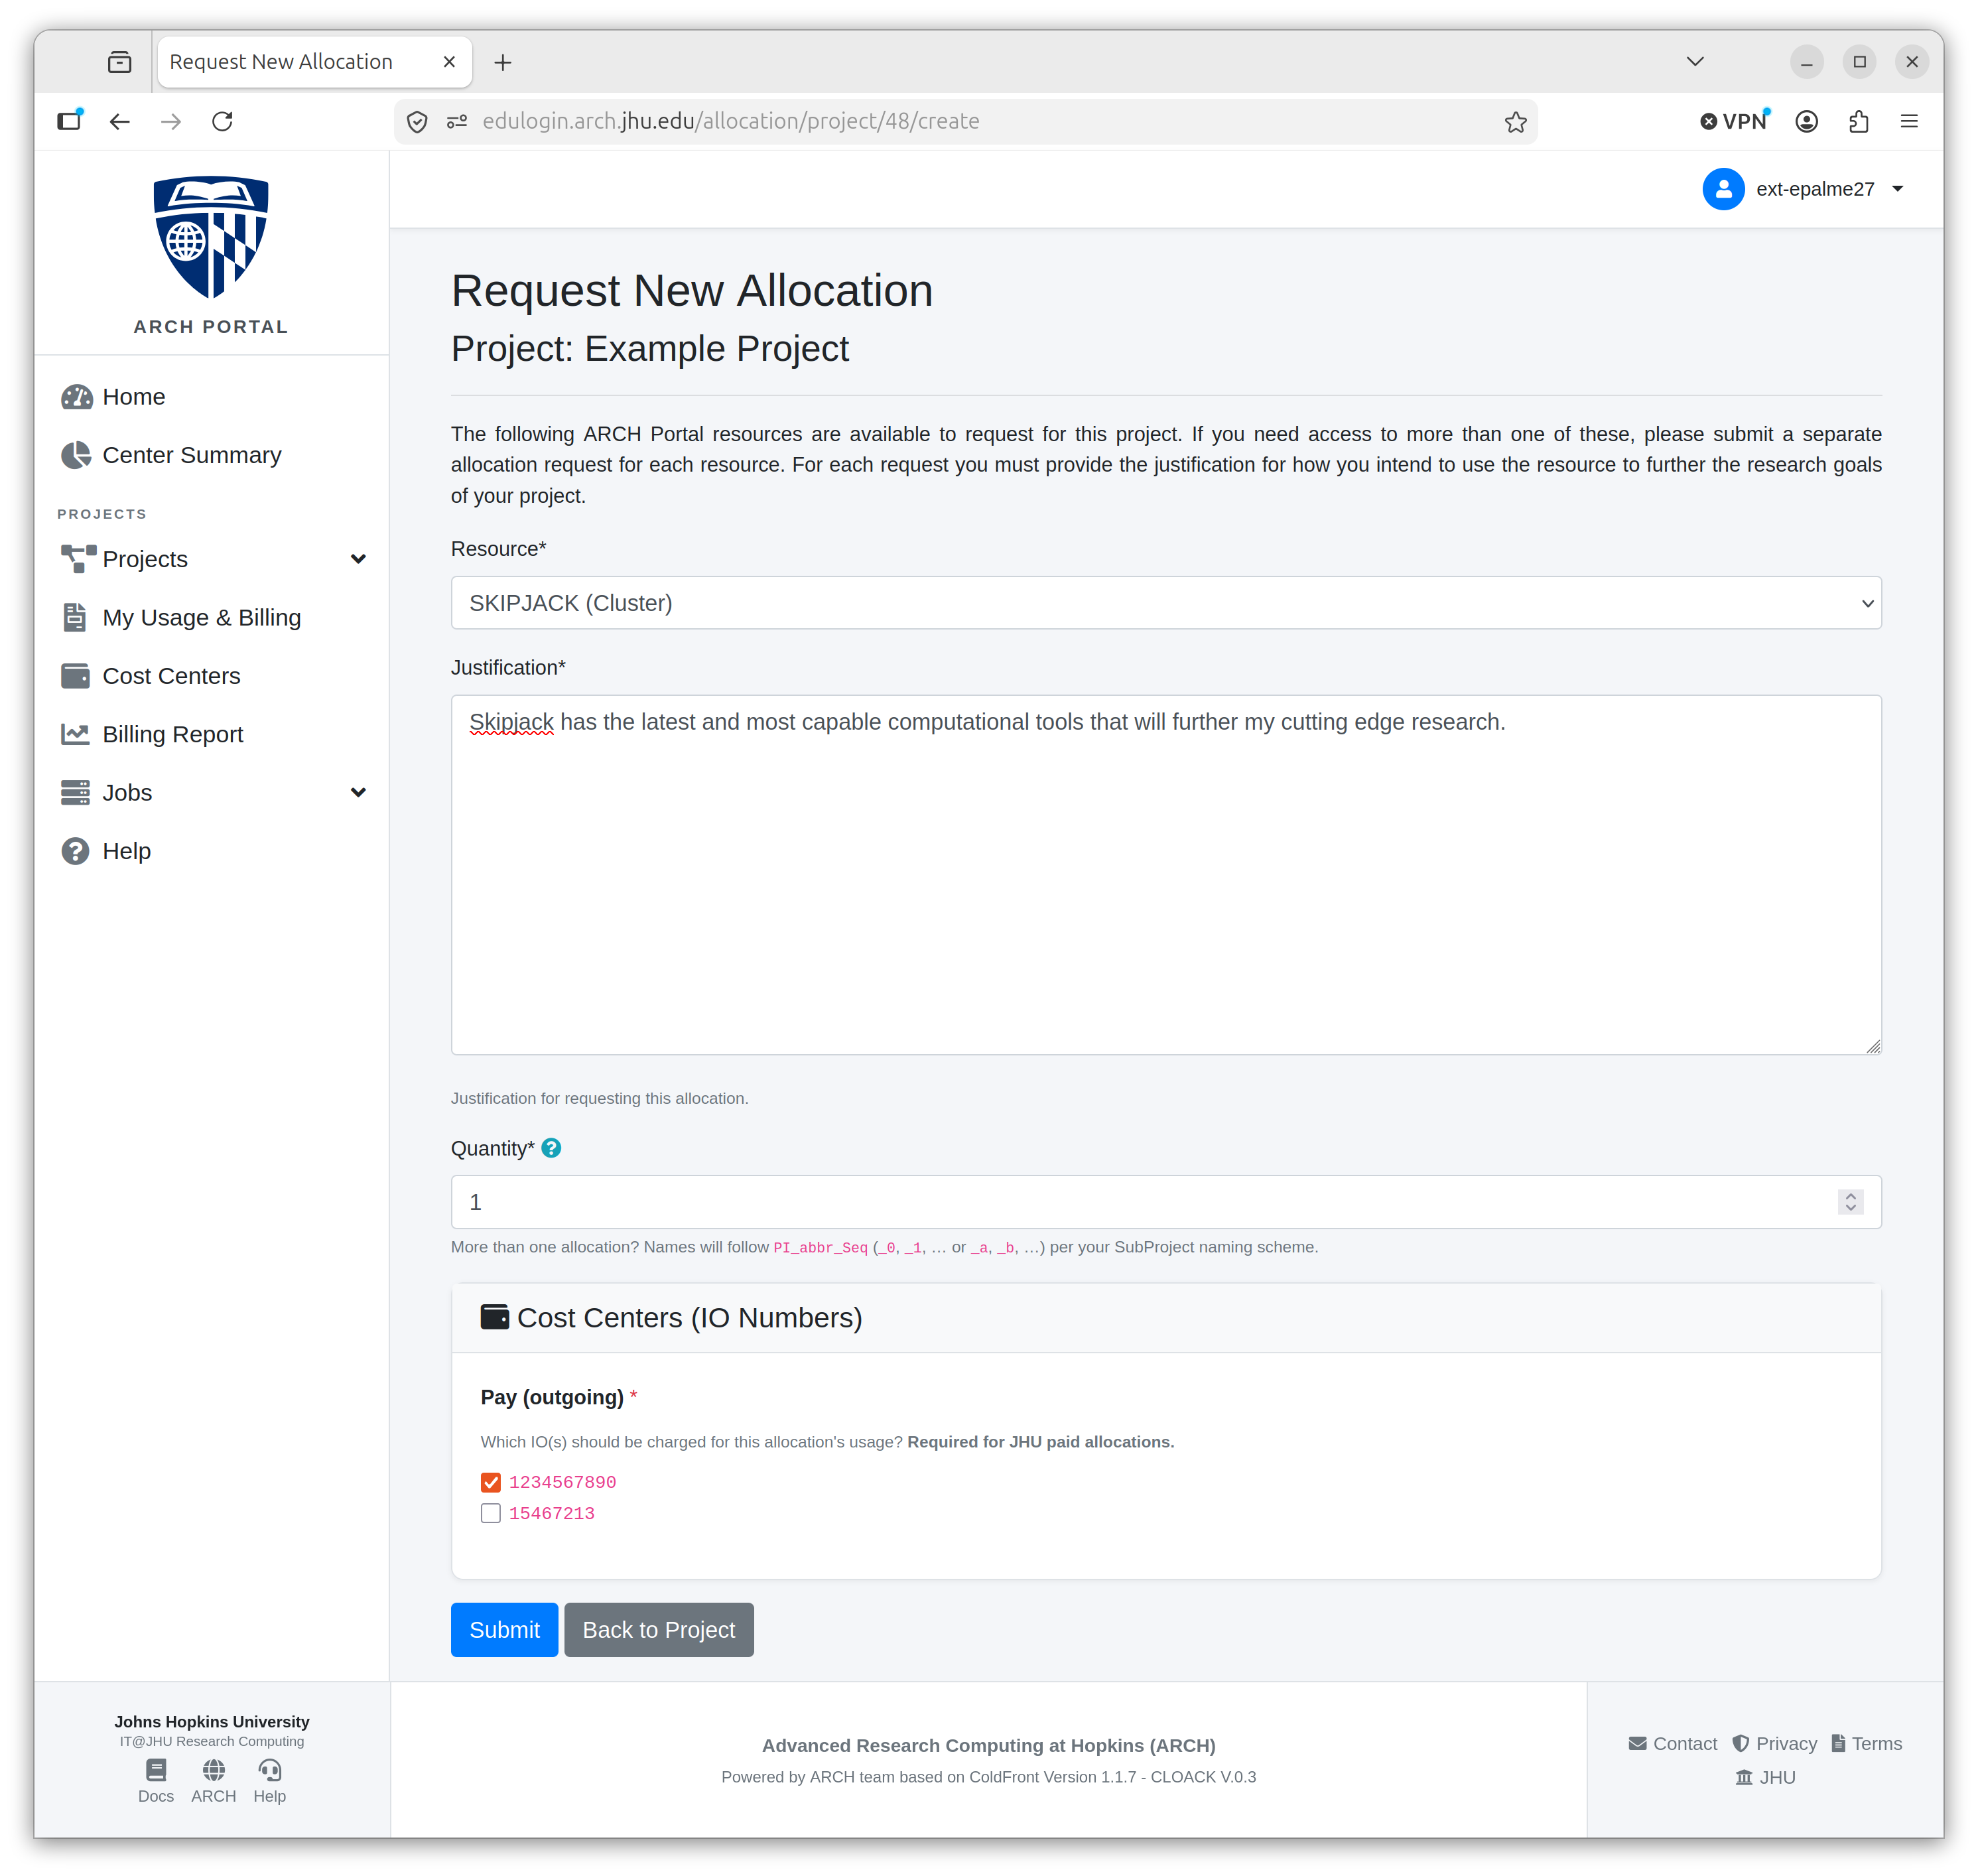
Fill out the required information and click Submit.
A banner at the top of the page will confirm your request has been sent.
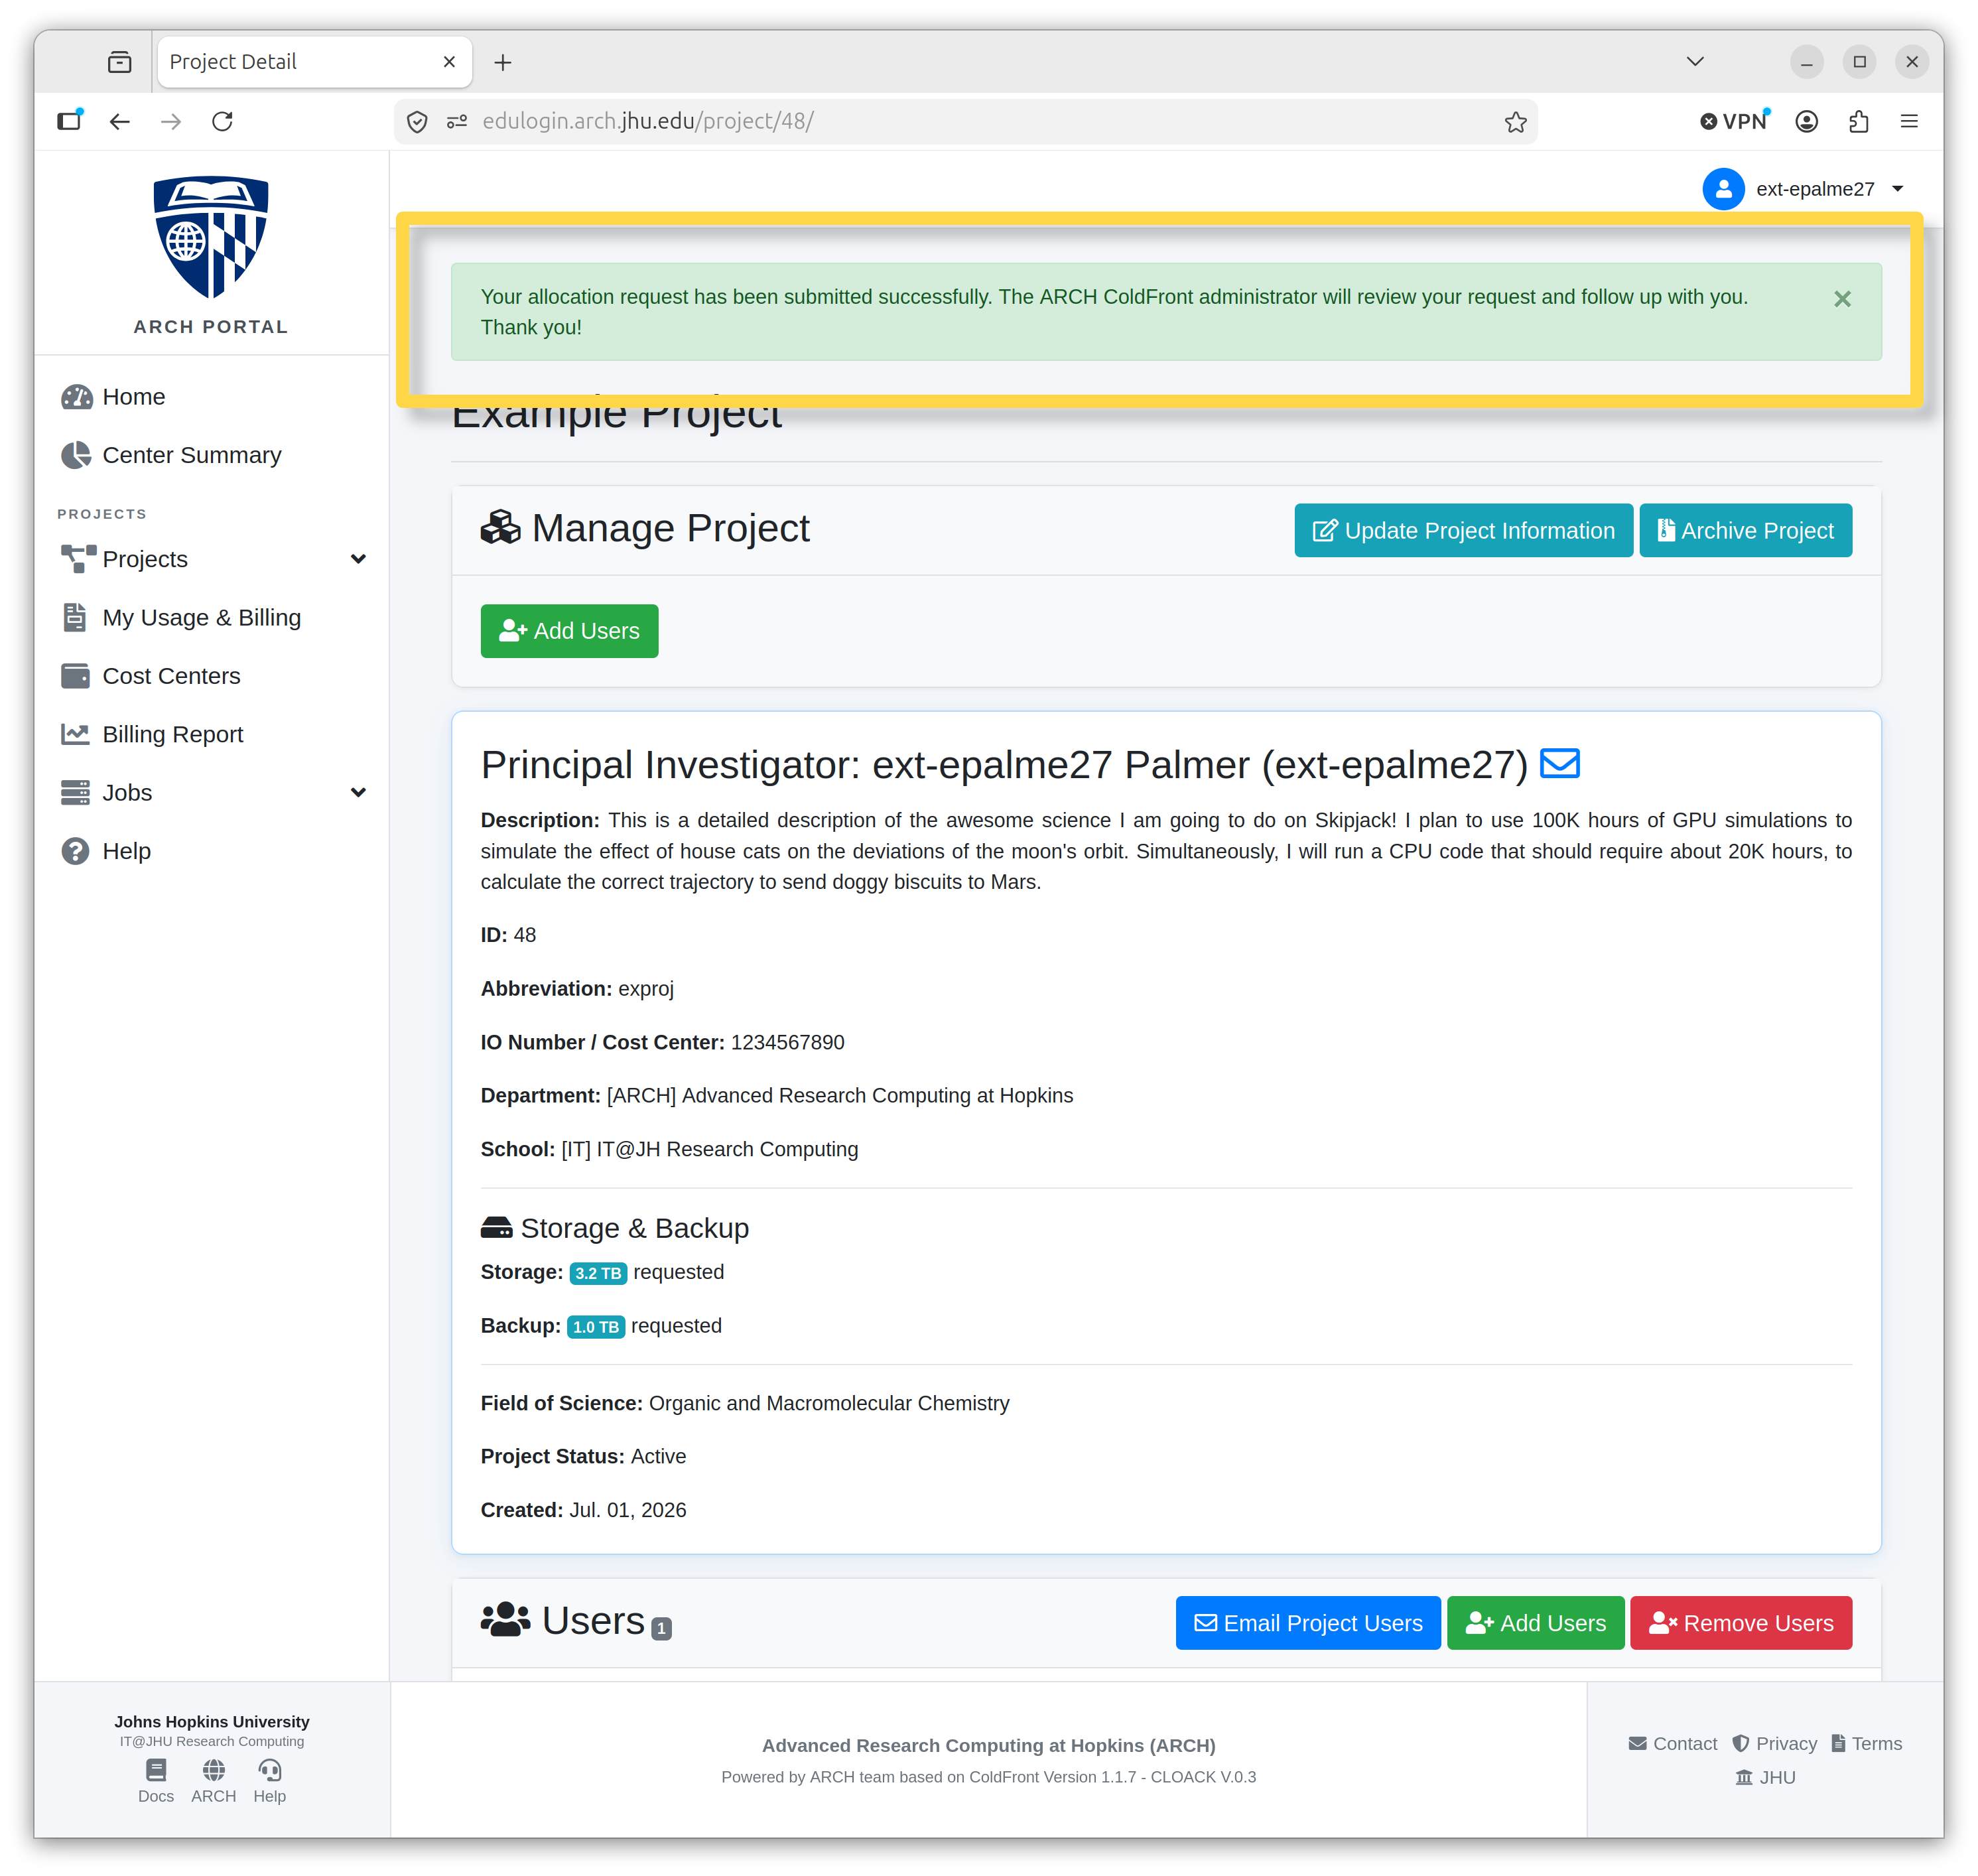
Add Users to a Project or Allocation
Note
Only PIs and managers of the same project can add users.
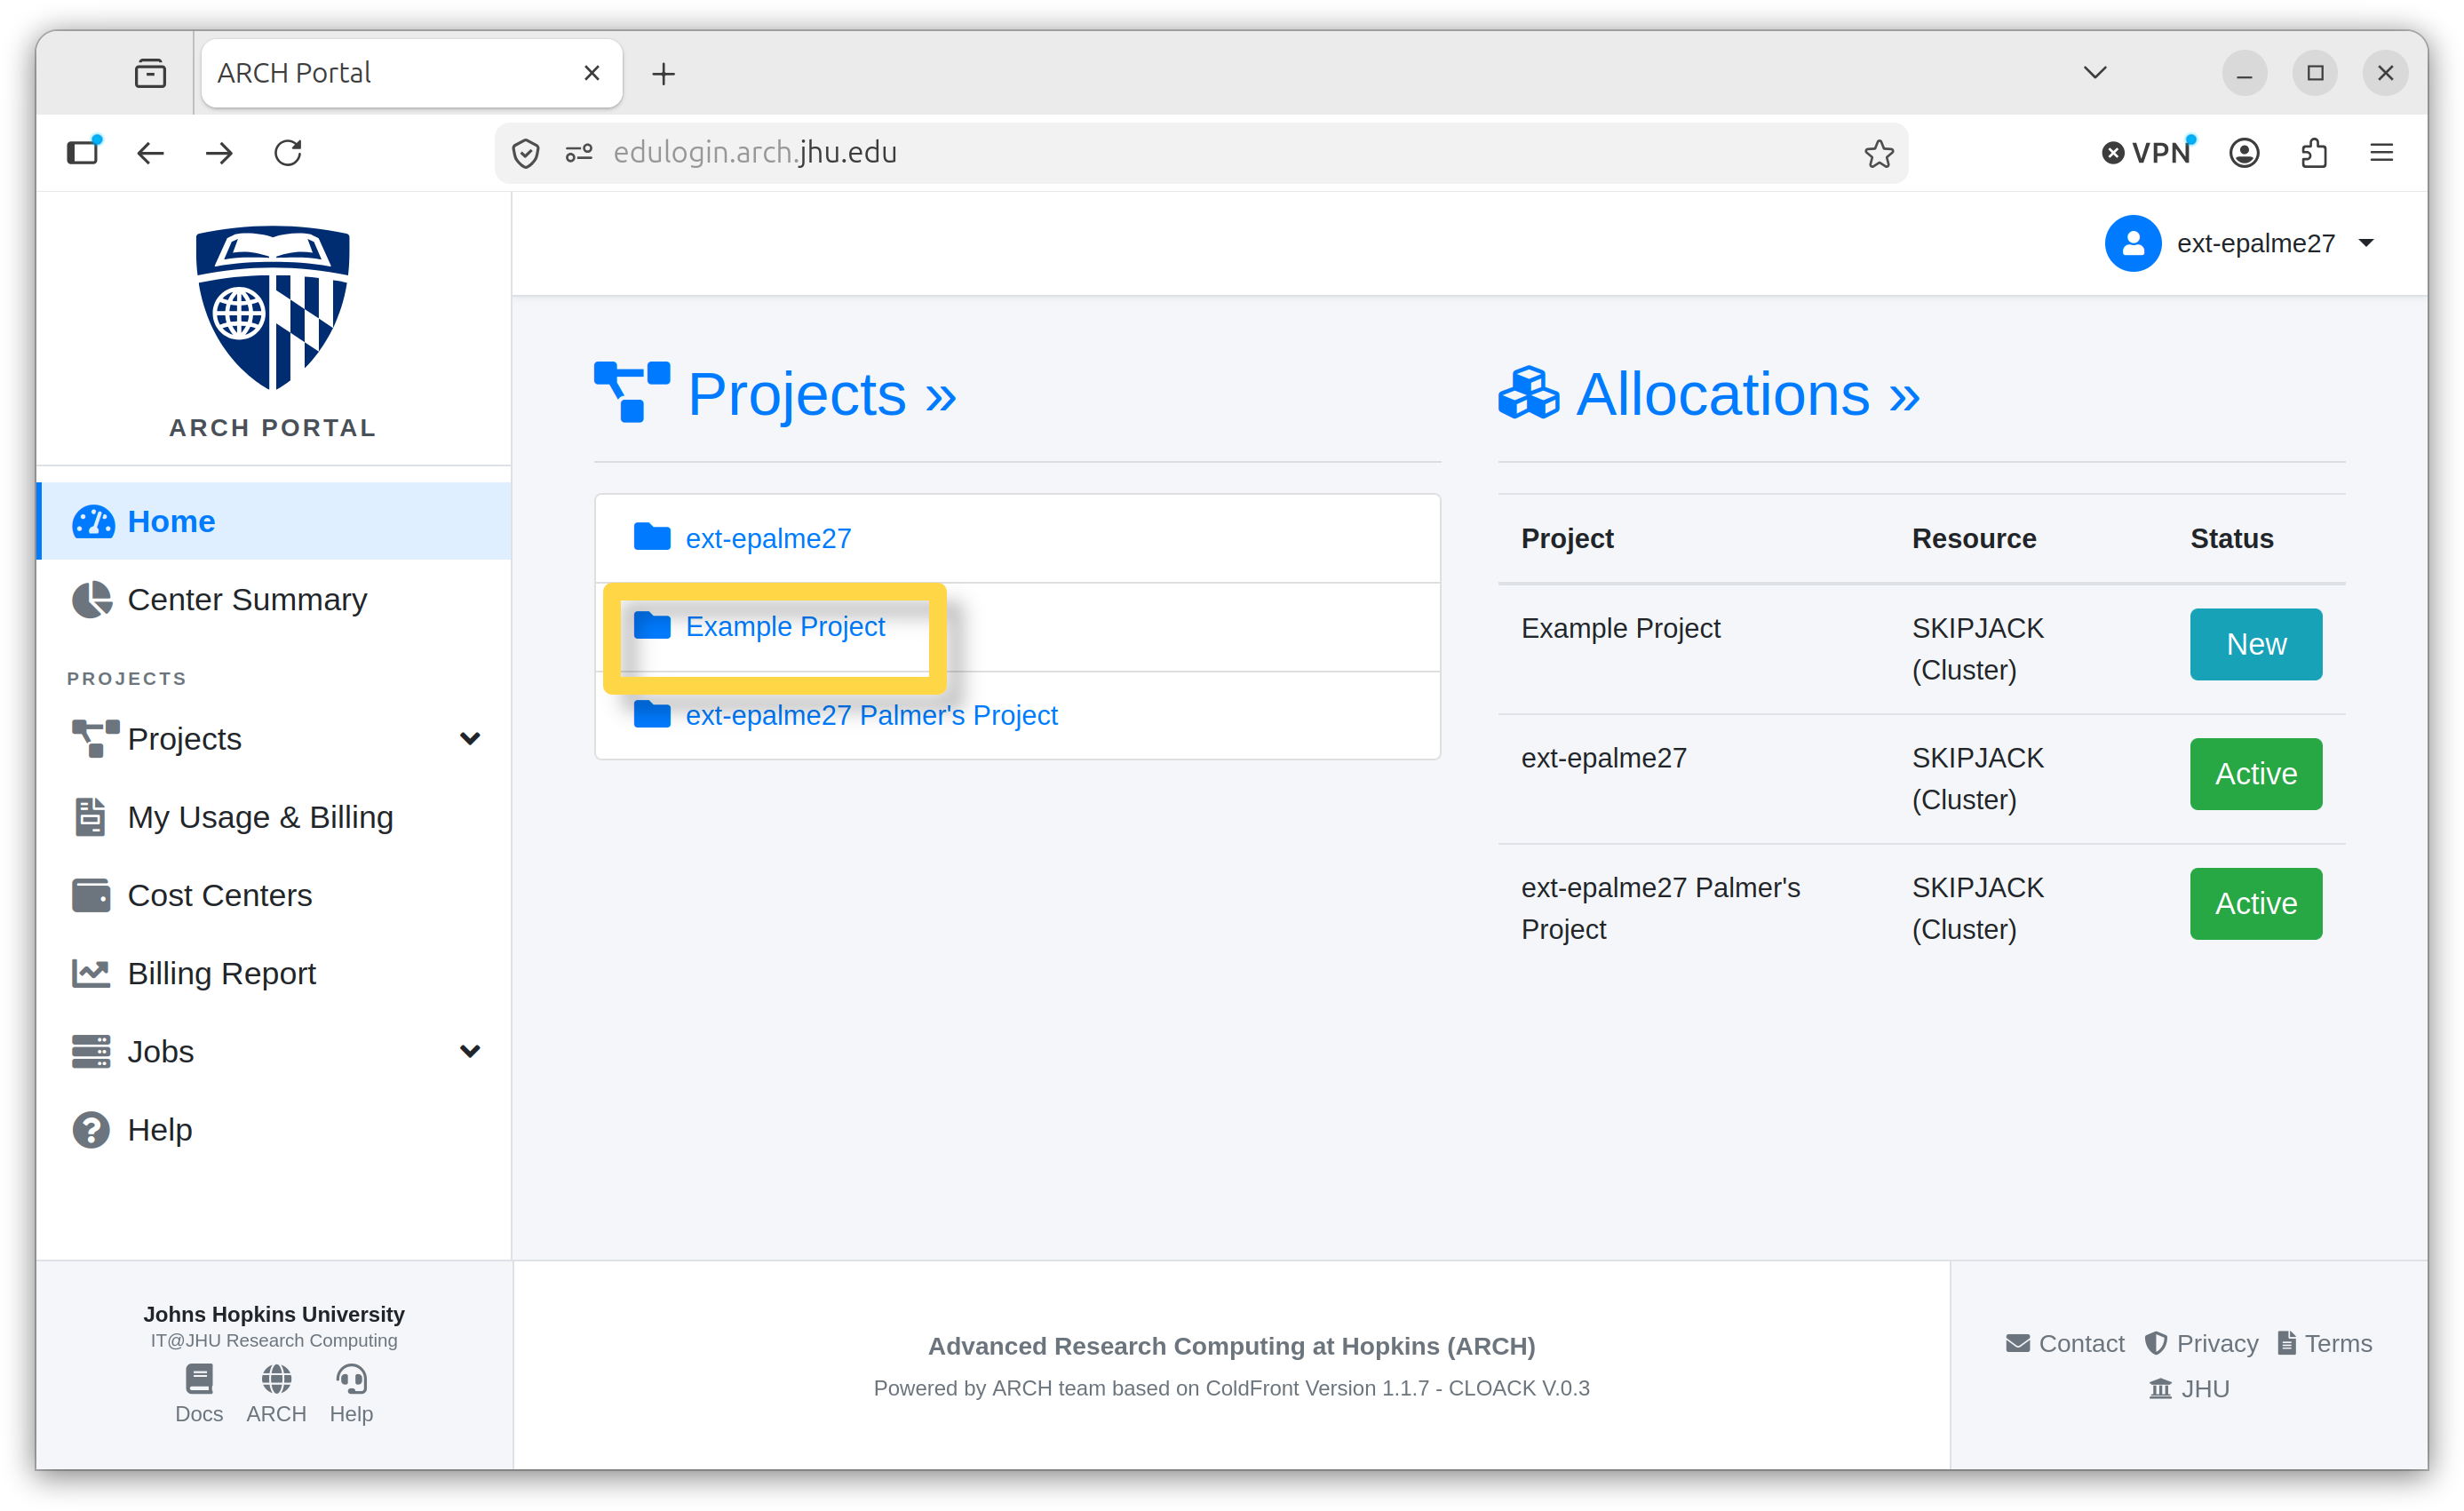
Navigate to the project.
Select the project you wish to add users to by clicking on the name hyperlink.
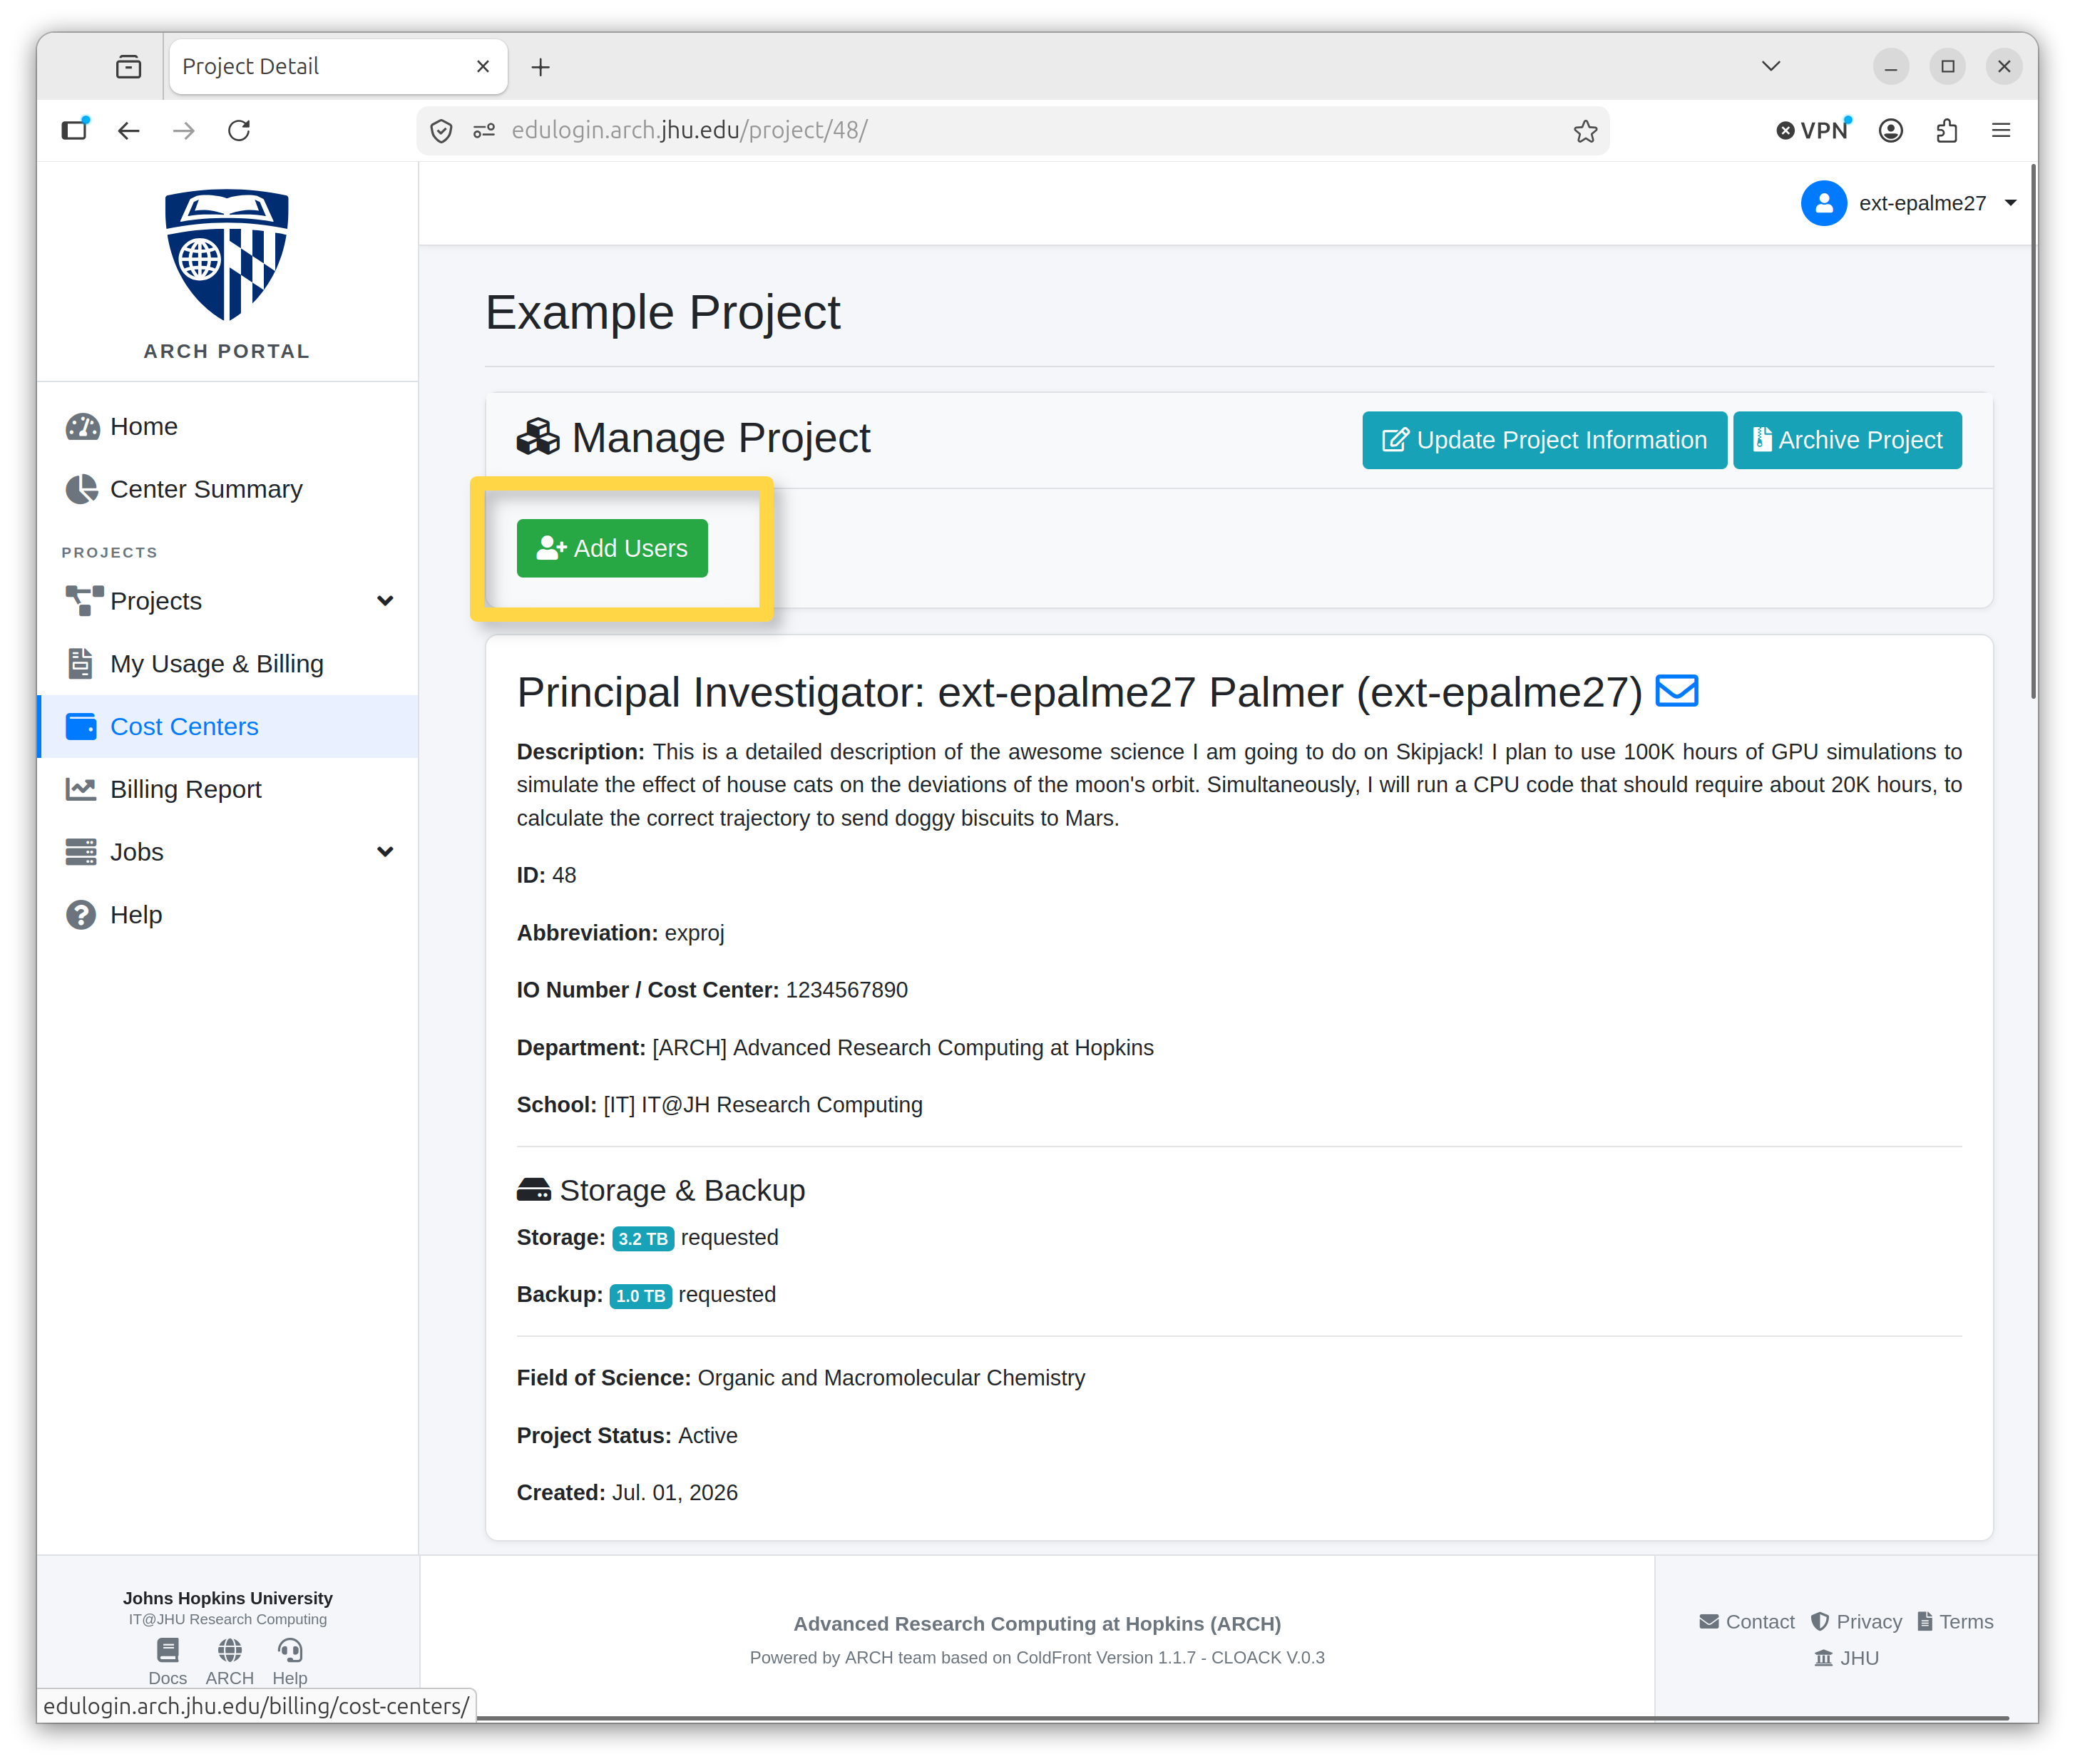
Press the green Add Users button under Manage Project.
Enter the username in the Search String field.
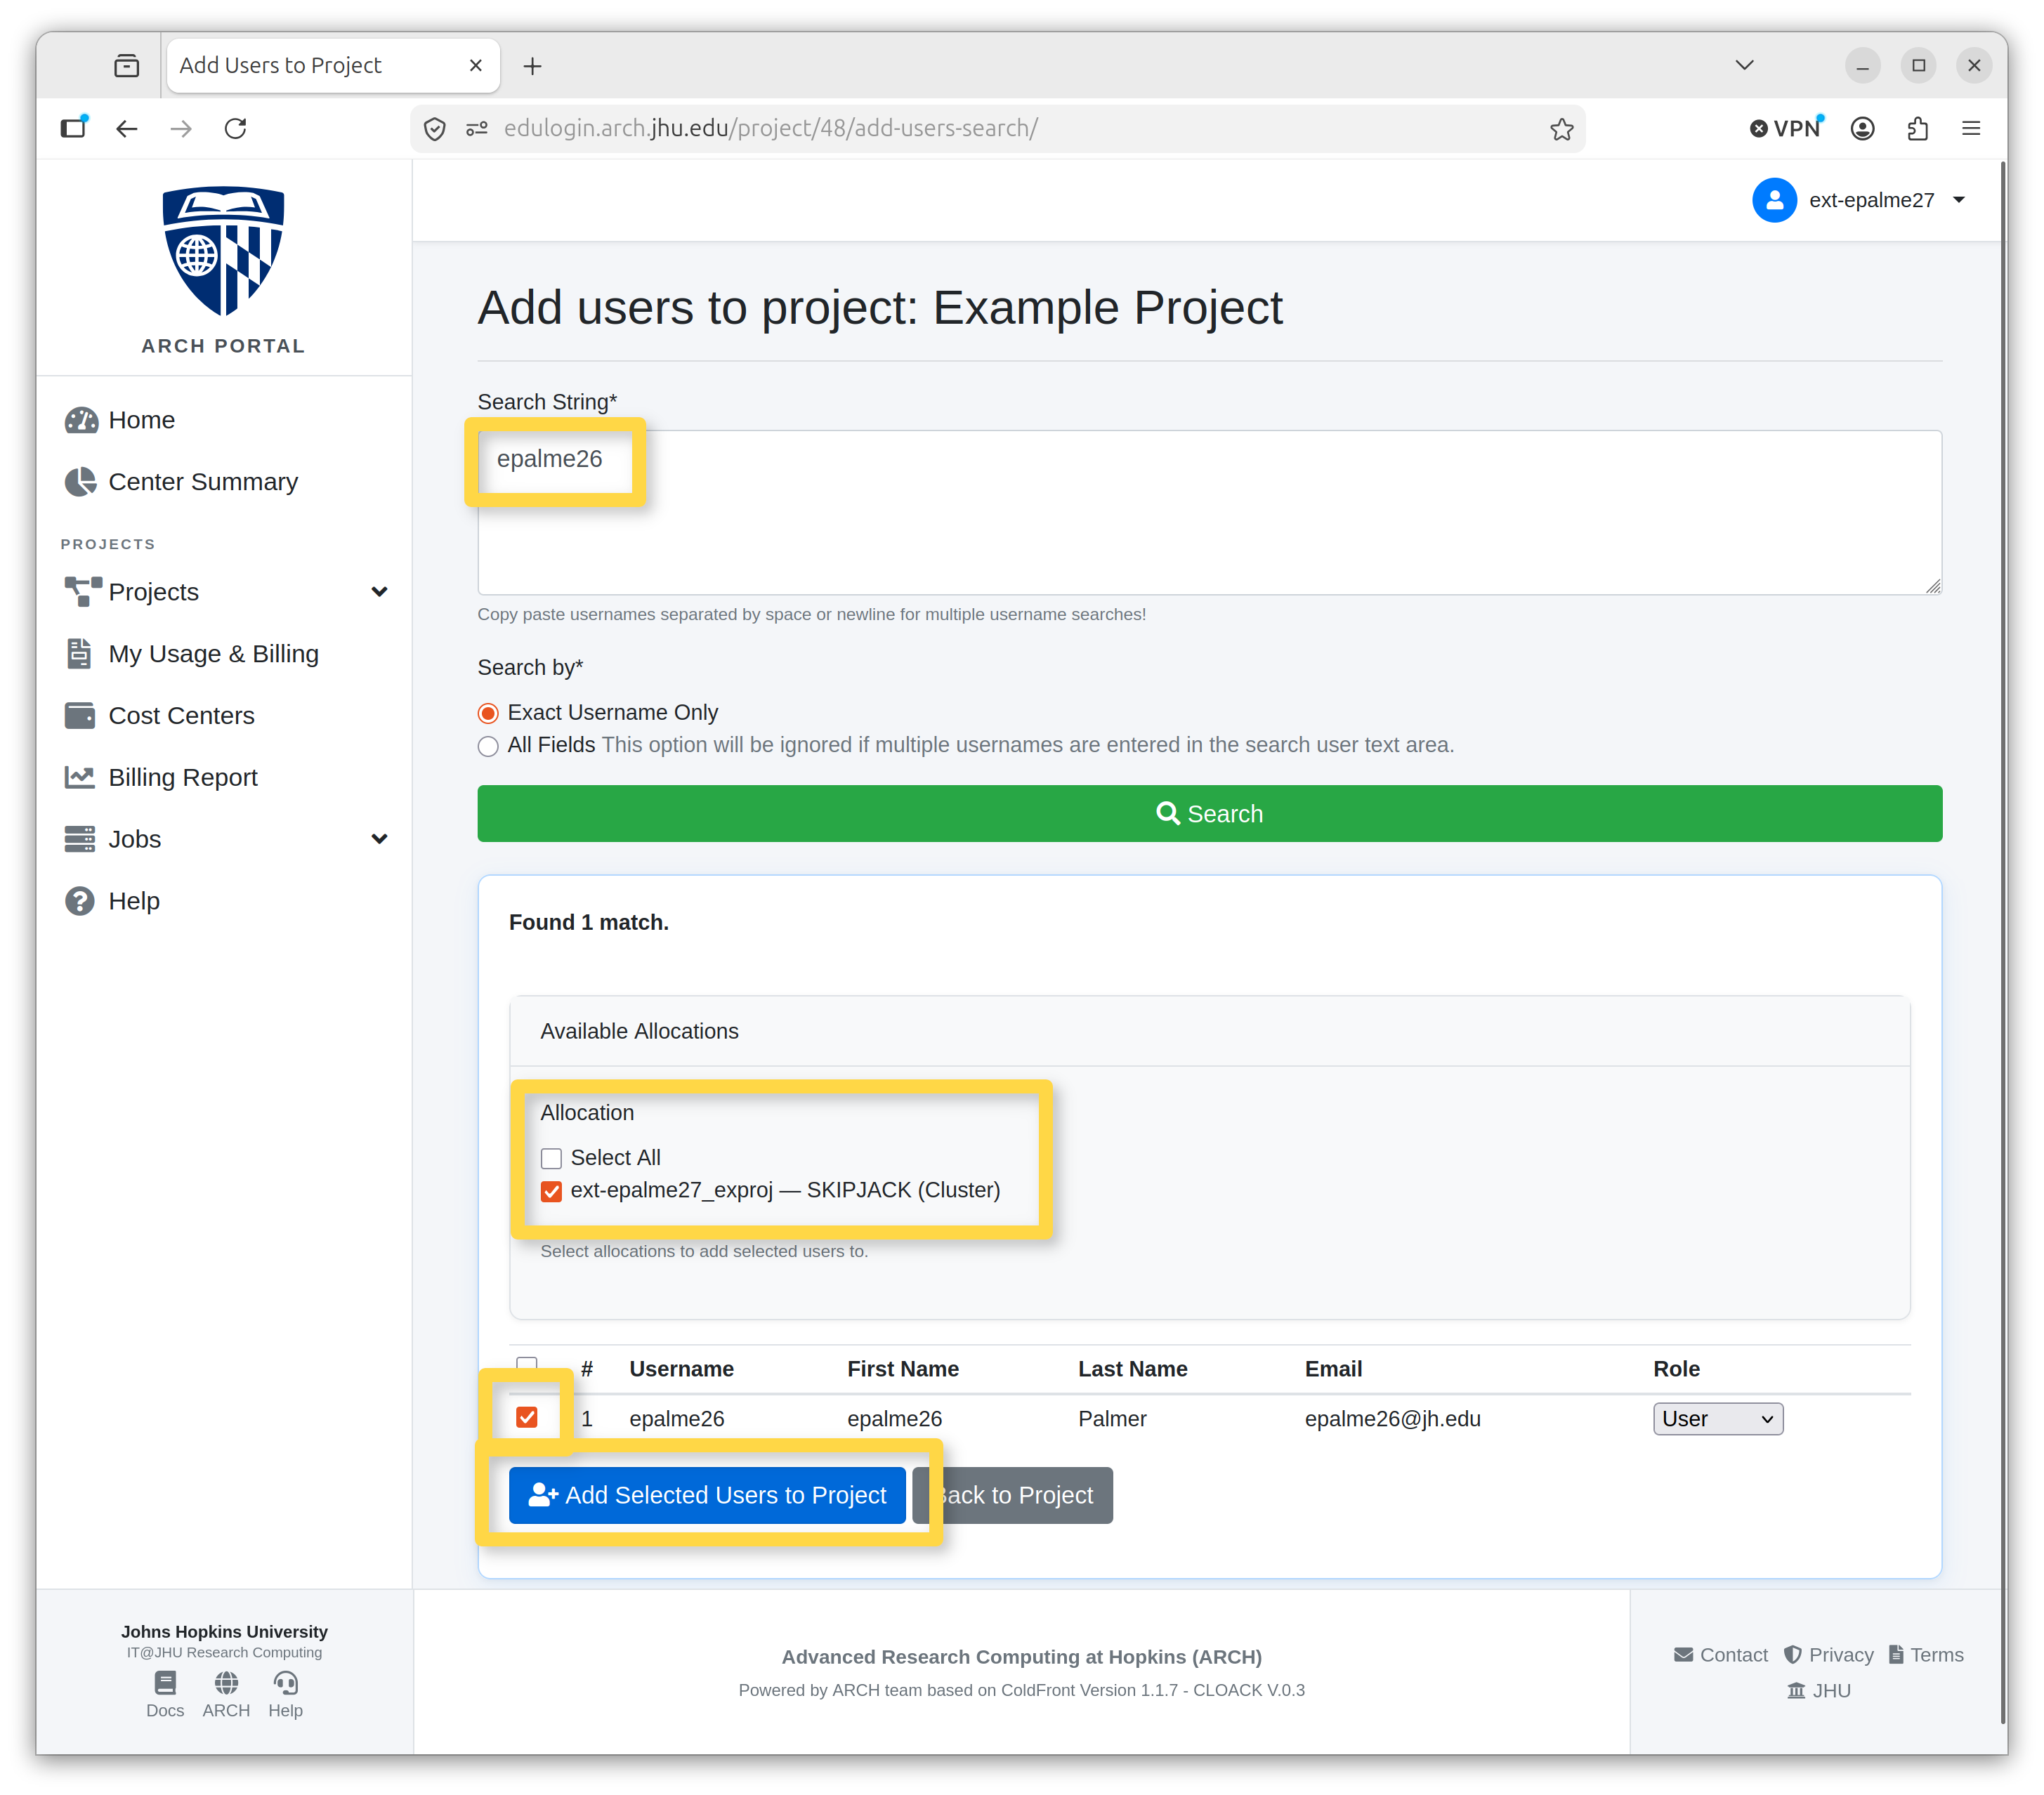
Click the green Search button to populate the found matches list. When the user is found, click the checkbox next to their username. Then click Add Selected Users to Project to add the user to the project.
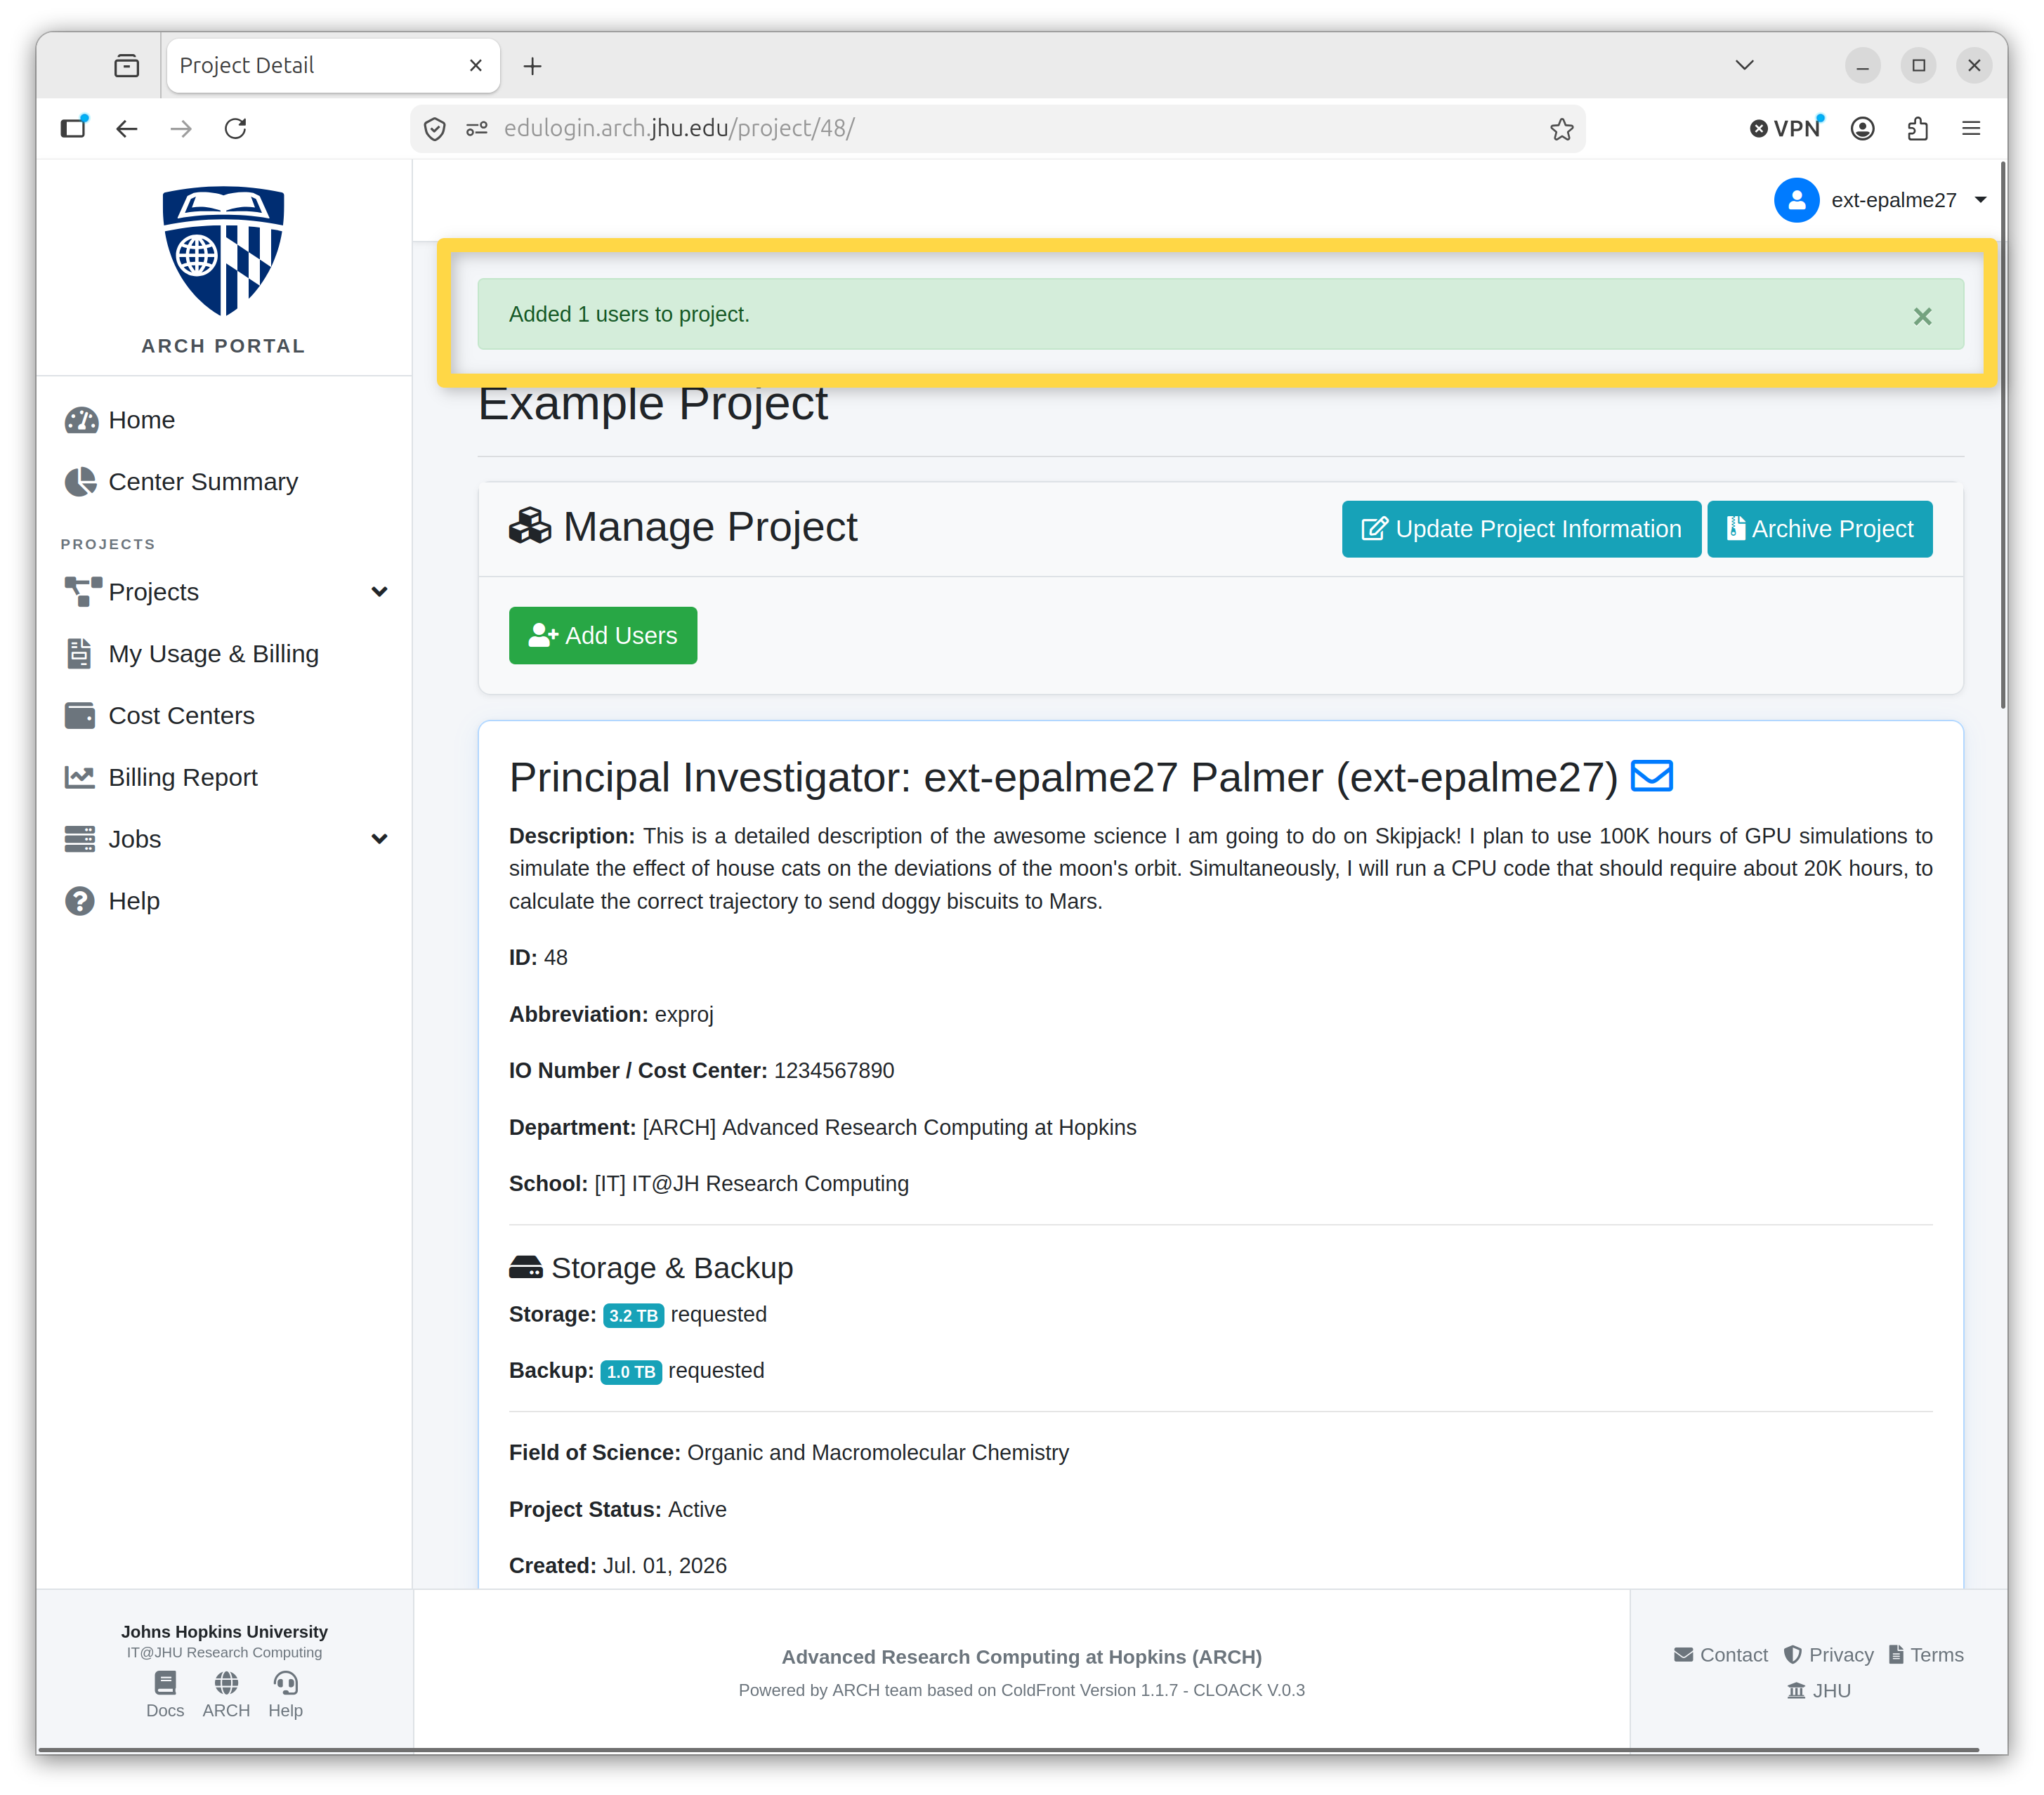
The banner at the top will confirm the user has been added.
Assign Proxy Account Managers
Note
Only PIs can assign a user to manage a project they own.
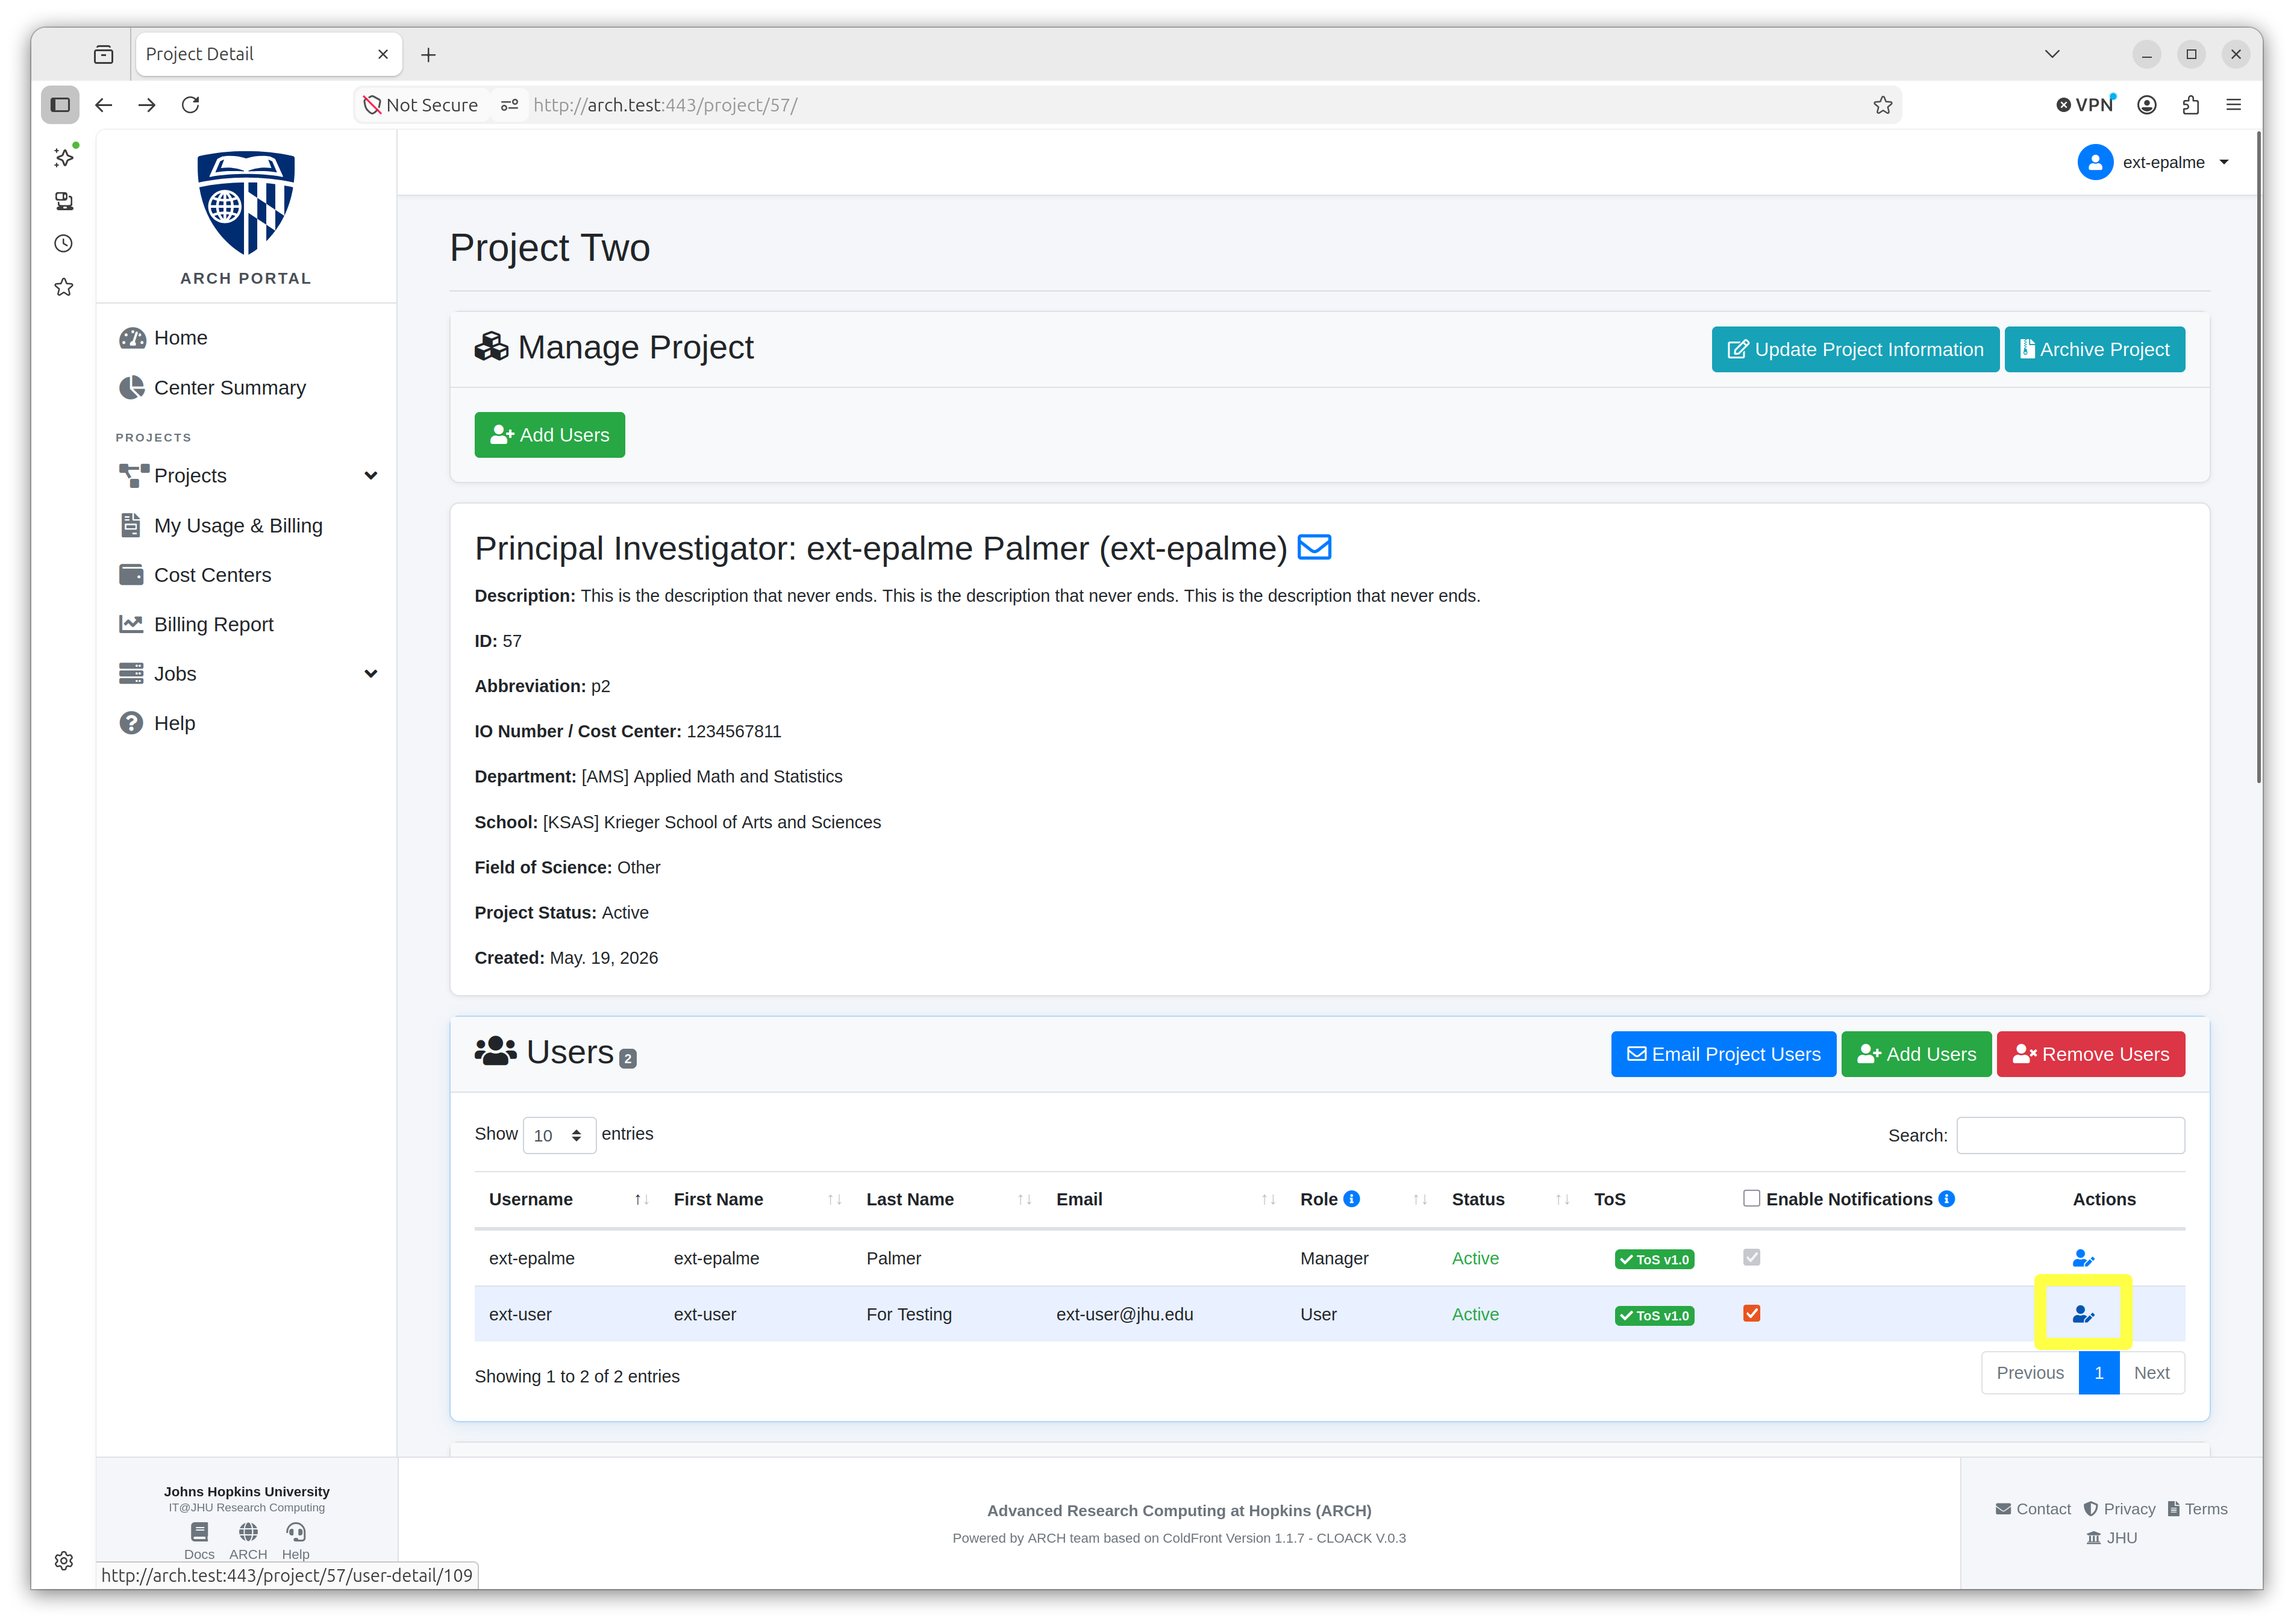
From the project page locate the Users table.
Select the user whose role you want to change and click the person icon under Actions.
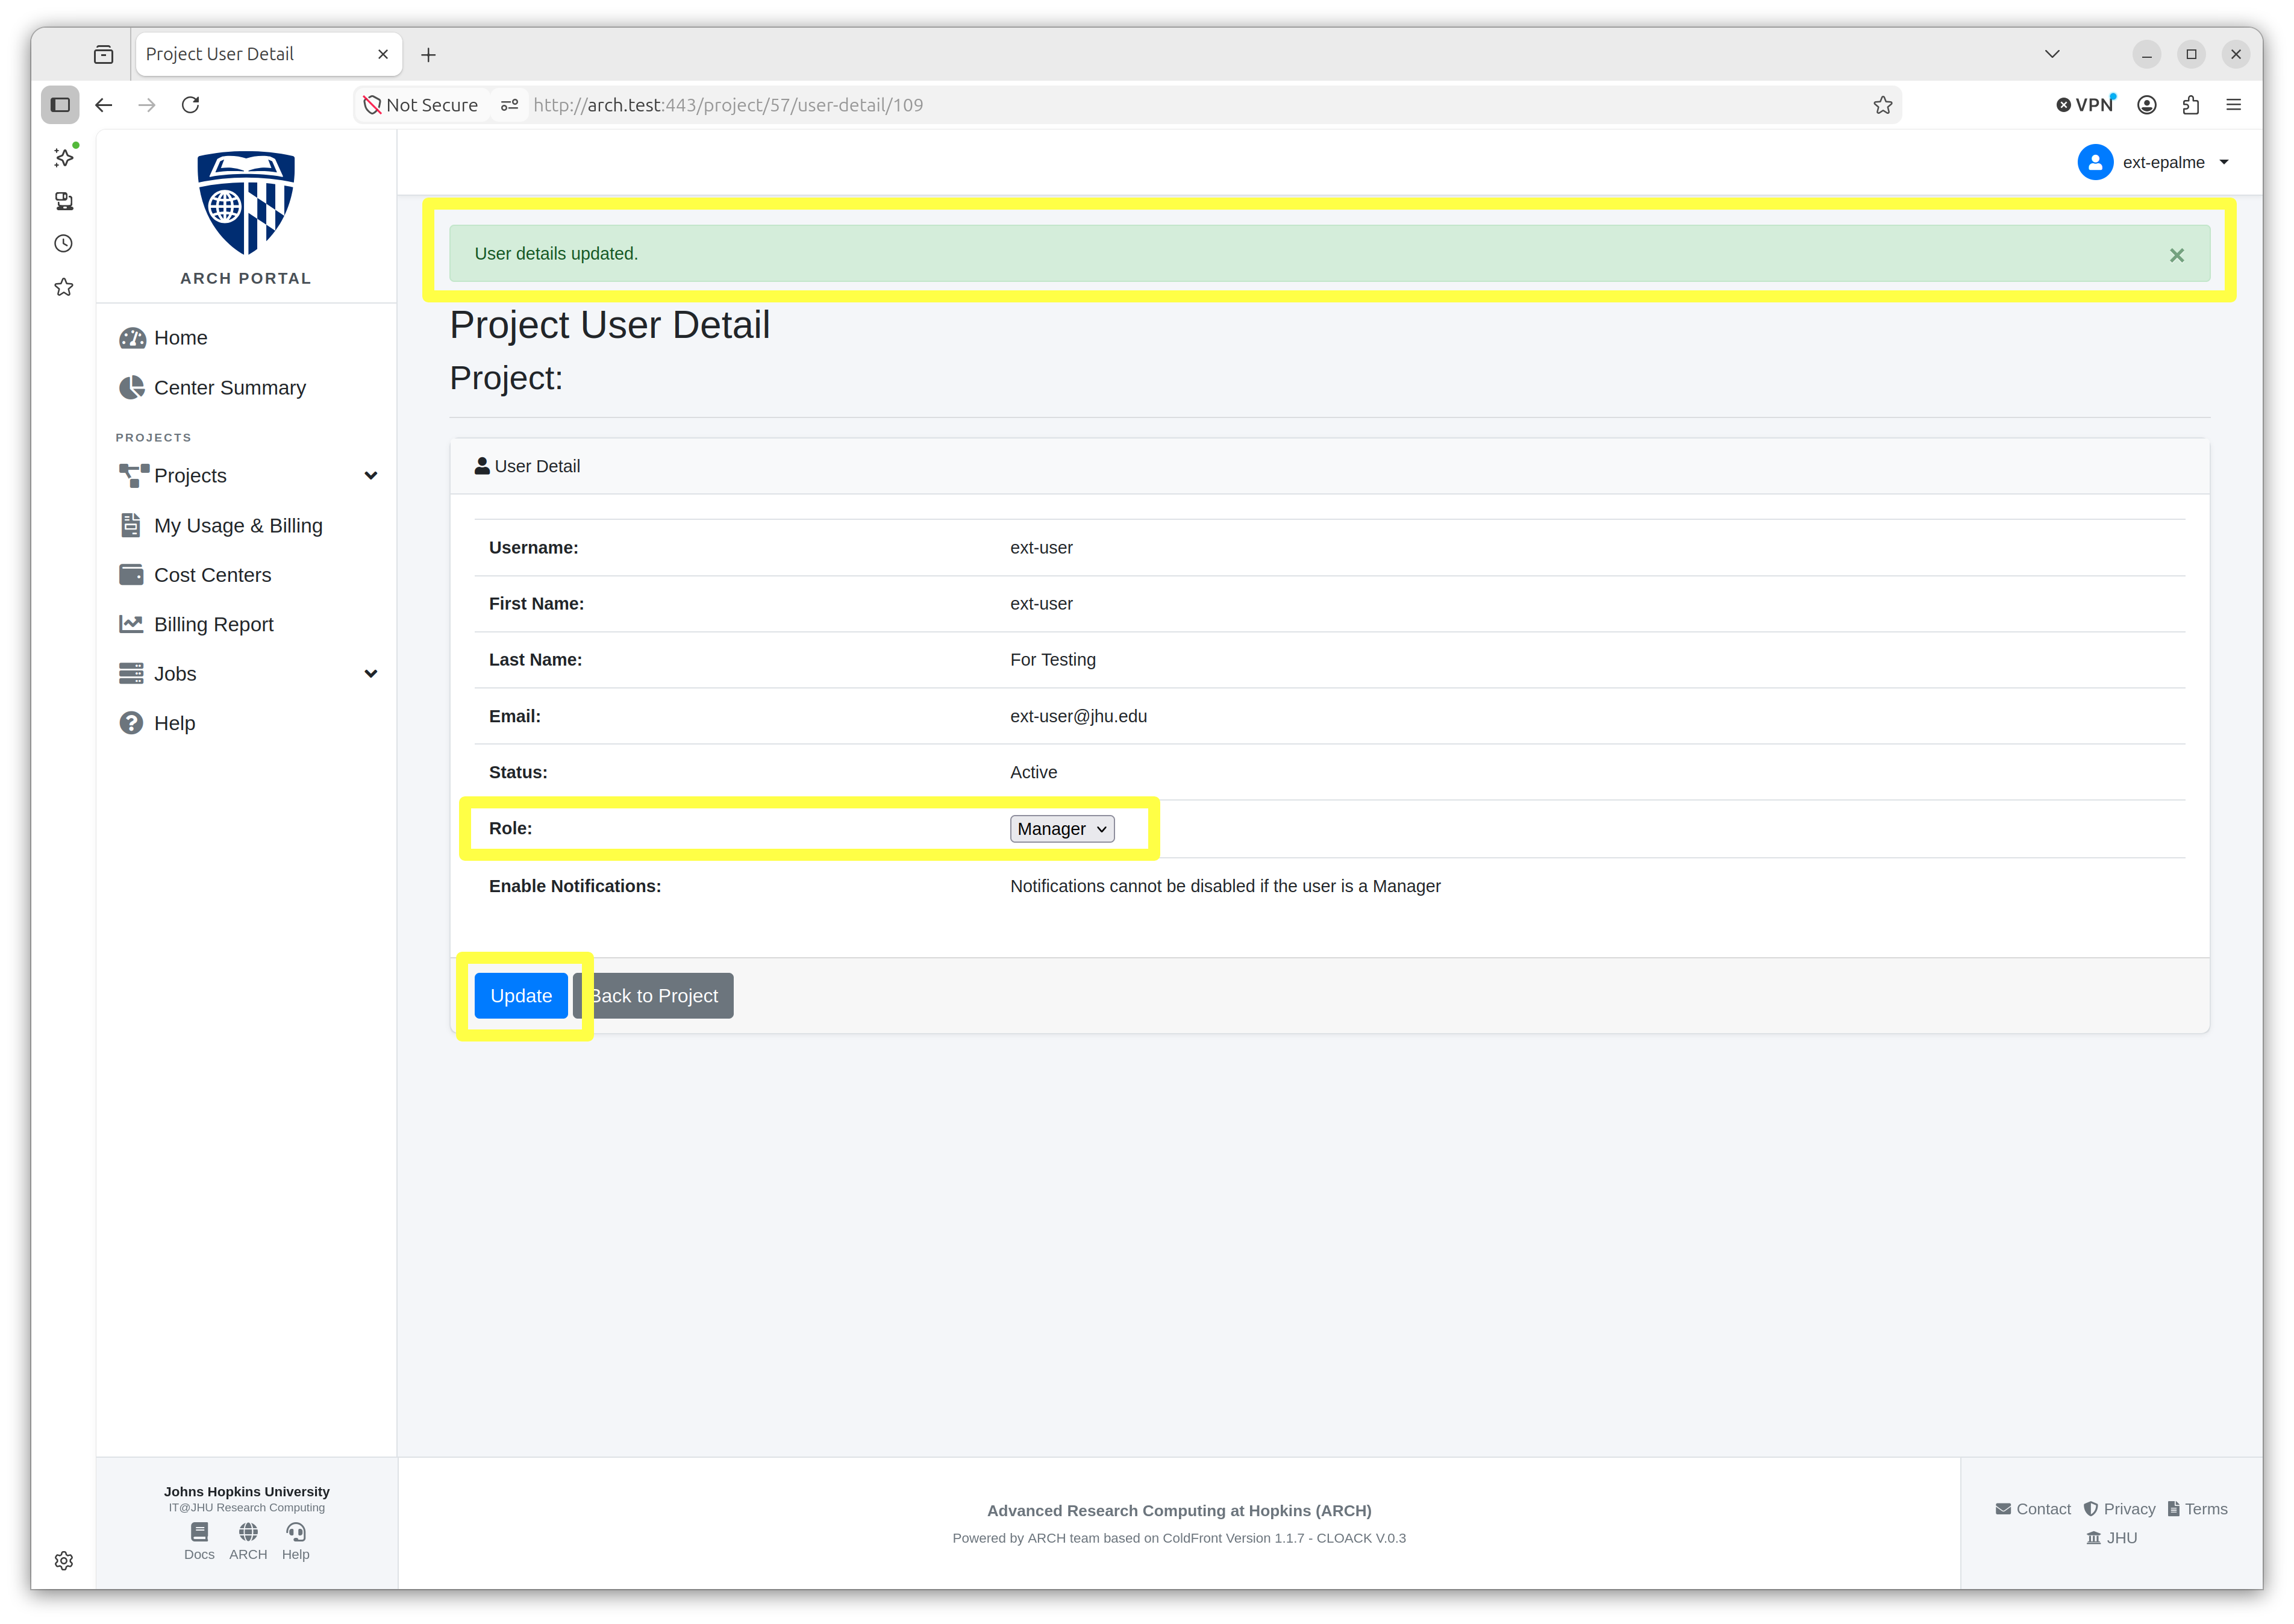
On the Project User Detail page, select the Manager role from the dropdown menu.
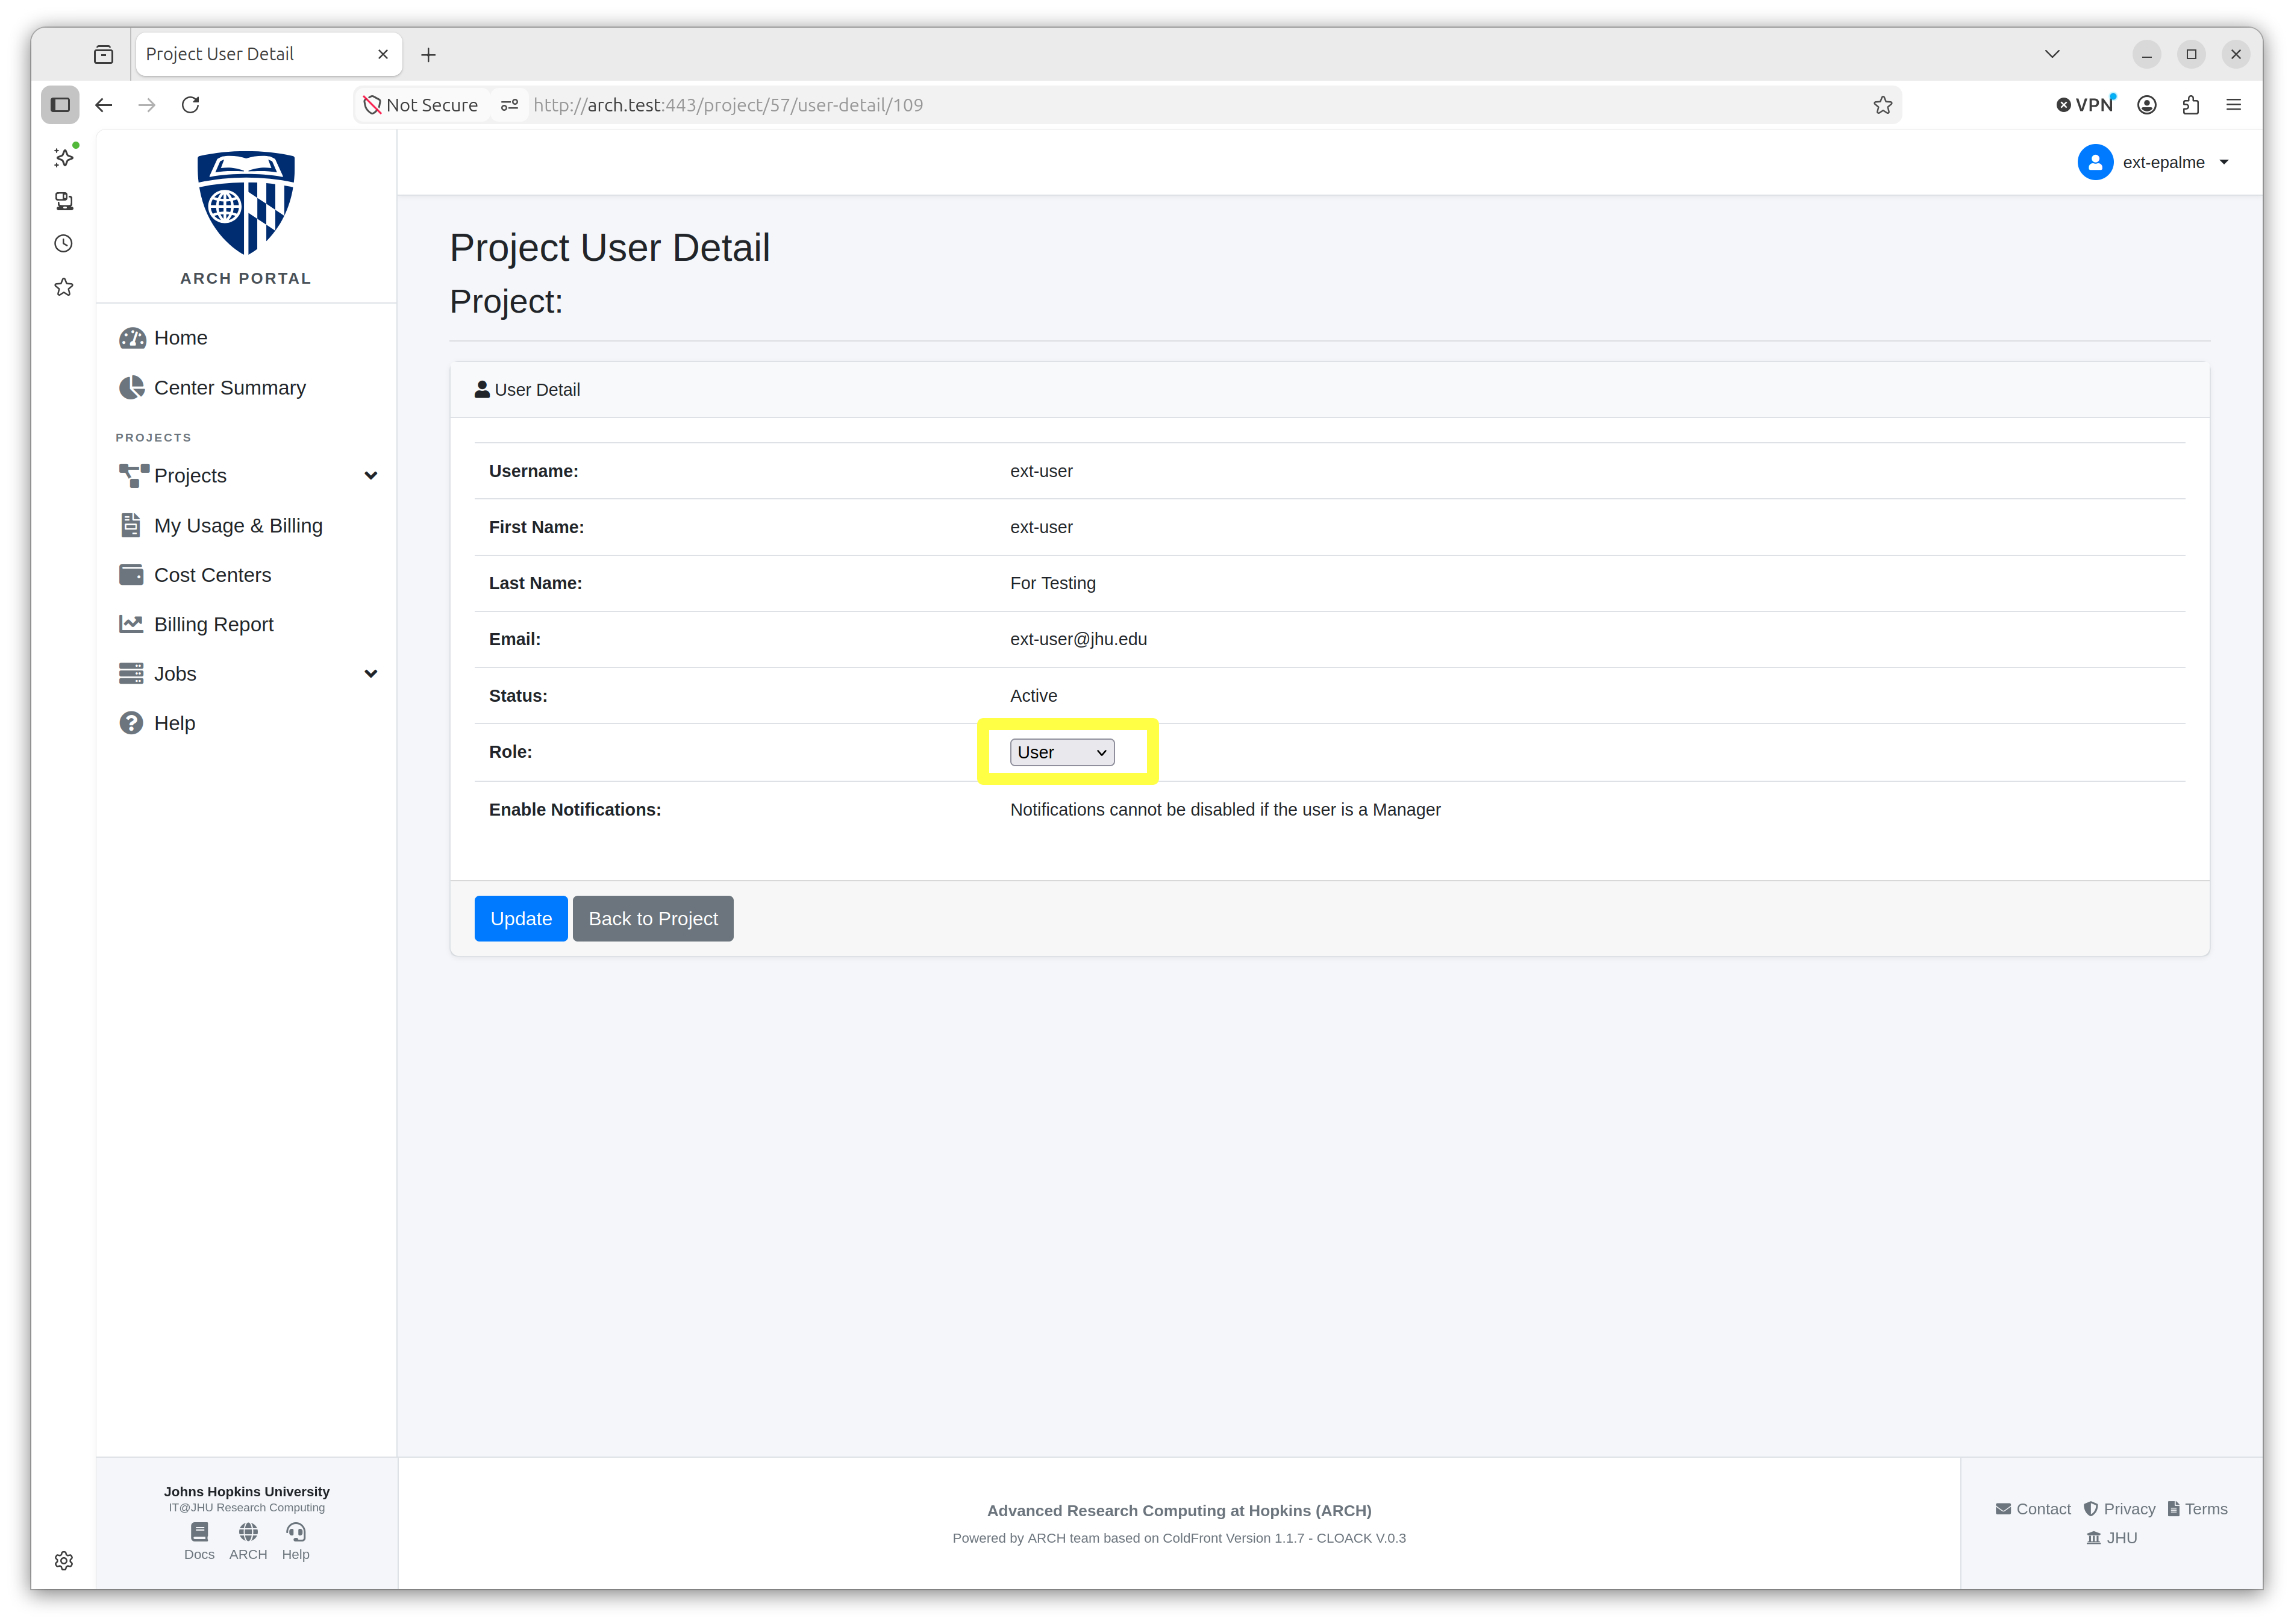
4. Click the Update button and note the green banner at the top of the screen confirming the change.